

Integrating Paddle
Paddle is a global payment and revenue management platform designed for SaaS and digital products. It provides subscription management, tax compliance, invoice generation and other features, enabling developers to focus on product development without having to worry about payment and compliance issues.
Overview
Applications deployed on EdgeOne Pages can call Paddle via Paddle API to achieve payment functionality. This guide details the principles and procedures for integrating Paddle's payment system on the EdgeOne Pages platform, helping you quickly implement secure online transaction features.
Registering and Setting Up Paddle
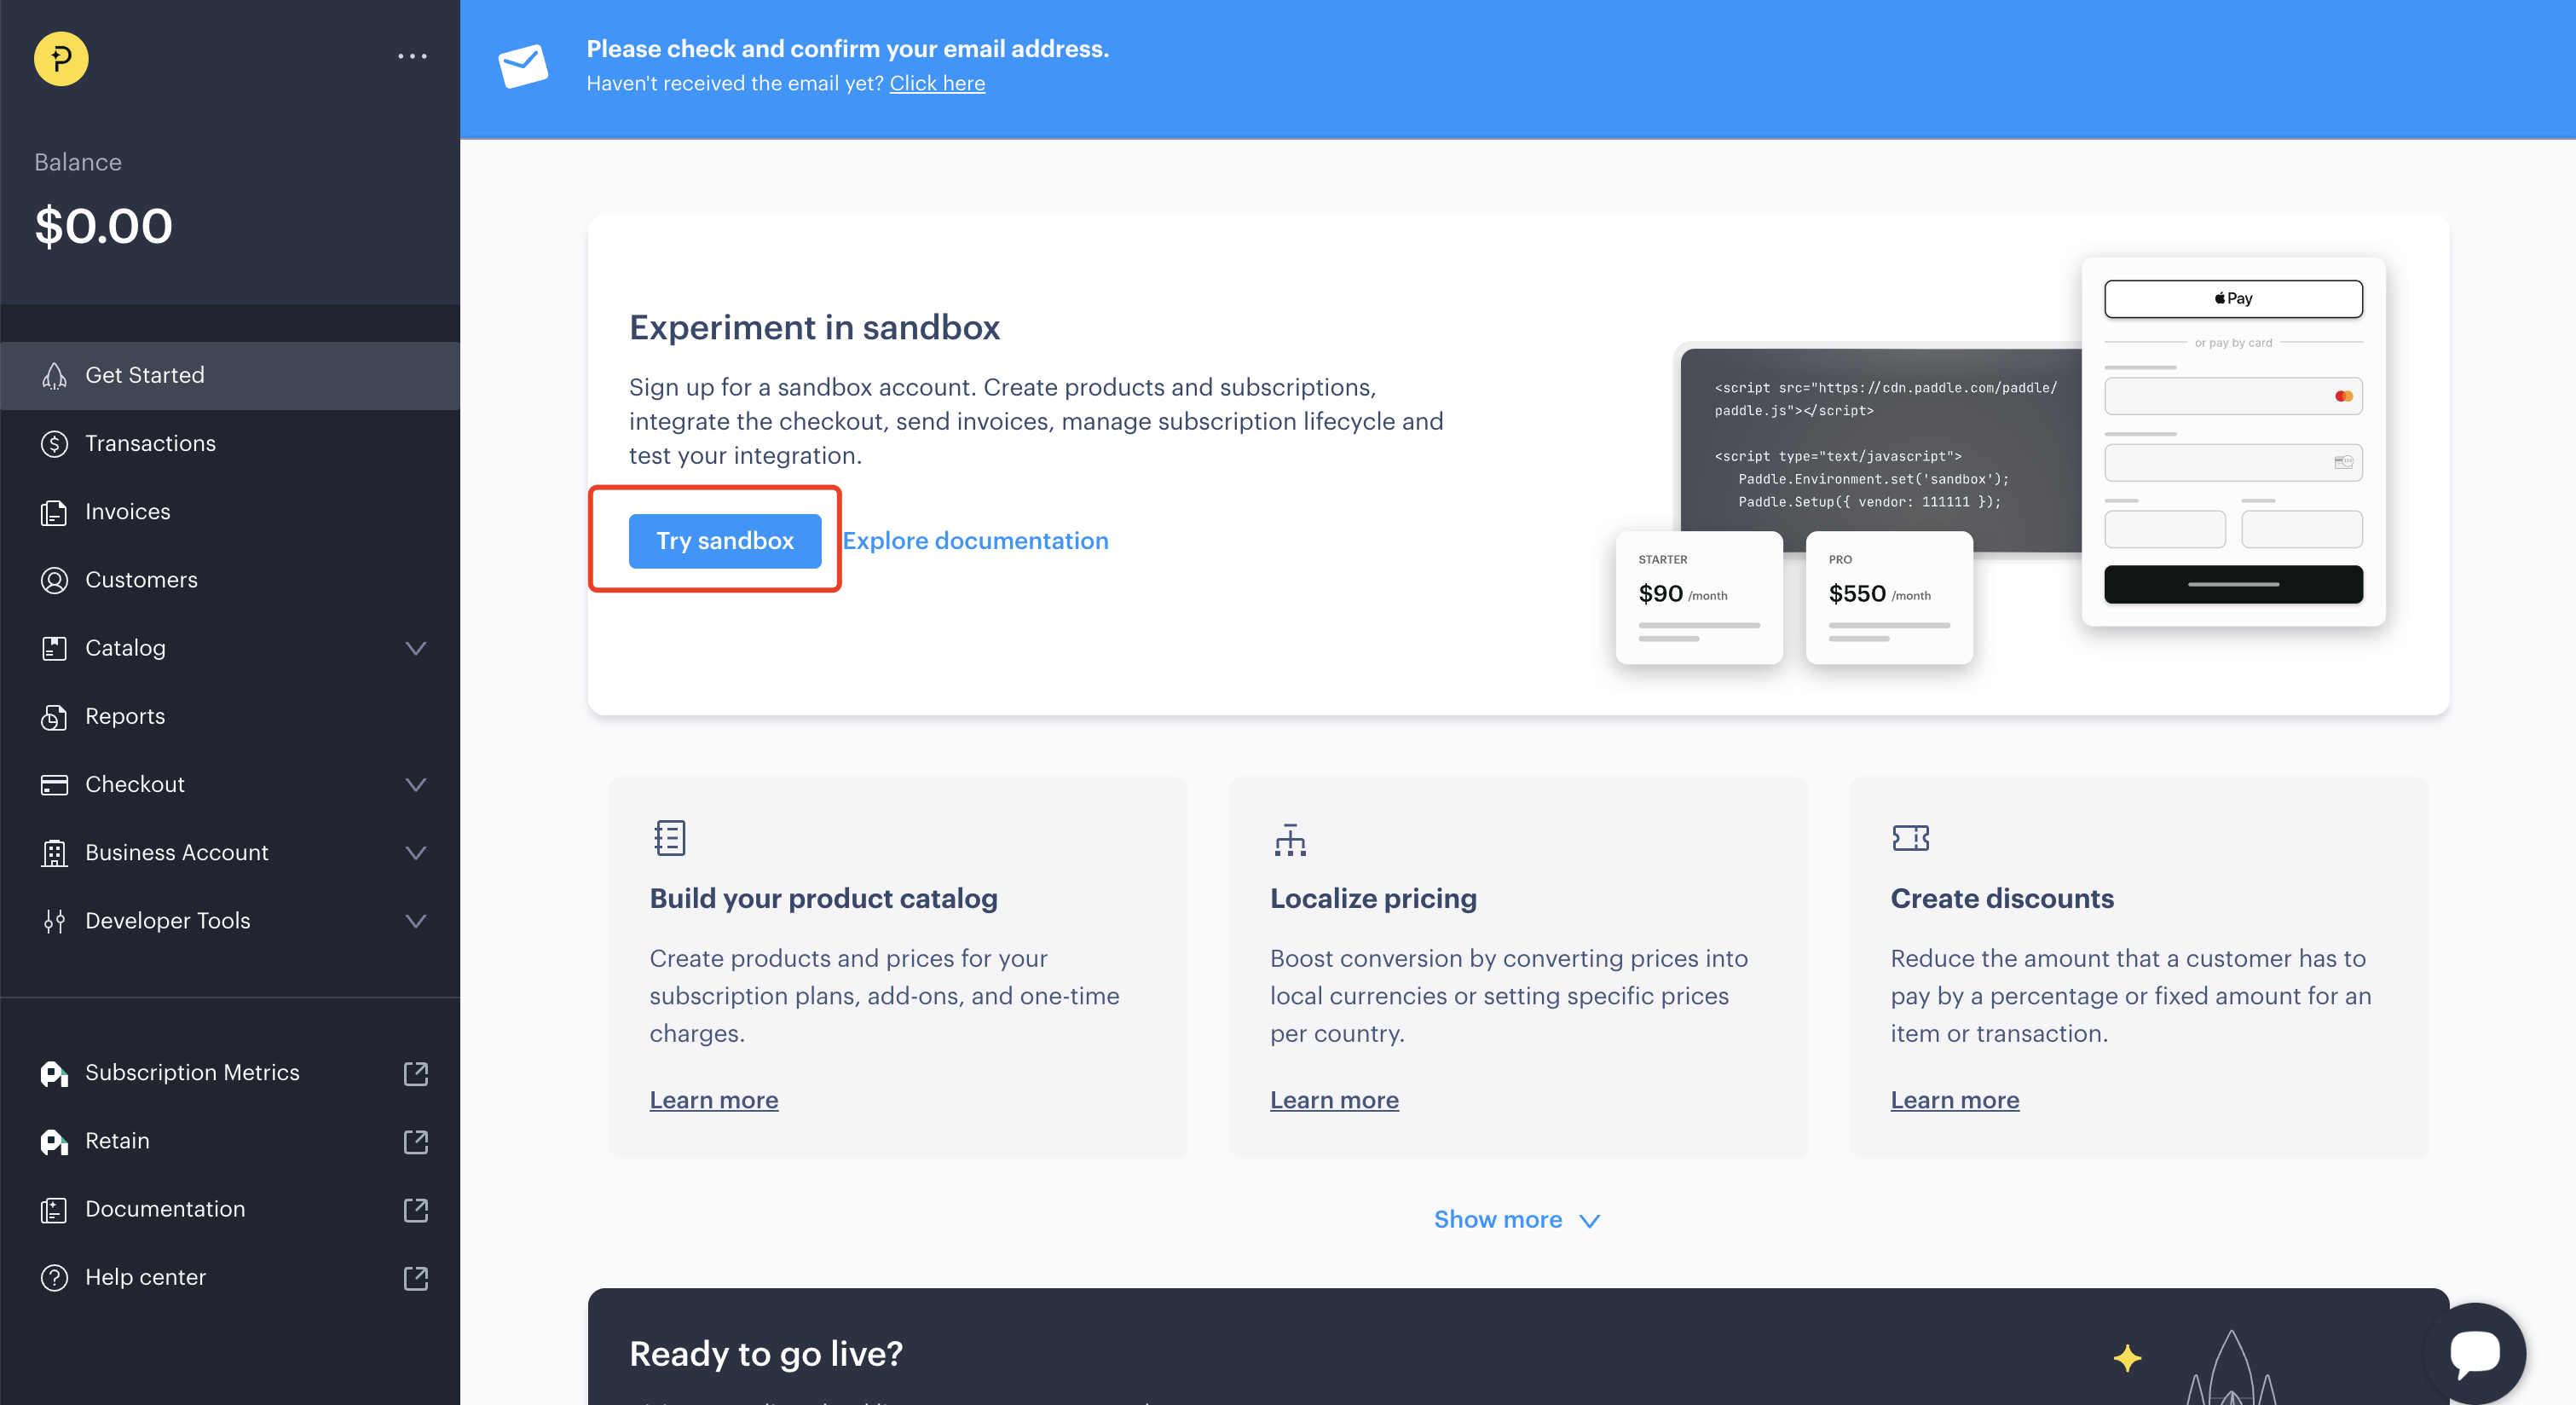
1. Registering Paddle
If experiencing only in development mode, you can enter sandbox mode on the console.
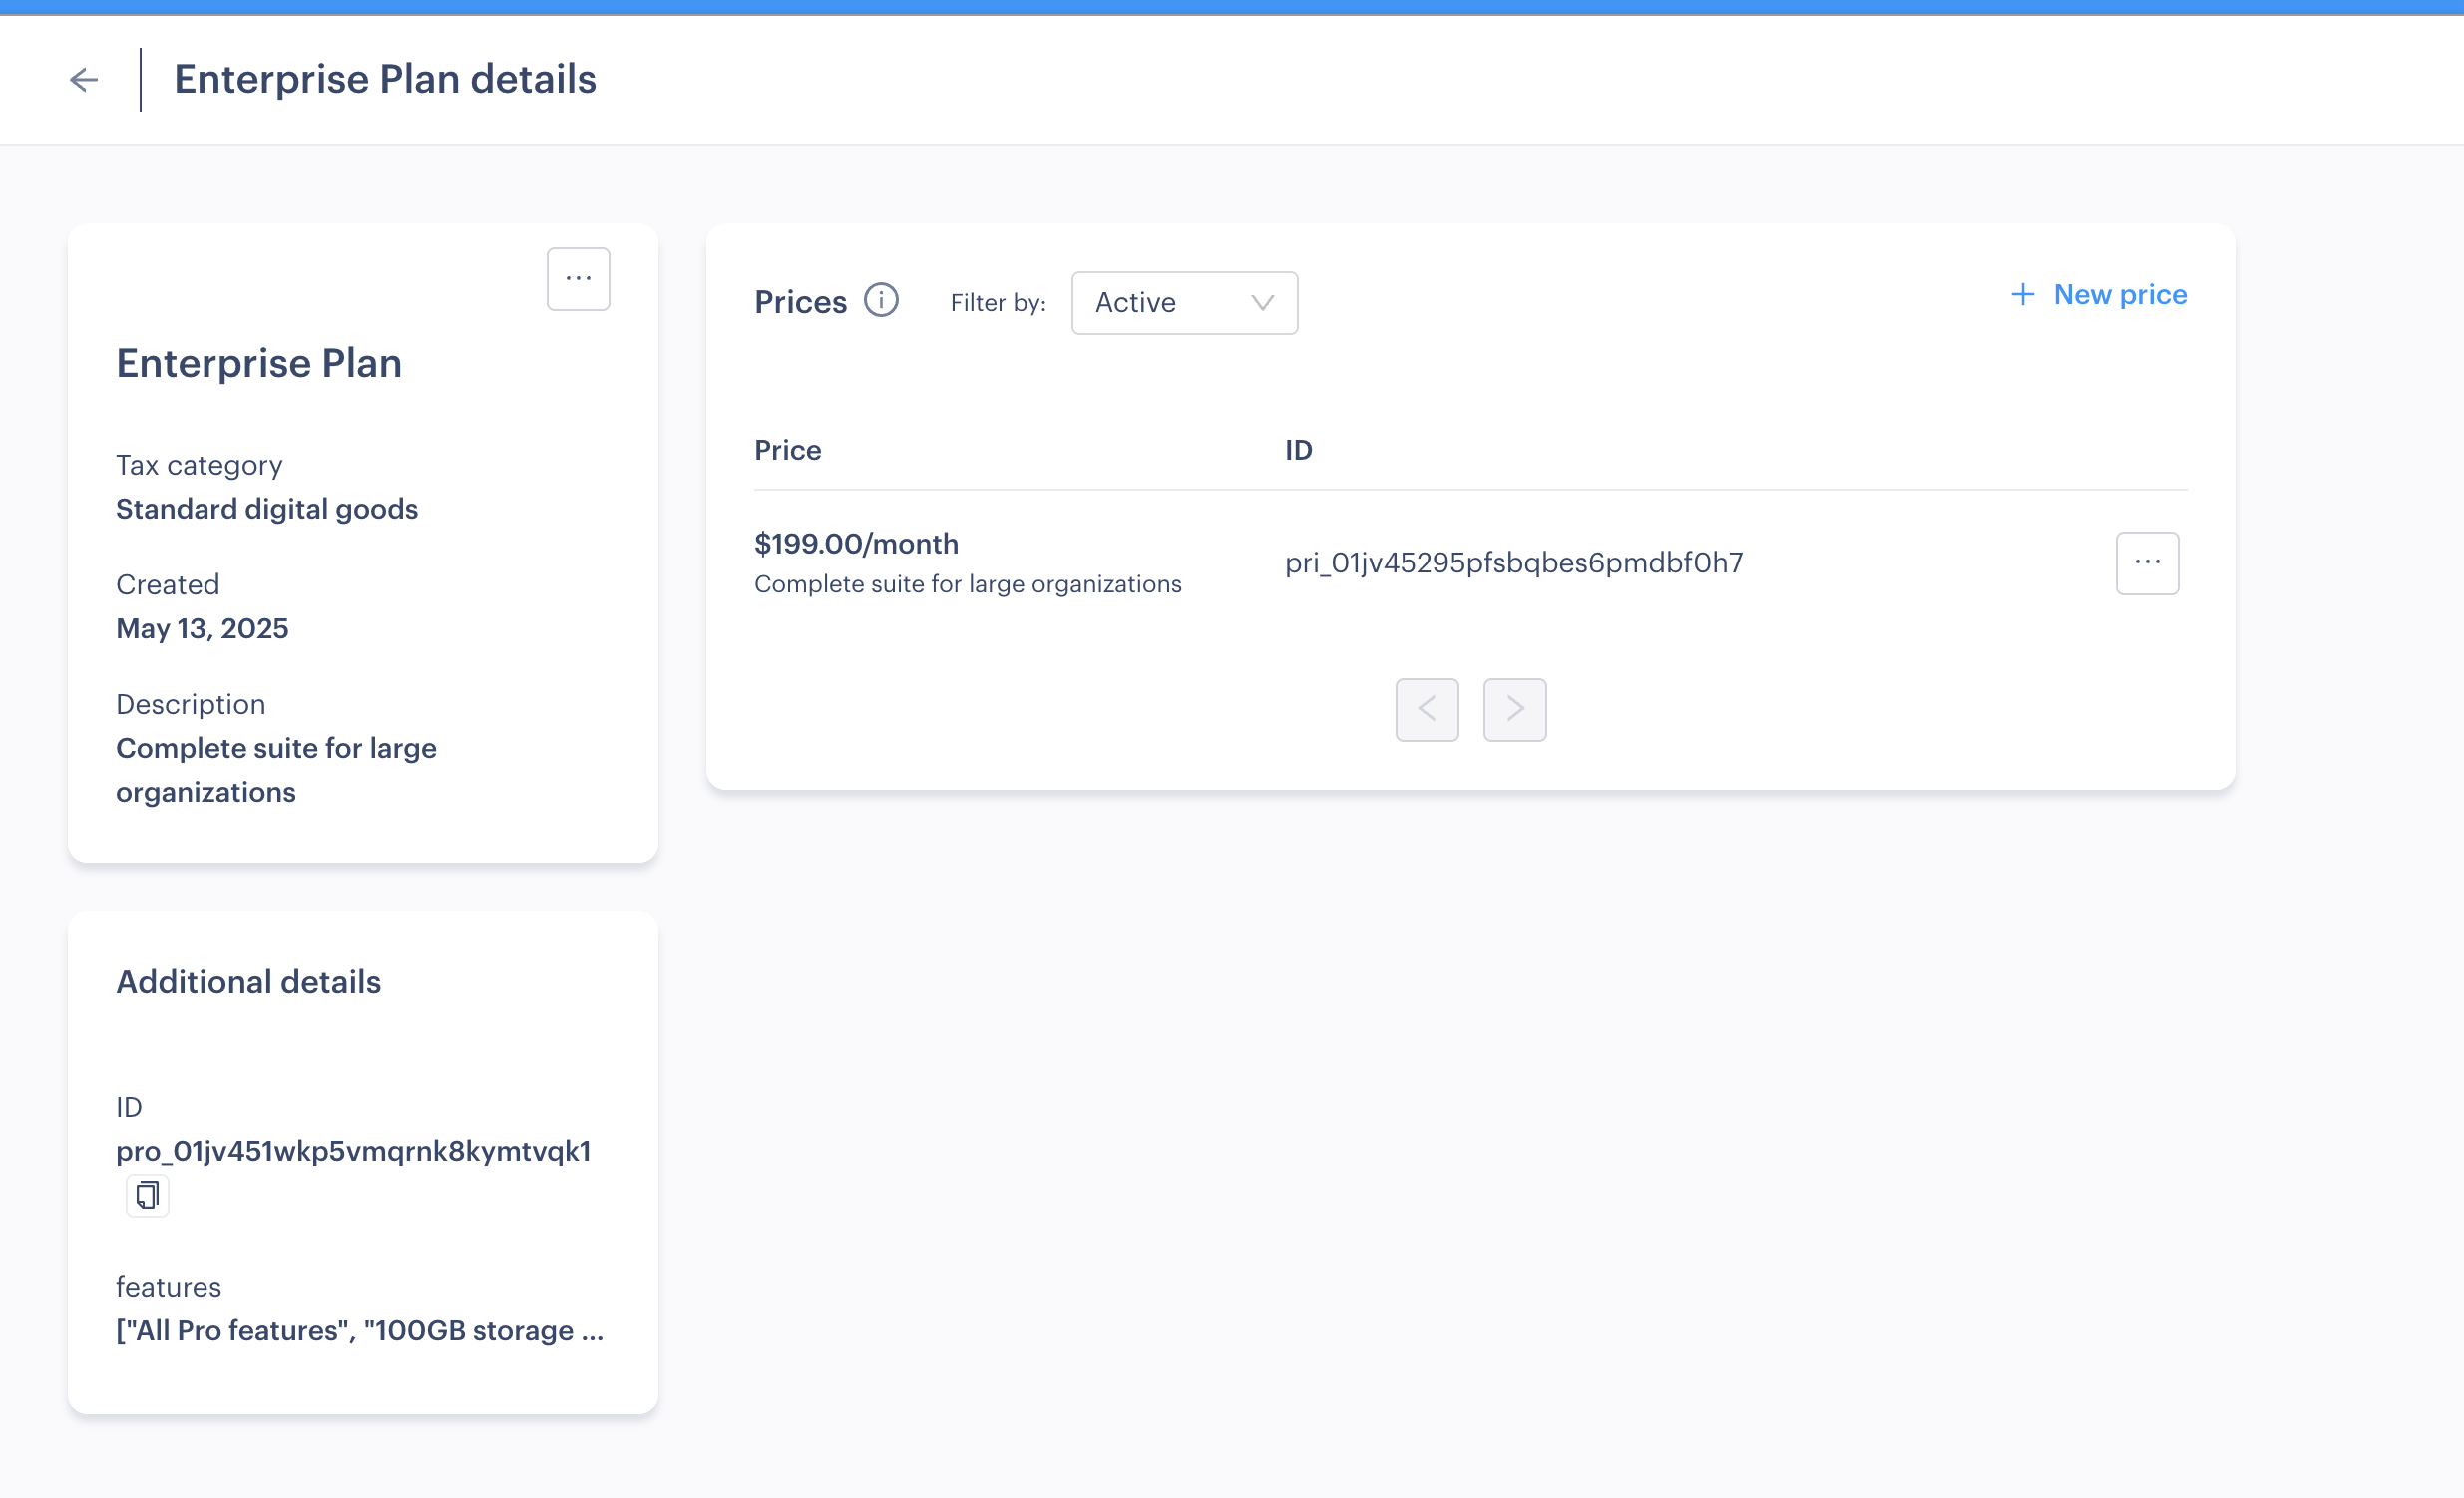
2. Setting a Product
This document is based on a subscription-based product.
3. Getting an API Key
Under
Developer Tools-Authentication, click +New API key to create a new API key: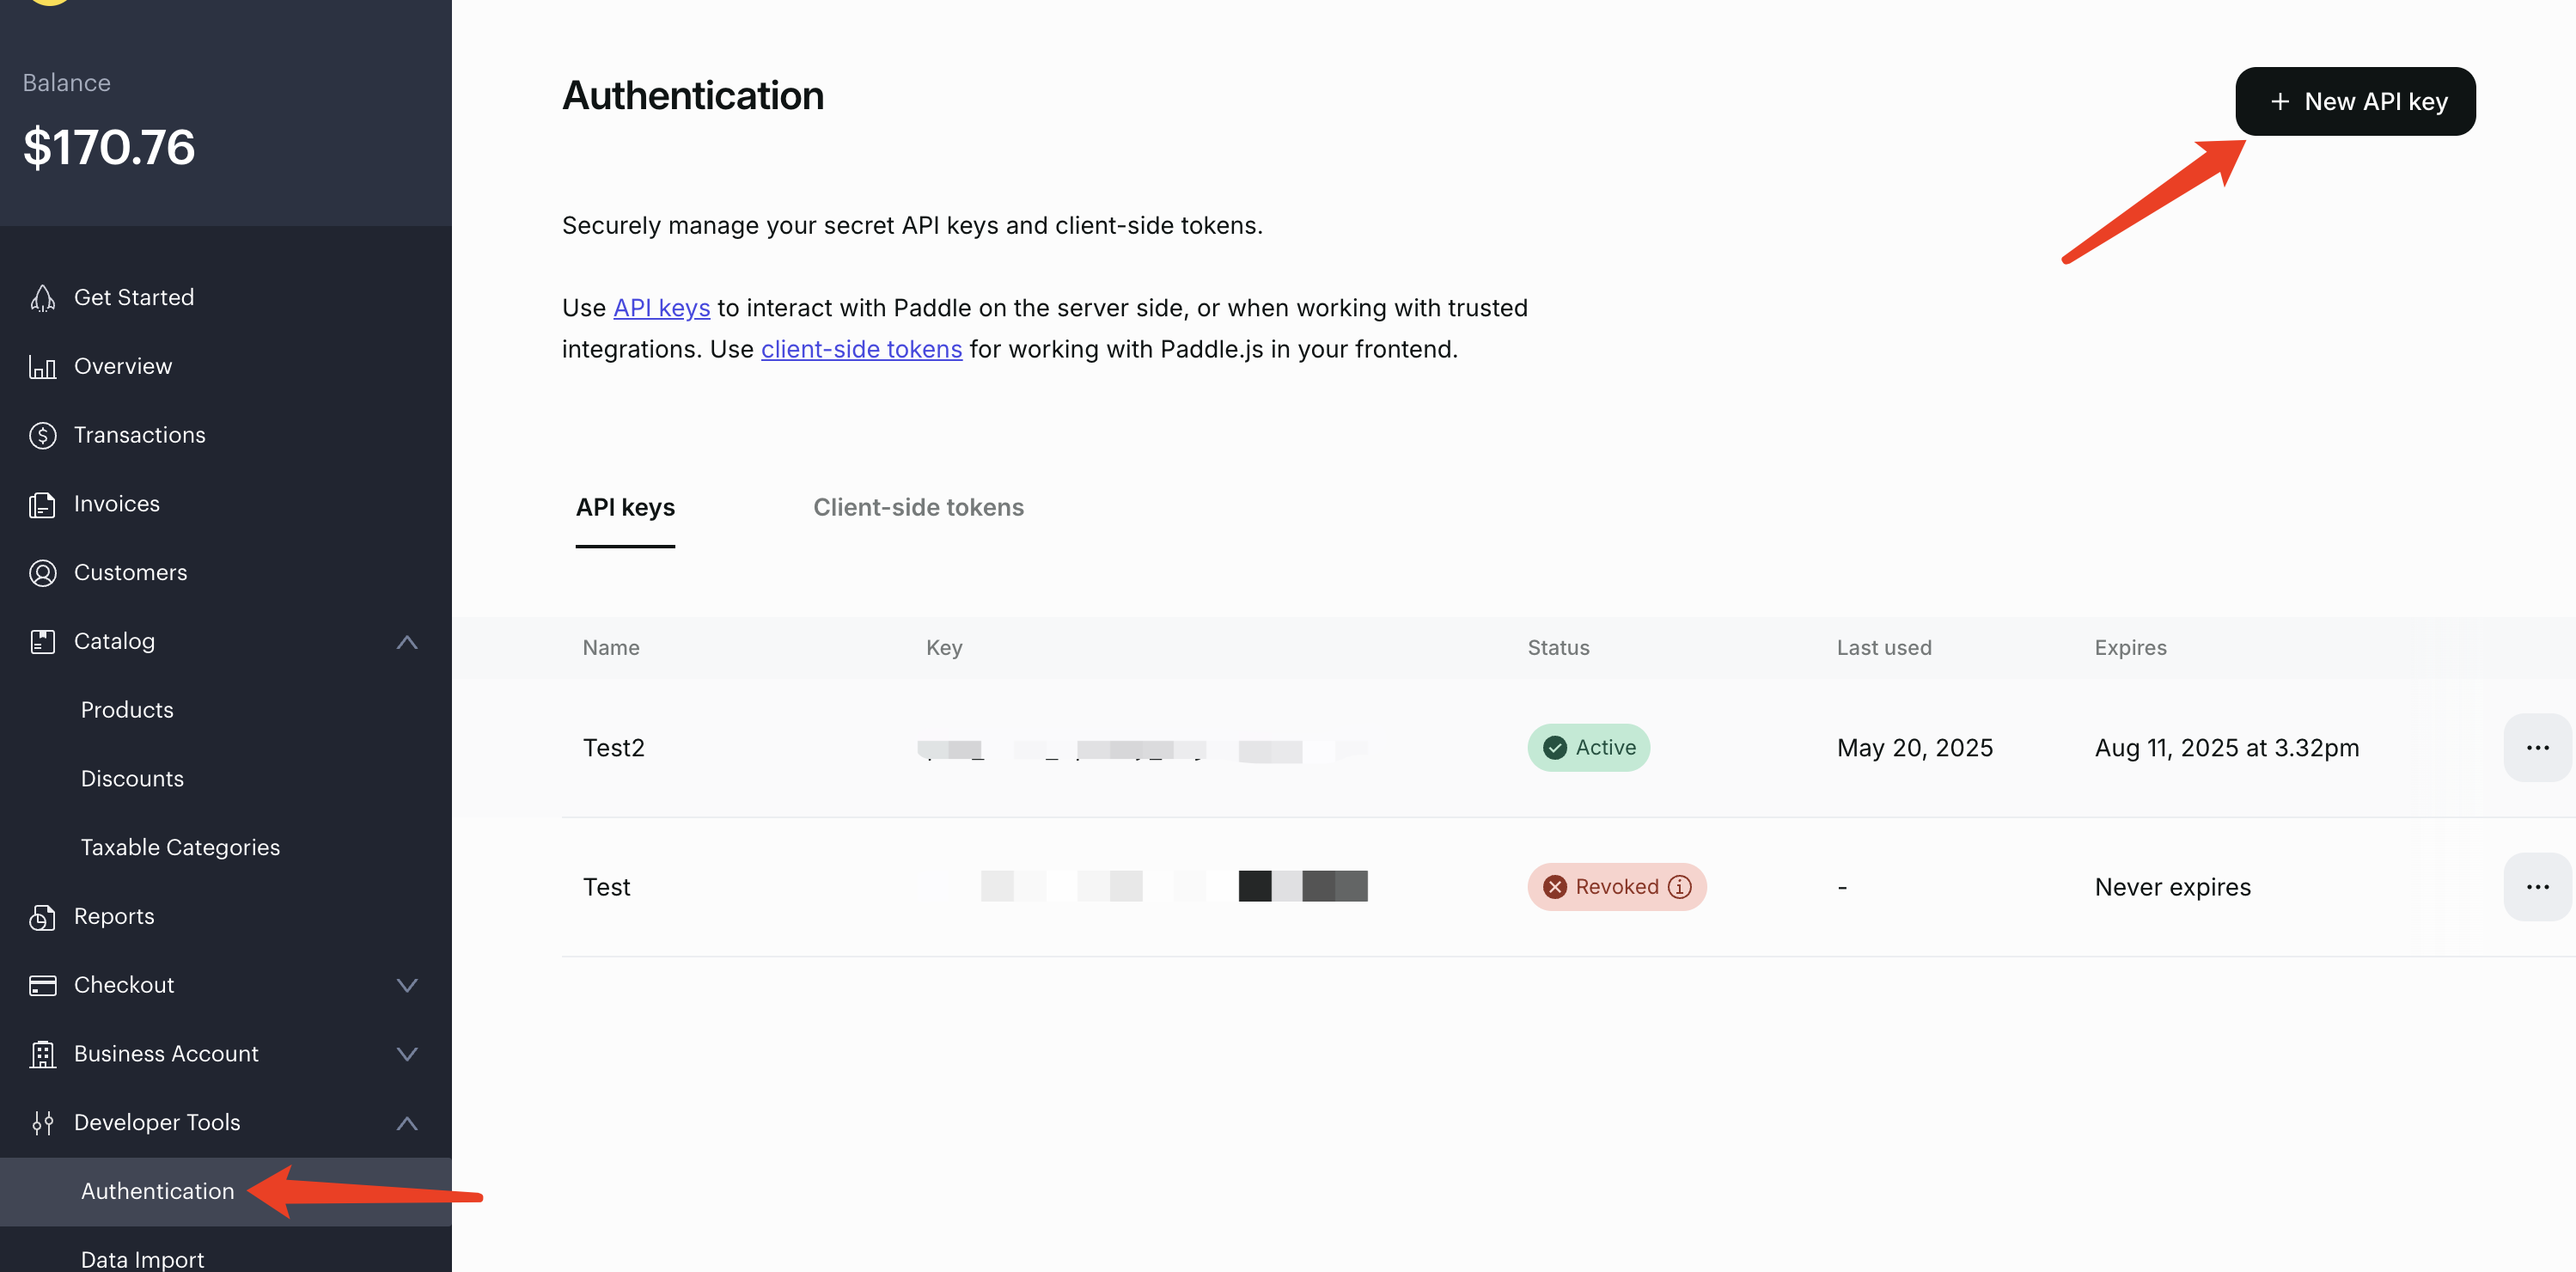
Permission settings are as follows:
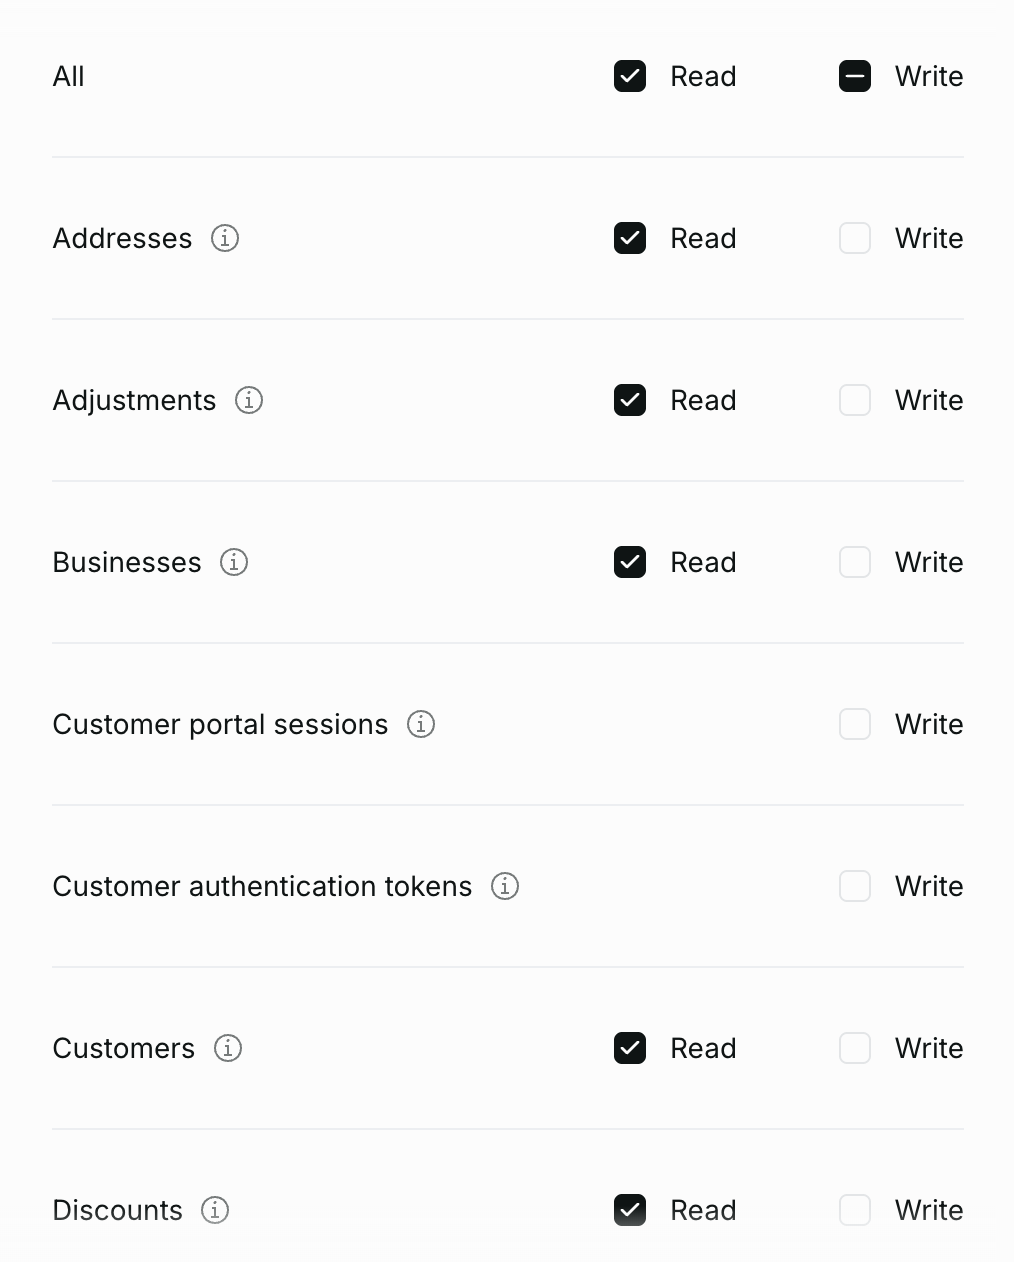
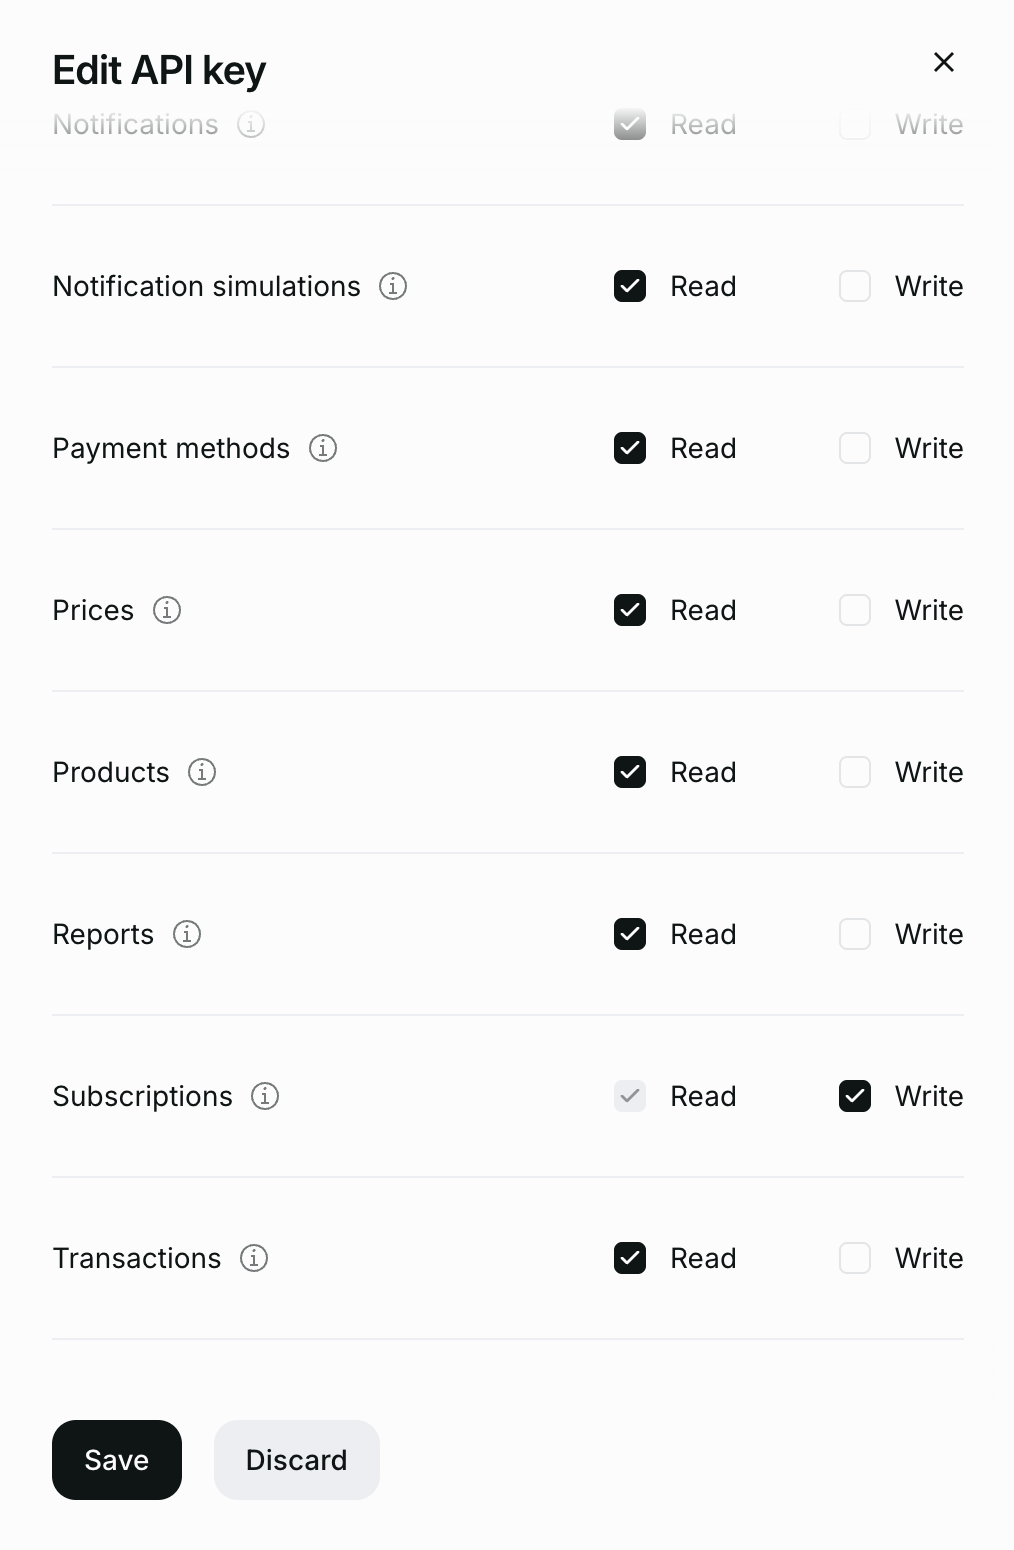
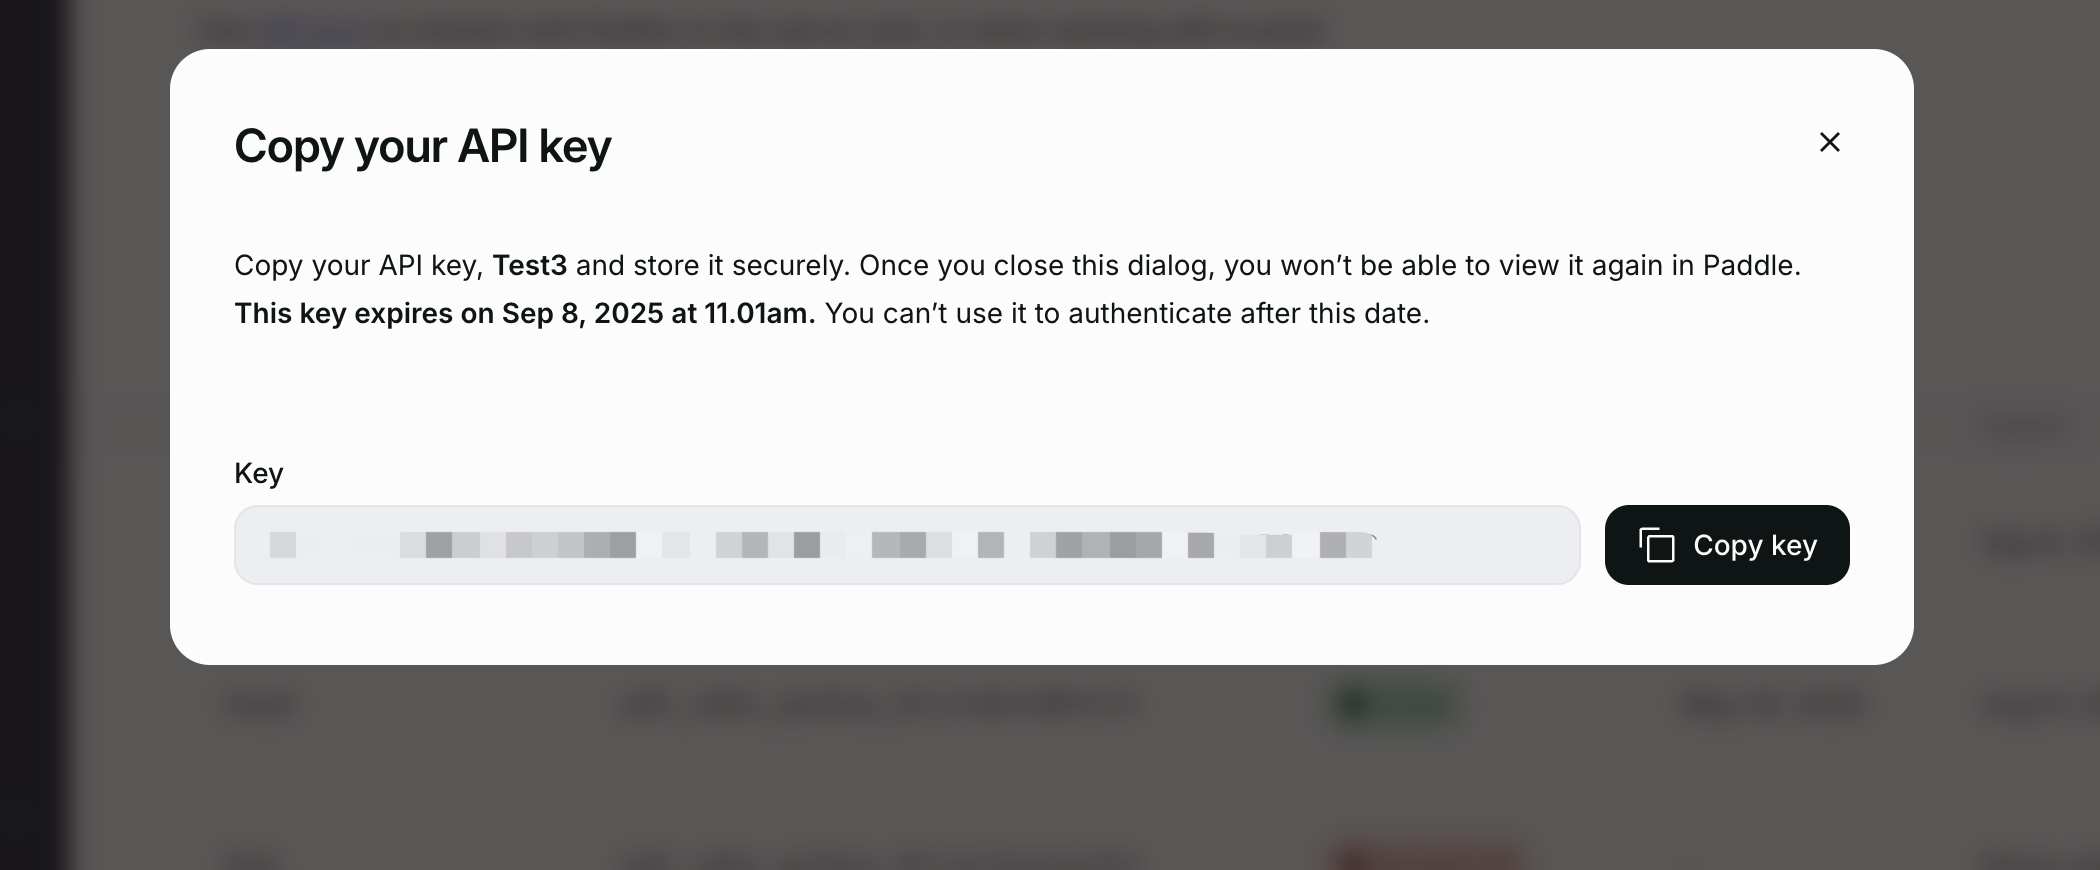
Click to save and then copy the API Key for backup.
Then switch to the
Client-side tokens tab, click to create a Client-side token, used for pulling data when compiling frontend static pages.
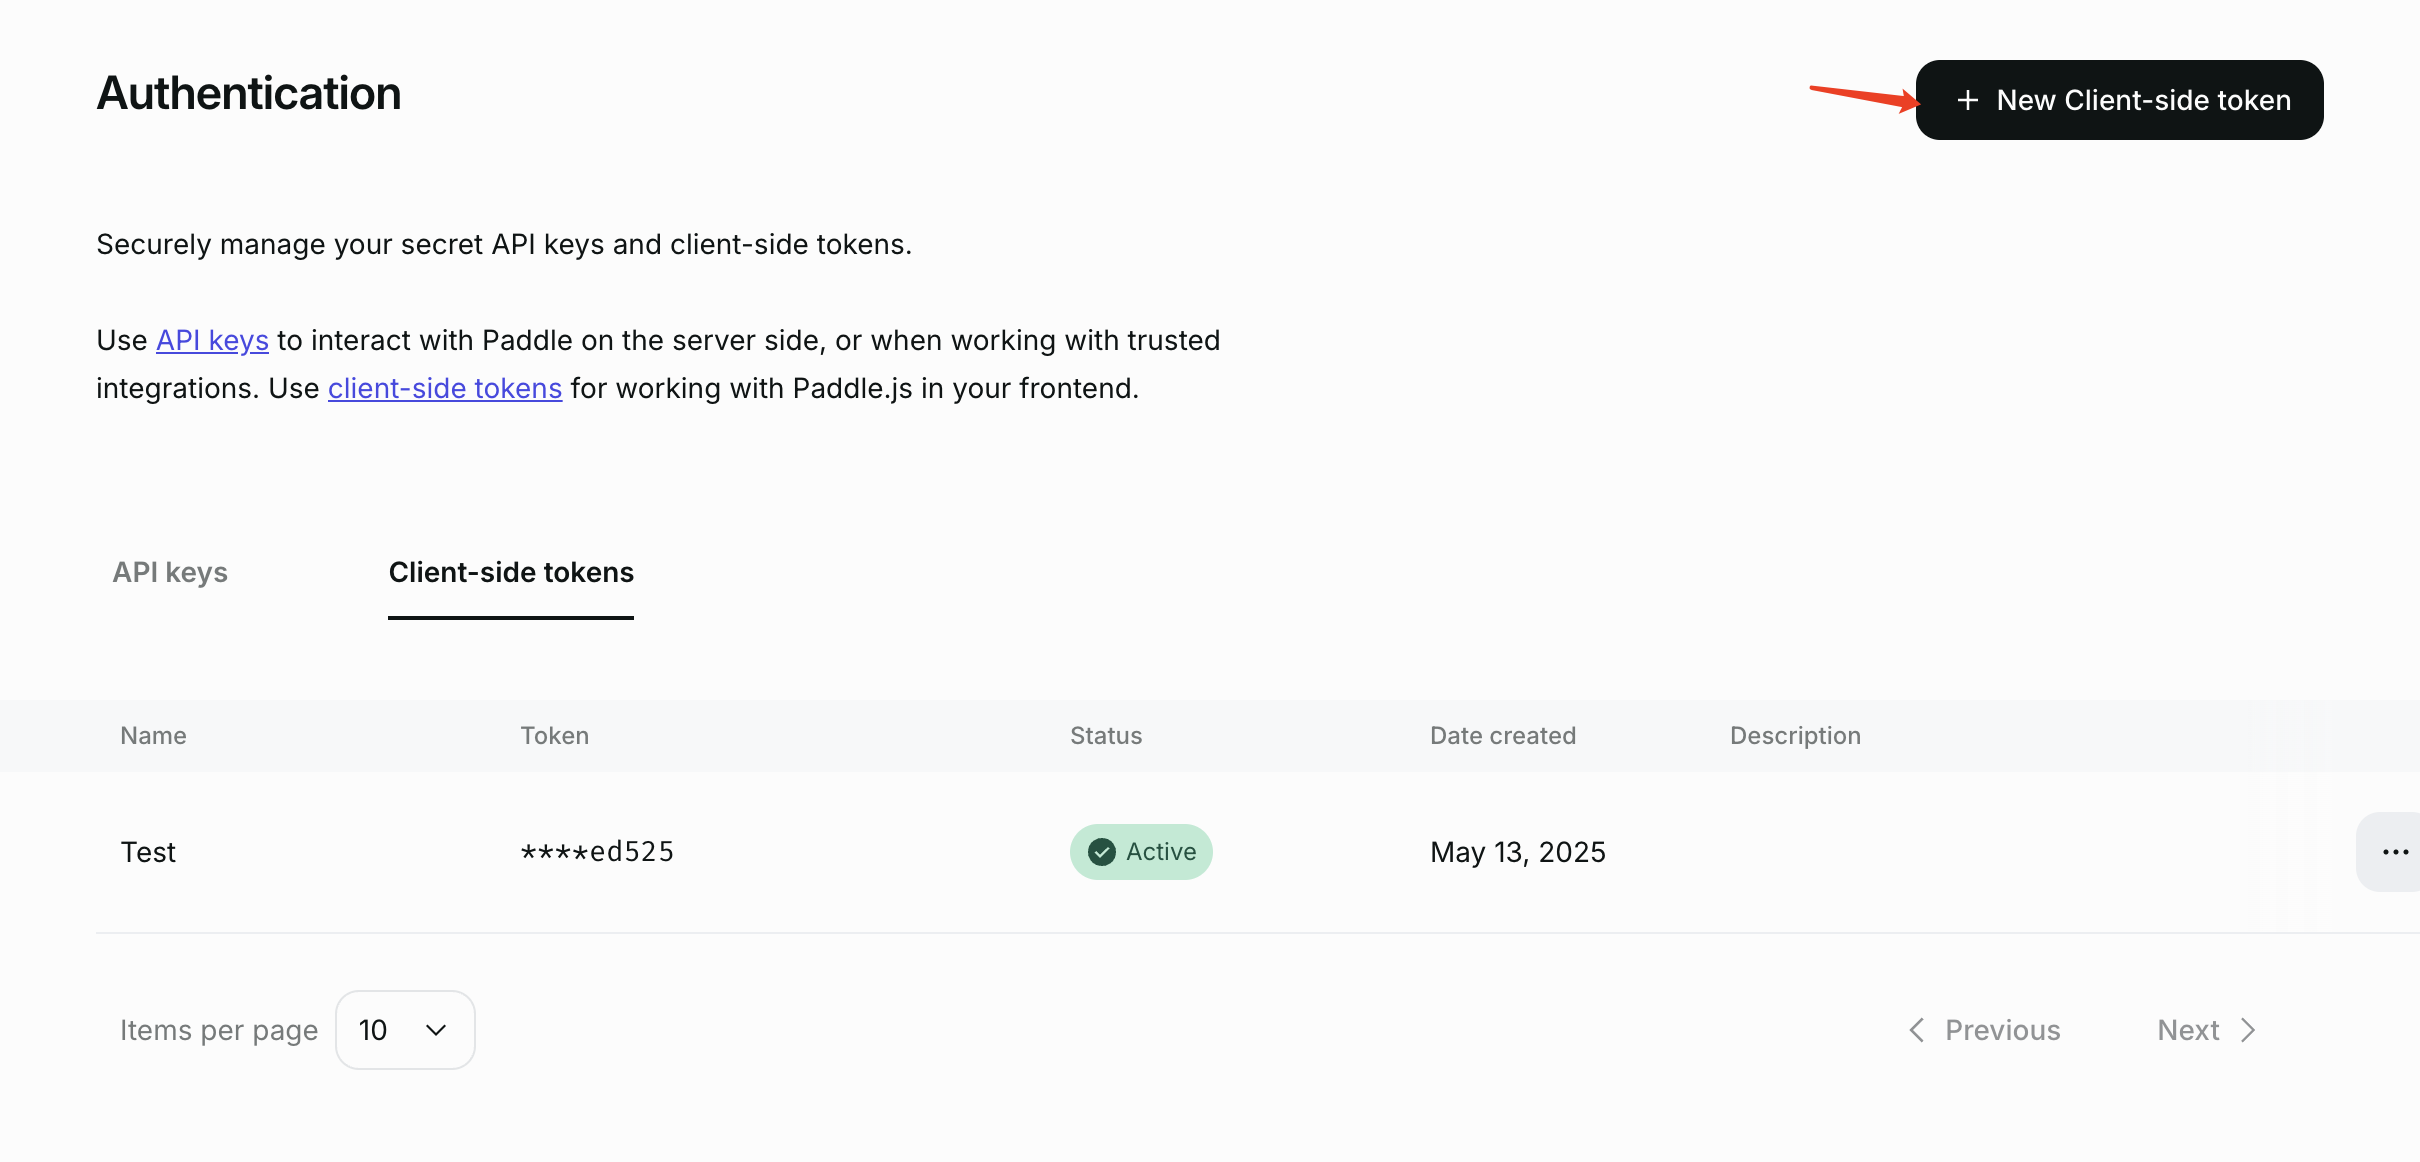
Once created, similarly copy it for backup.
4. Webhook
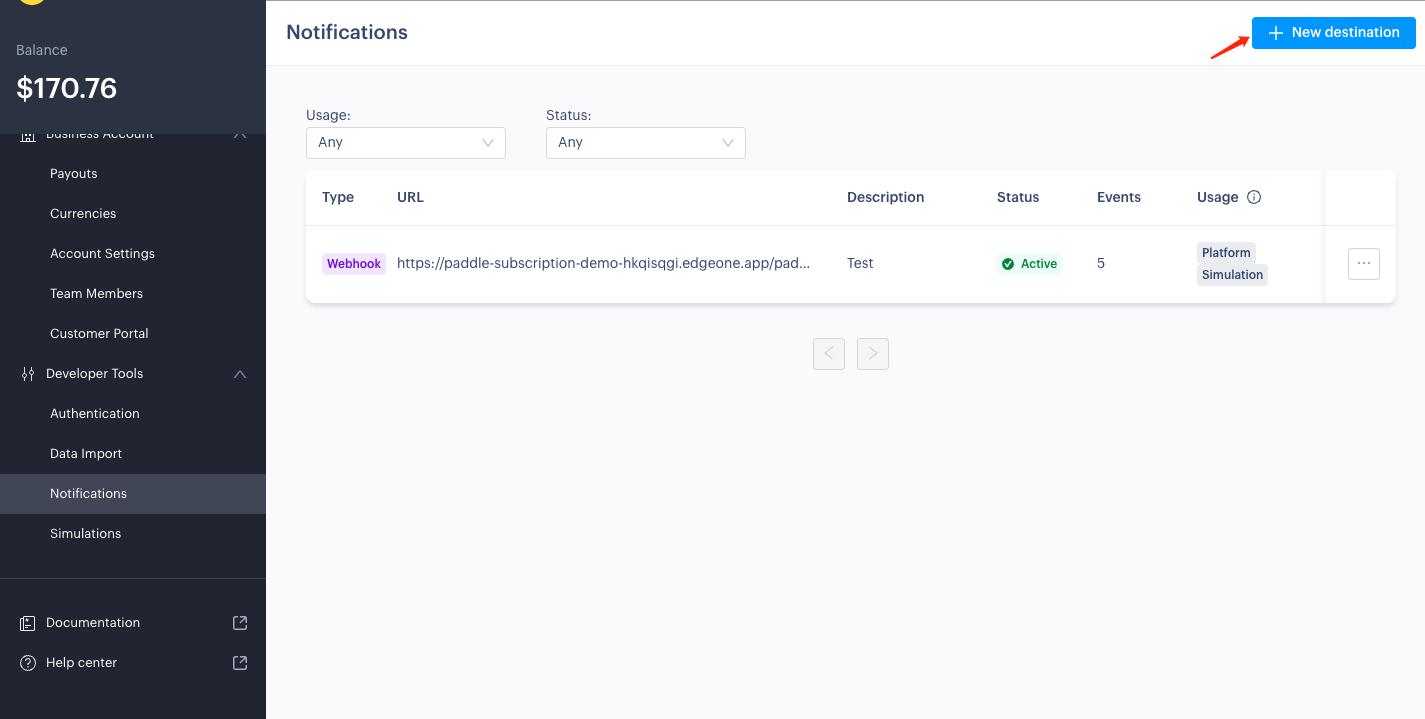
In the
Dashboard interface, navigate to the Developer Tools option at the bottom of the left menu. After clicking to enter, select the Notifications tab and click +New Destination.
On the Webhooks page, click
Add destination to add a trigger.Fill in Webhook information:
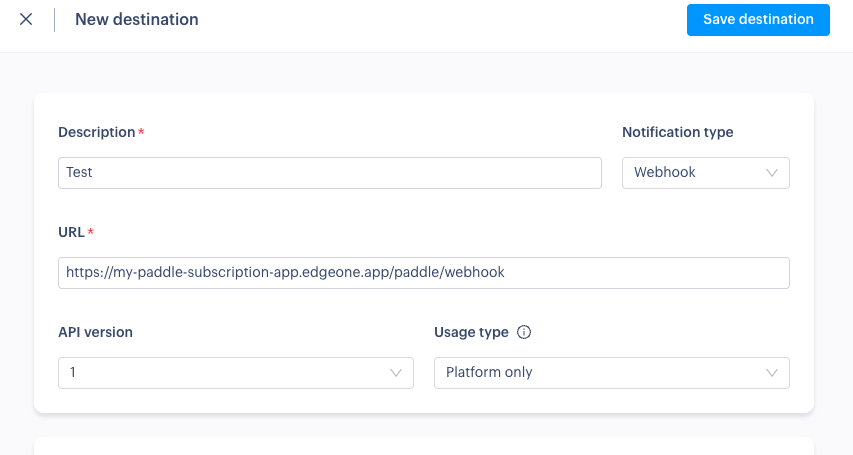
Enter the hook address of the Pages application in the URL field. You can temporarily fill it in and come back to modify it later, for example:
https://${your-app-name}.edgeone.app/paddle/webhook
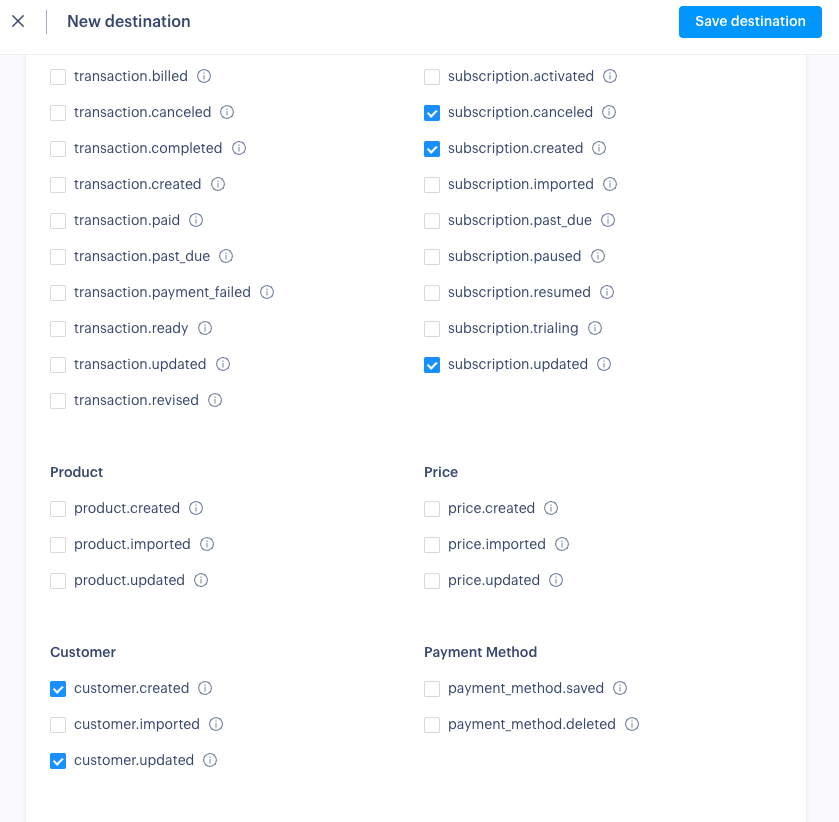
In the new trigger configuration, select these events:
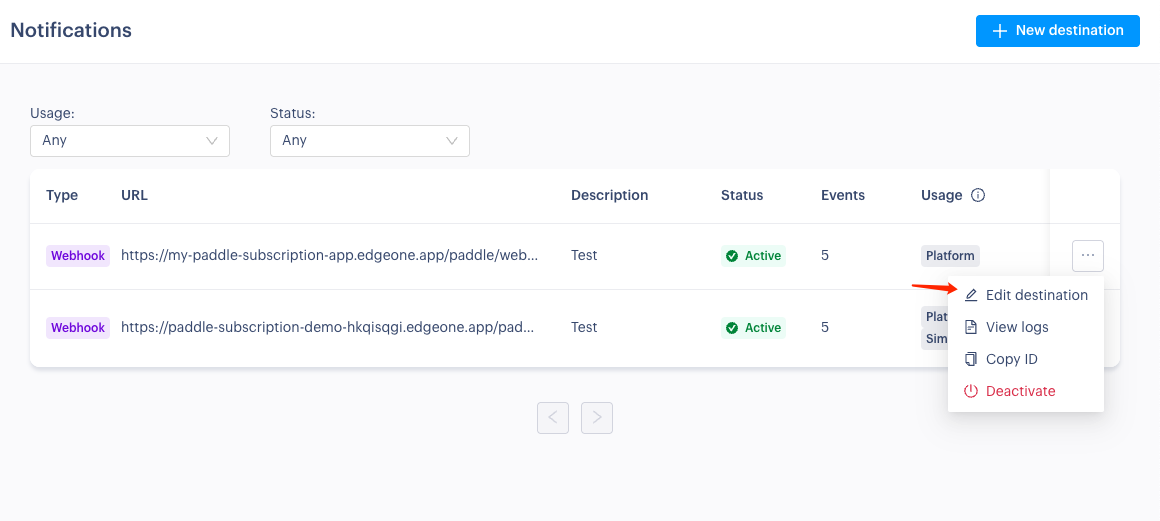
Click
Save destination to Save, then click Edit destination in the list. You can see Webhook Secret Key:
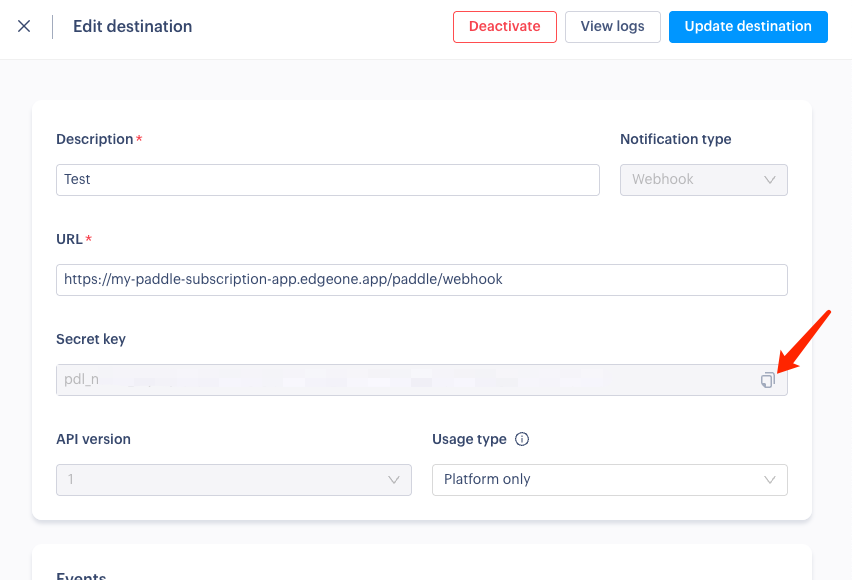
Copy
Webhook Secret key for backup.Setting Up Supabase
The Supabase database will be used to store your application's core data, including user information, product information, price information, and other key data. Paddle makes webhook calls to EdgeOne Pages Functions, which update the data transmitted by Paddle into the Supabase database. The three form a complete system.
1. Registering and Integrating
First, complete the registration and access process for Supabase. For detailed guidance, refer to the Supabase Integration Tutorial.
2. Initialize a Database Table
After completing the Supabase account settings, you need to initialize the necessary database table structure.
1. Download the provided initialization
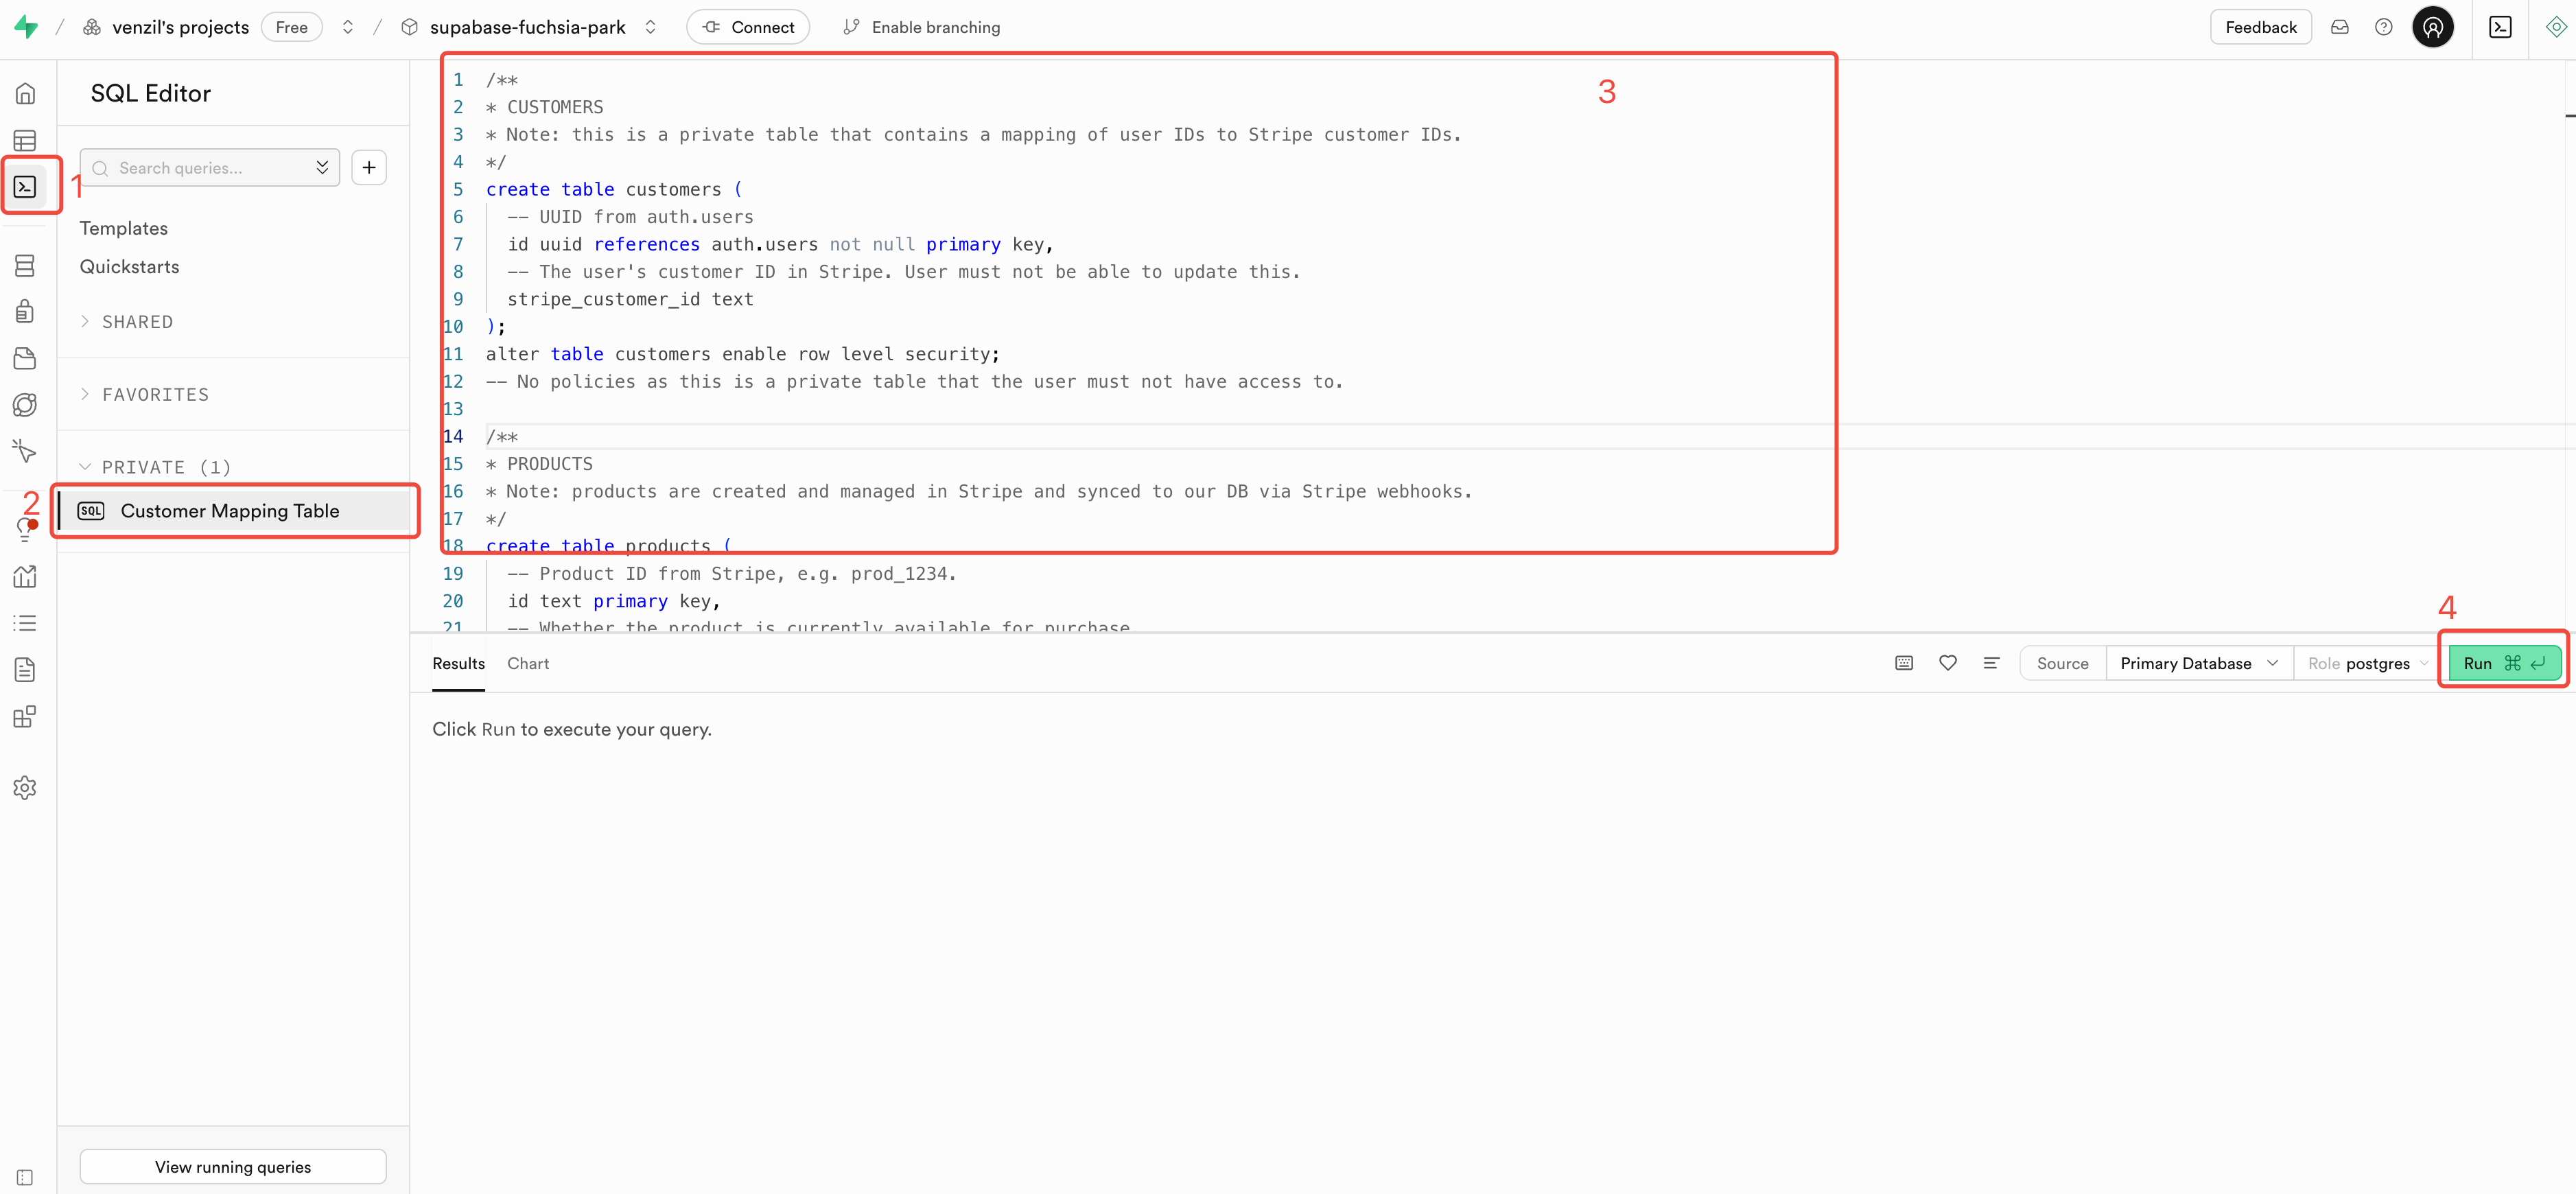
2. In the Supabase management interface, navigate to the SQL editor.
3. Copy the SQL code in the downloaded initialization file completely into the editor.
4. Click the
Run button to execute the SQL command.
After successful execution, the system will create all necessary data tables and relationships, providing your application with a complete data storage foundation.
Deploying on EdgeOne Pages
After completing the configuration of Paddle and Supabase, you need to set the necessary development environment variables so that your application can correctly connect to these services. You can fill in the response parameters into the local
.env for local development. If you need to deploy to EdgeOne Pages, you also need to fill in the environment variables.
1. Create an Application Template
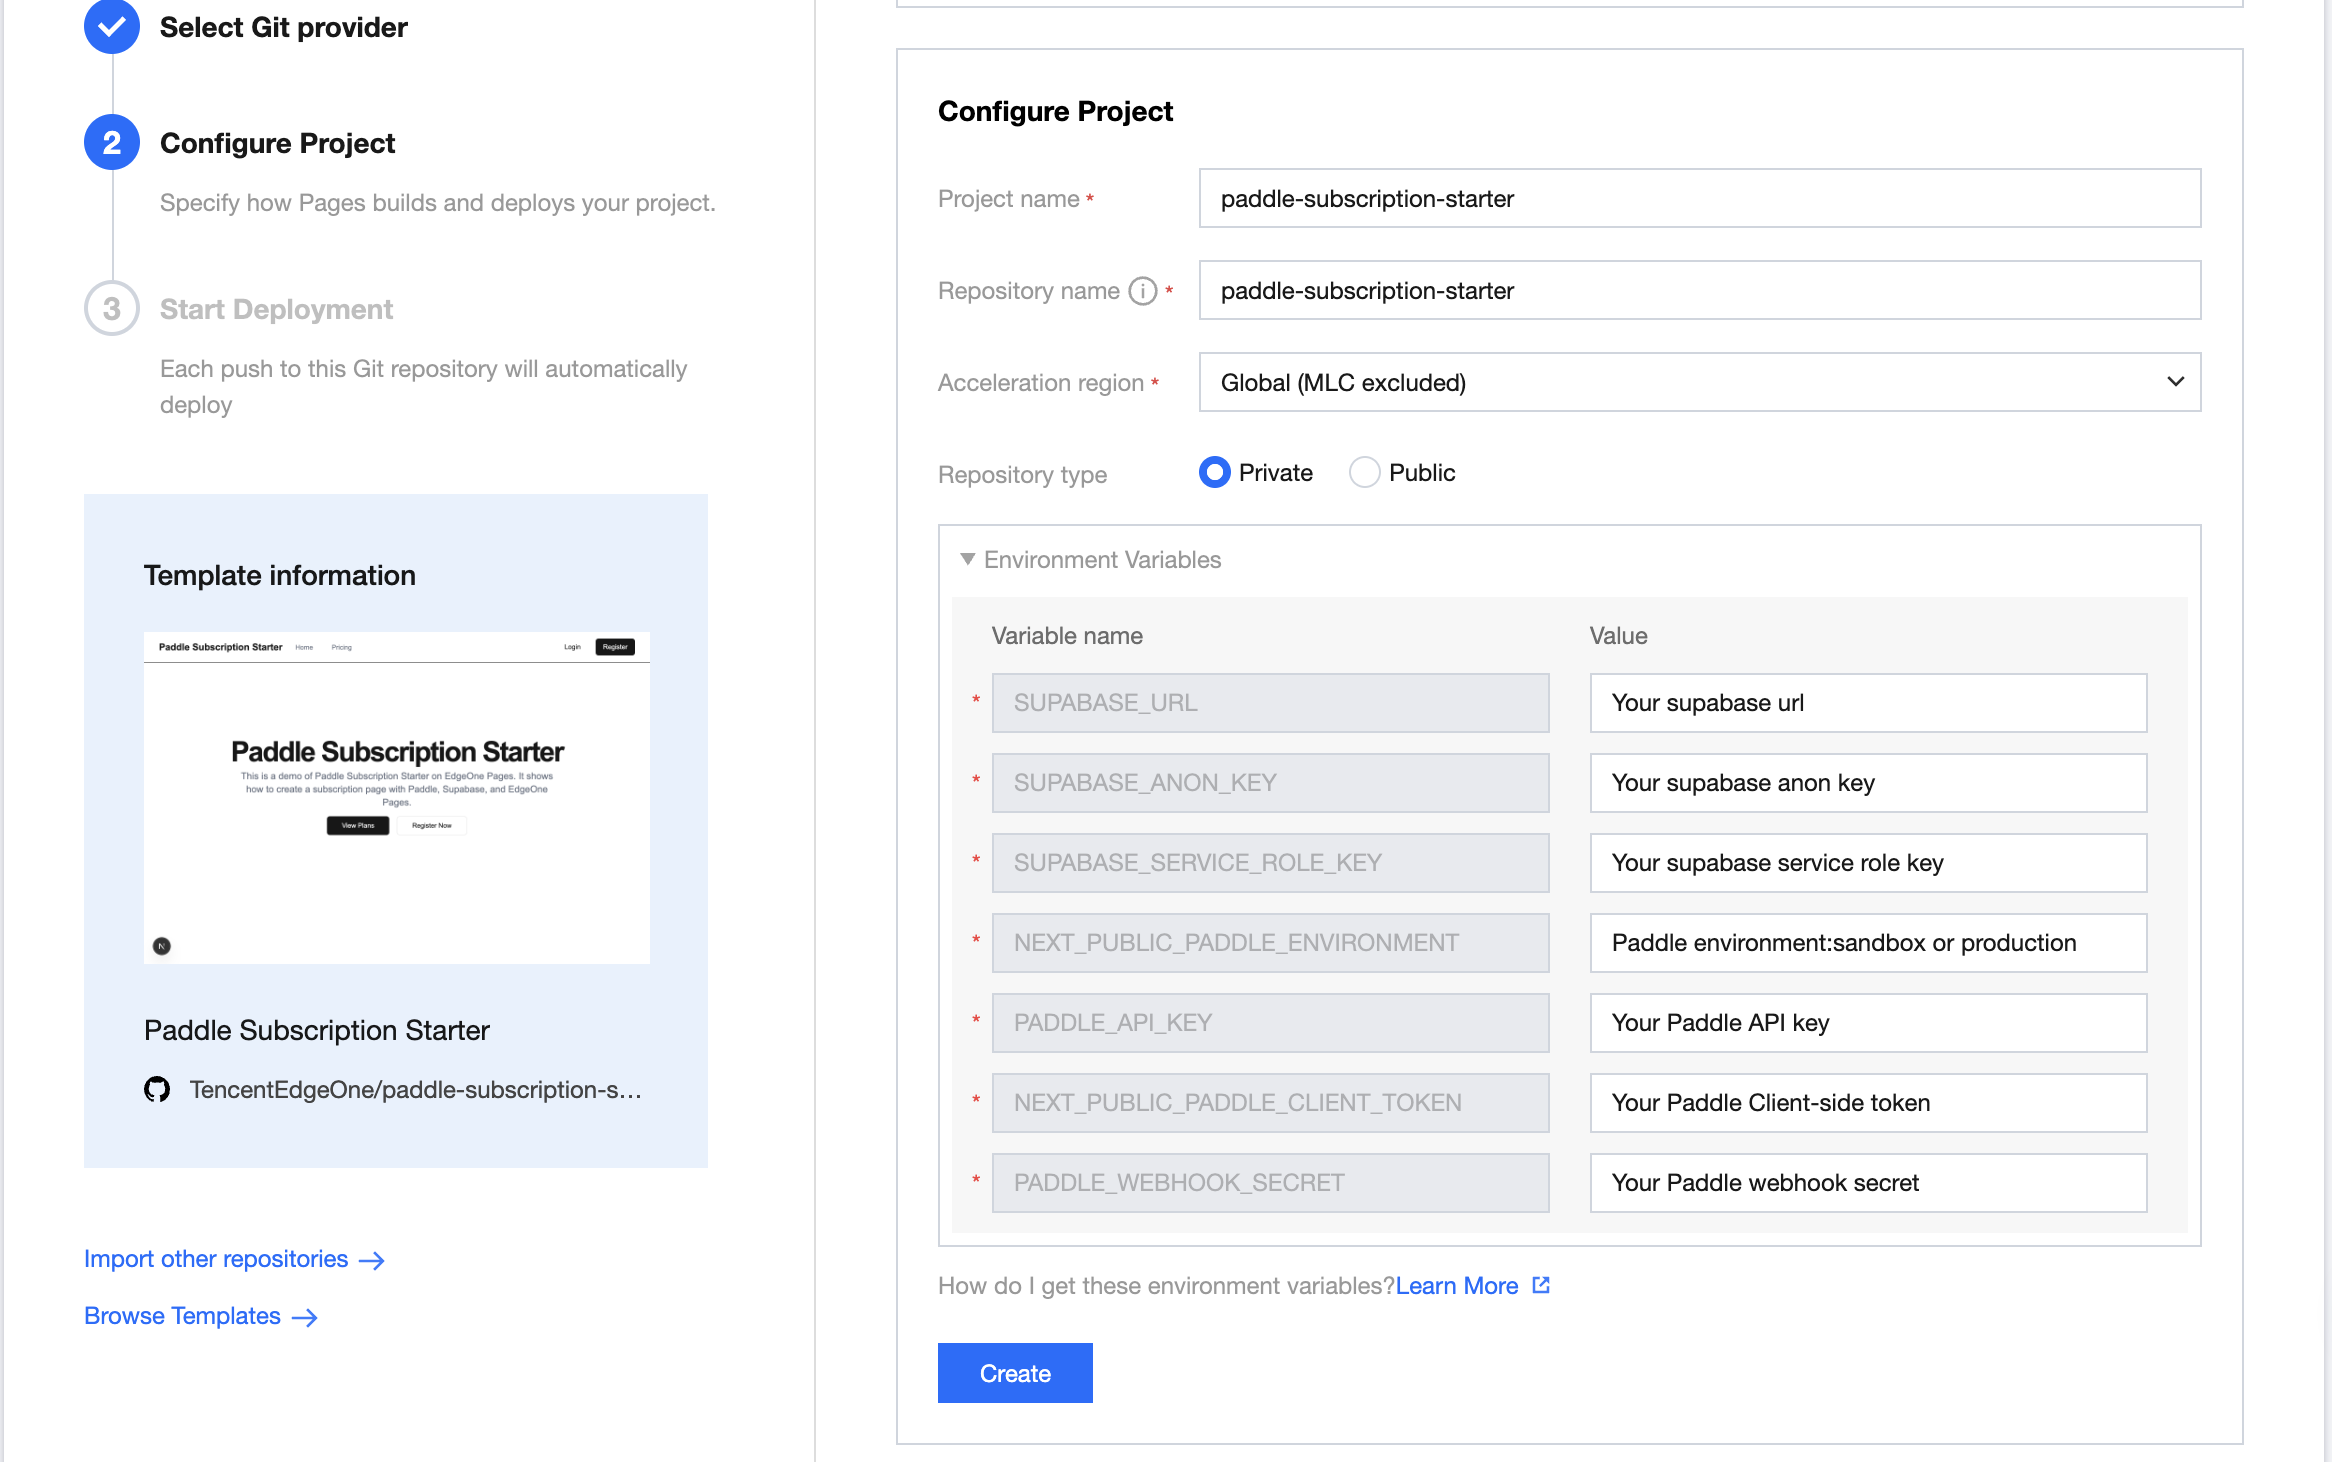
2. Fill in Environment Variables
In the EdgeOne Pages configuration panel, you need to fill in two key items:
1. Project Name - After configuration, this name will become part of your application's URL. Add this URL to the
URL field in Paddle Notifications configuration (format: ${your-project-name}.edgeone.app/paddle/webhook).
2. Environment Variables - Add all necessary configuration parameters.
Supabase connection parameters (see Supabase Integration Tutorial to obtain specific parameter values)
Paddle-related parameters (key obtained in previous steps)
After configuring this information correctly, your application will be able to seamlessly integrate with the Stripe payment system and Supabase database.
After filling in the parameters, click
Start Deployment to begin deployment, which will take 1-3 minutes. If the project fails during deployment, you can modify the project based on Build Logs and Build Summary, or contact staff to resolve the issue.3. Using and Verification
In the Paddle control panel, access
Catalog -> Product through the left navigation pane, then click the New product button to create a new product. After creation is completed, the new product information will be automatically synchronized to the products table in the Supabase database. At this point, refresh the deployed web page, and you will see the newly created product card displayed on the page.More Related Content
Learn more about Supabase: Supabase Operation Document
Learn more about Paddle: Paddle Operation Document