

Supabase Integration
Supabase is an open-source alternative to Firebase. Use a Postgres database, identity authentication, real-time API, edge functions, real-time subscriptions, storage, and vector embeddings to start your project. Integrate EdgeOne Pages with Supabase to achieve data operations.
Overview
This guide provides step-by-step instructions for quickly integrating Supabase on the EdgeOne Pages platform. By connecting to a database, it enables more flexible page interactions. The example uses Supabase as the database, but the same deployment method is equally applicable to other similar databases, with largely consistent integration principles.
Getting Started
You can choose our Supabase integration template and click the Supabase Auth Starter template to start development directly. This tutorial is roughly divided into three steps: Supabase configuration, local integration, and Pages deployment. The following will introduce the detailed operations of each step.
Configuring Supabase
1. Register a Supabase Account and Create a Project
Go to Supabase.com to register an account. Click
Start your project, then Create your project. In this step, if Git is not associated, you must associate Git (supports Github/Gitee). Deployment takes about two minutes.
2. Initializing a Database
Enter the created
Project. You can initialize your data table in the left-side Table Editor, design the table structure, and define the data fields to be stored.
3. Connecting to the Database
In the leftmost navigation pane, select
API Docs. Upon entry, you will be directed to Introduction by default. Click on Connect above to select the connection method.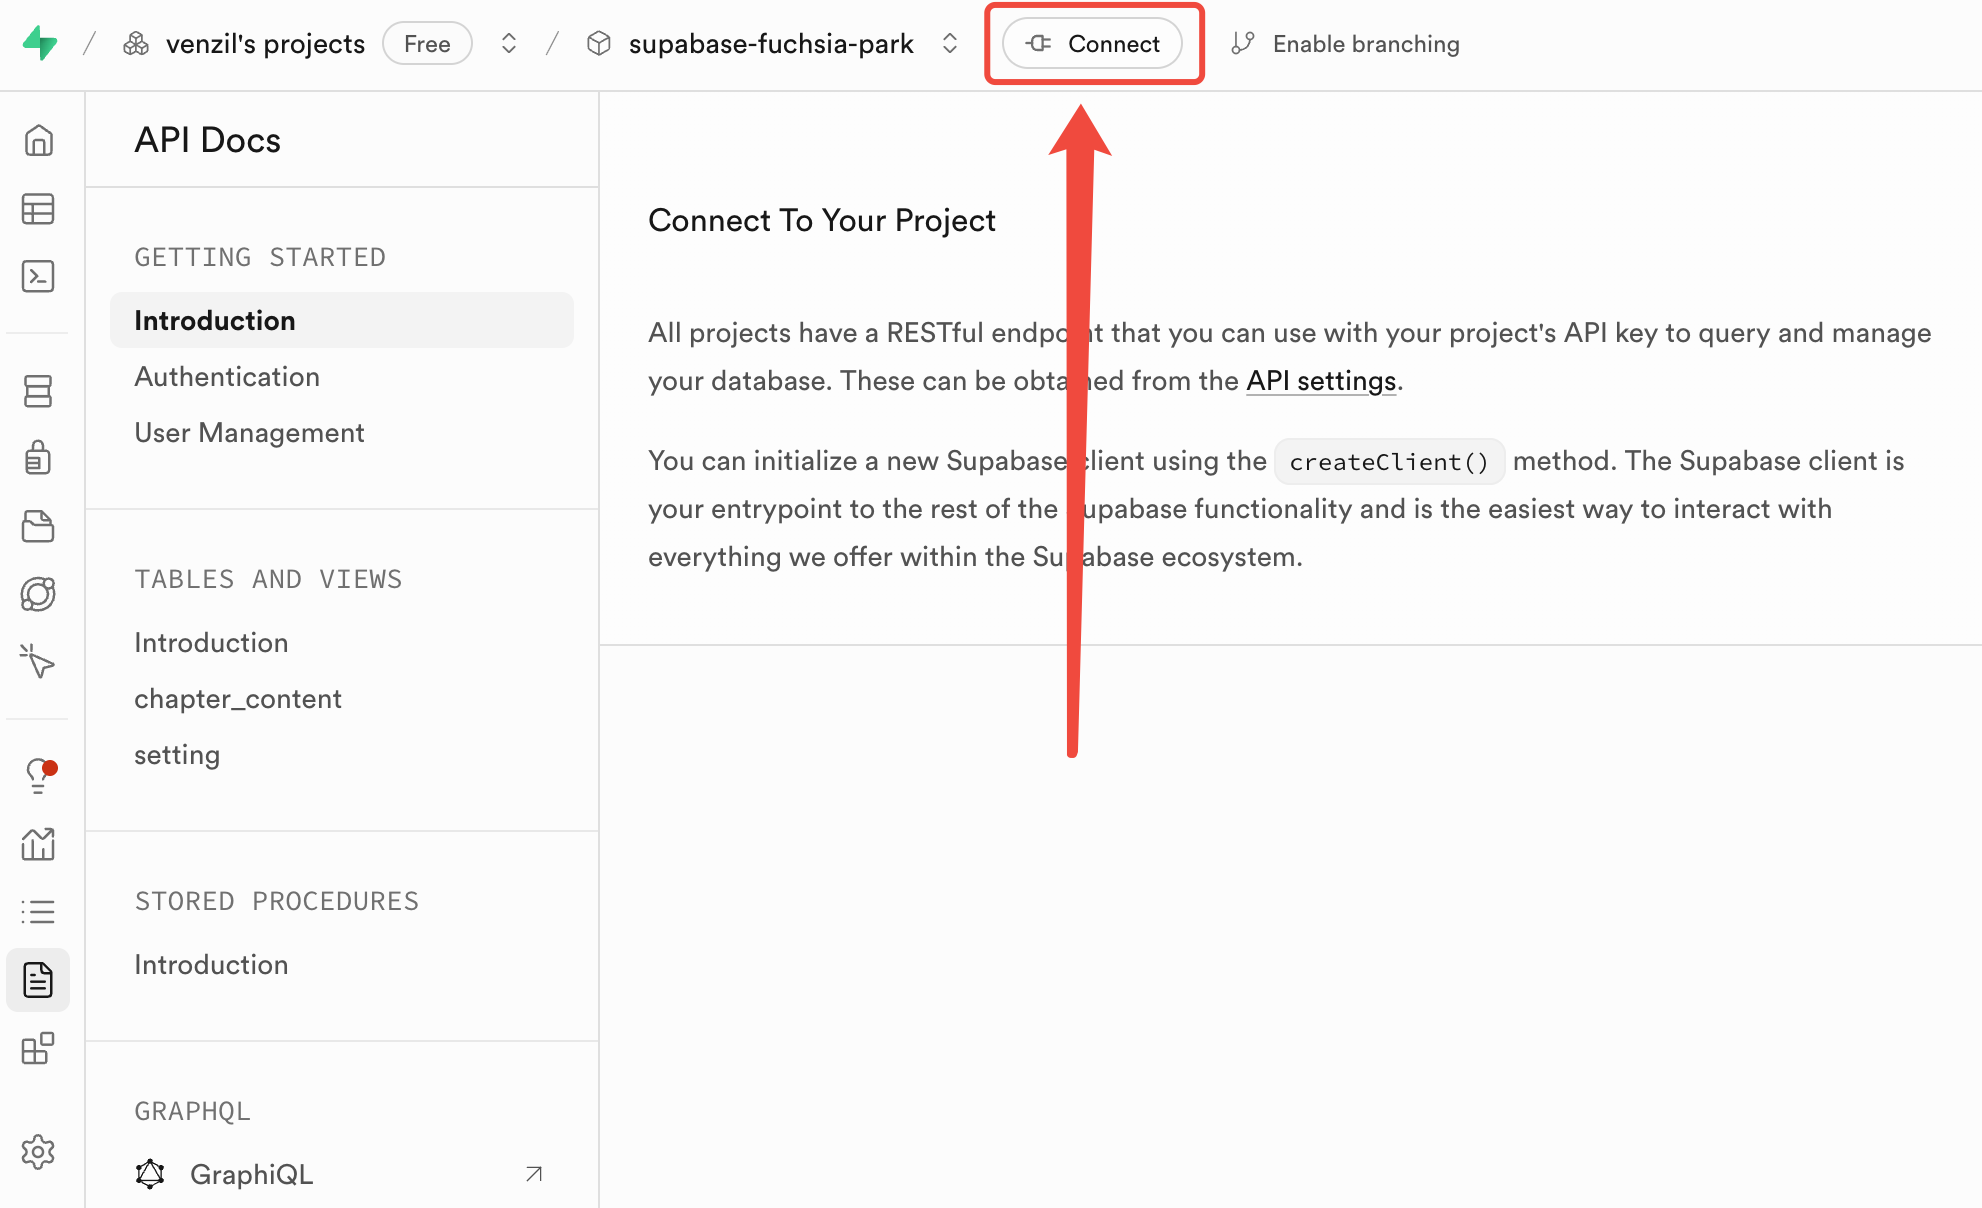
Select the program framework and Router method, integrate based on the instructions. Here, select
Next.js and Pages Router as an example.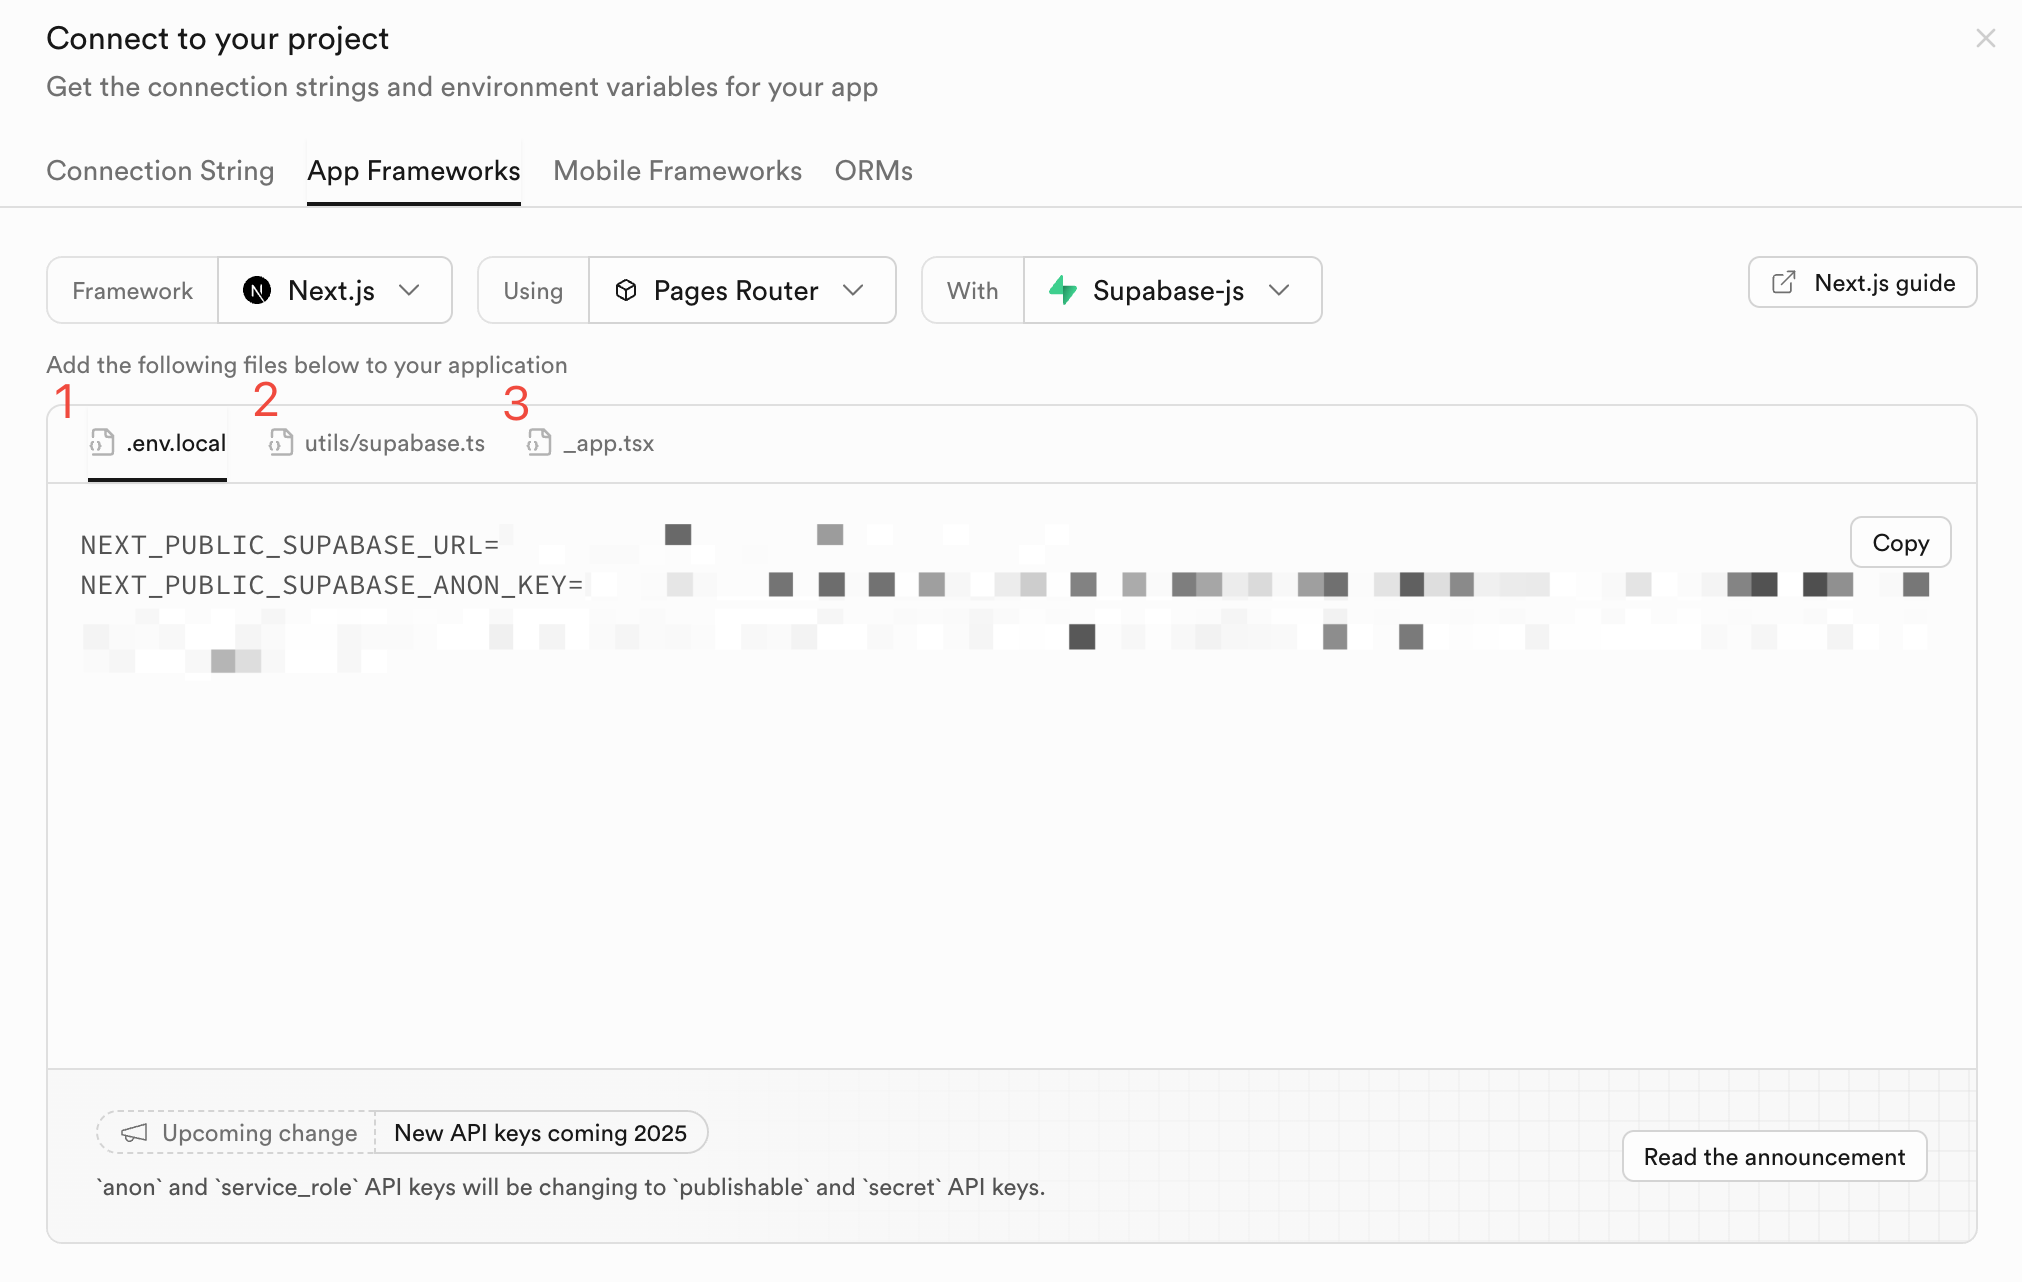
4. Filling in the Key
Create a
.env.local file for local development, then write URL and KEY into it. Here's an example using variables prefixed with NEXT_PUBLIC, which may cause warnings or errors in some frameworks.NEXT_PUBLIC_SUPABASE_URL=https://url.supabase.coNEXT_PUBLIC_SUPABASE_ANON_KEY=key
If you need to fill in more link parameters, such as
service_role or JWT Settings, you can select Project Settings -> Data API in the left sidebar, then find the relevant parameters.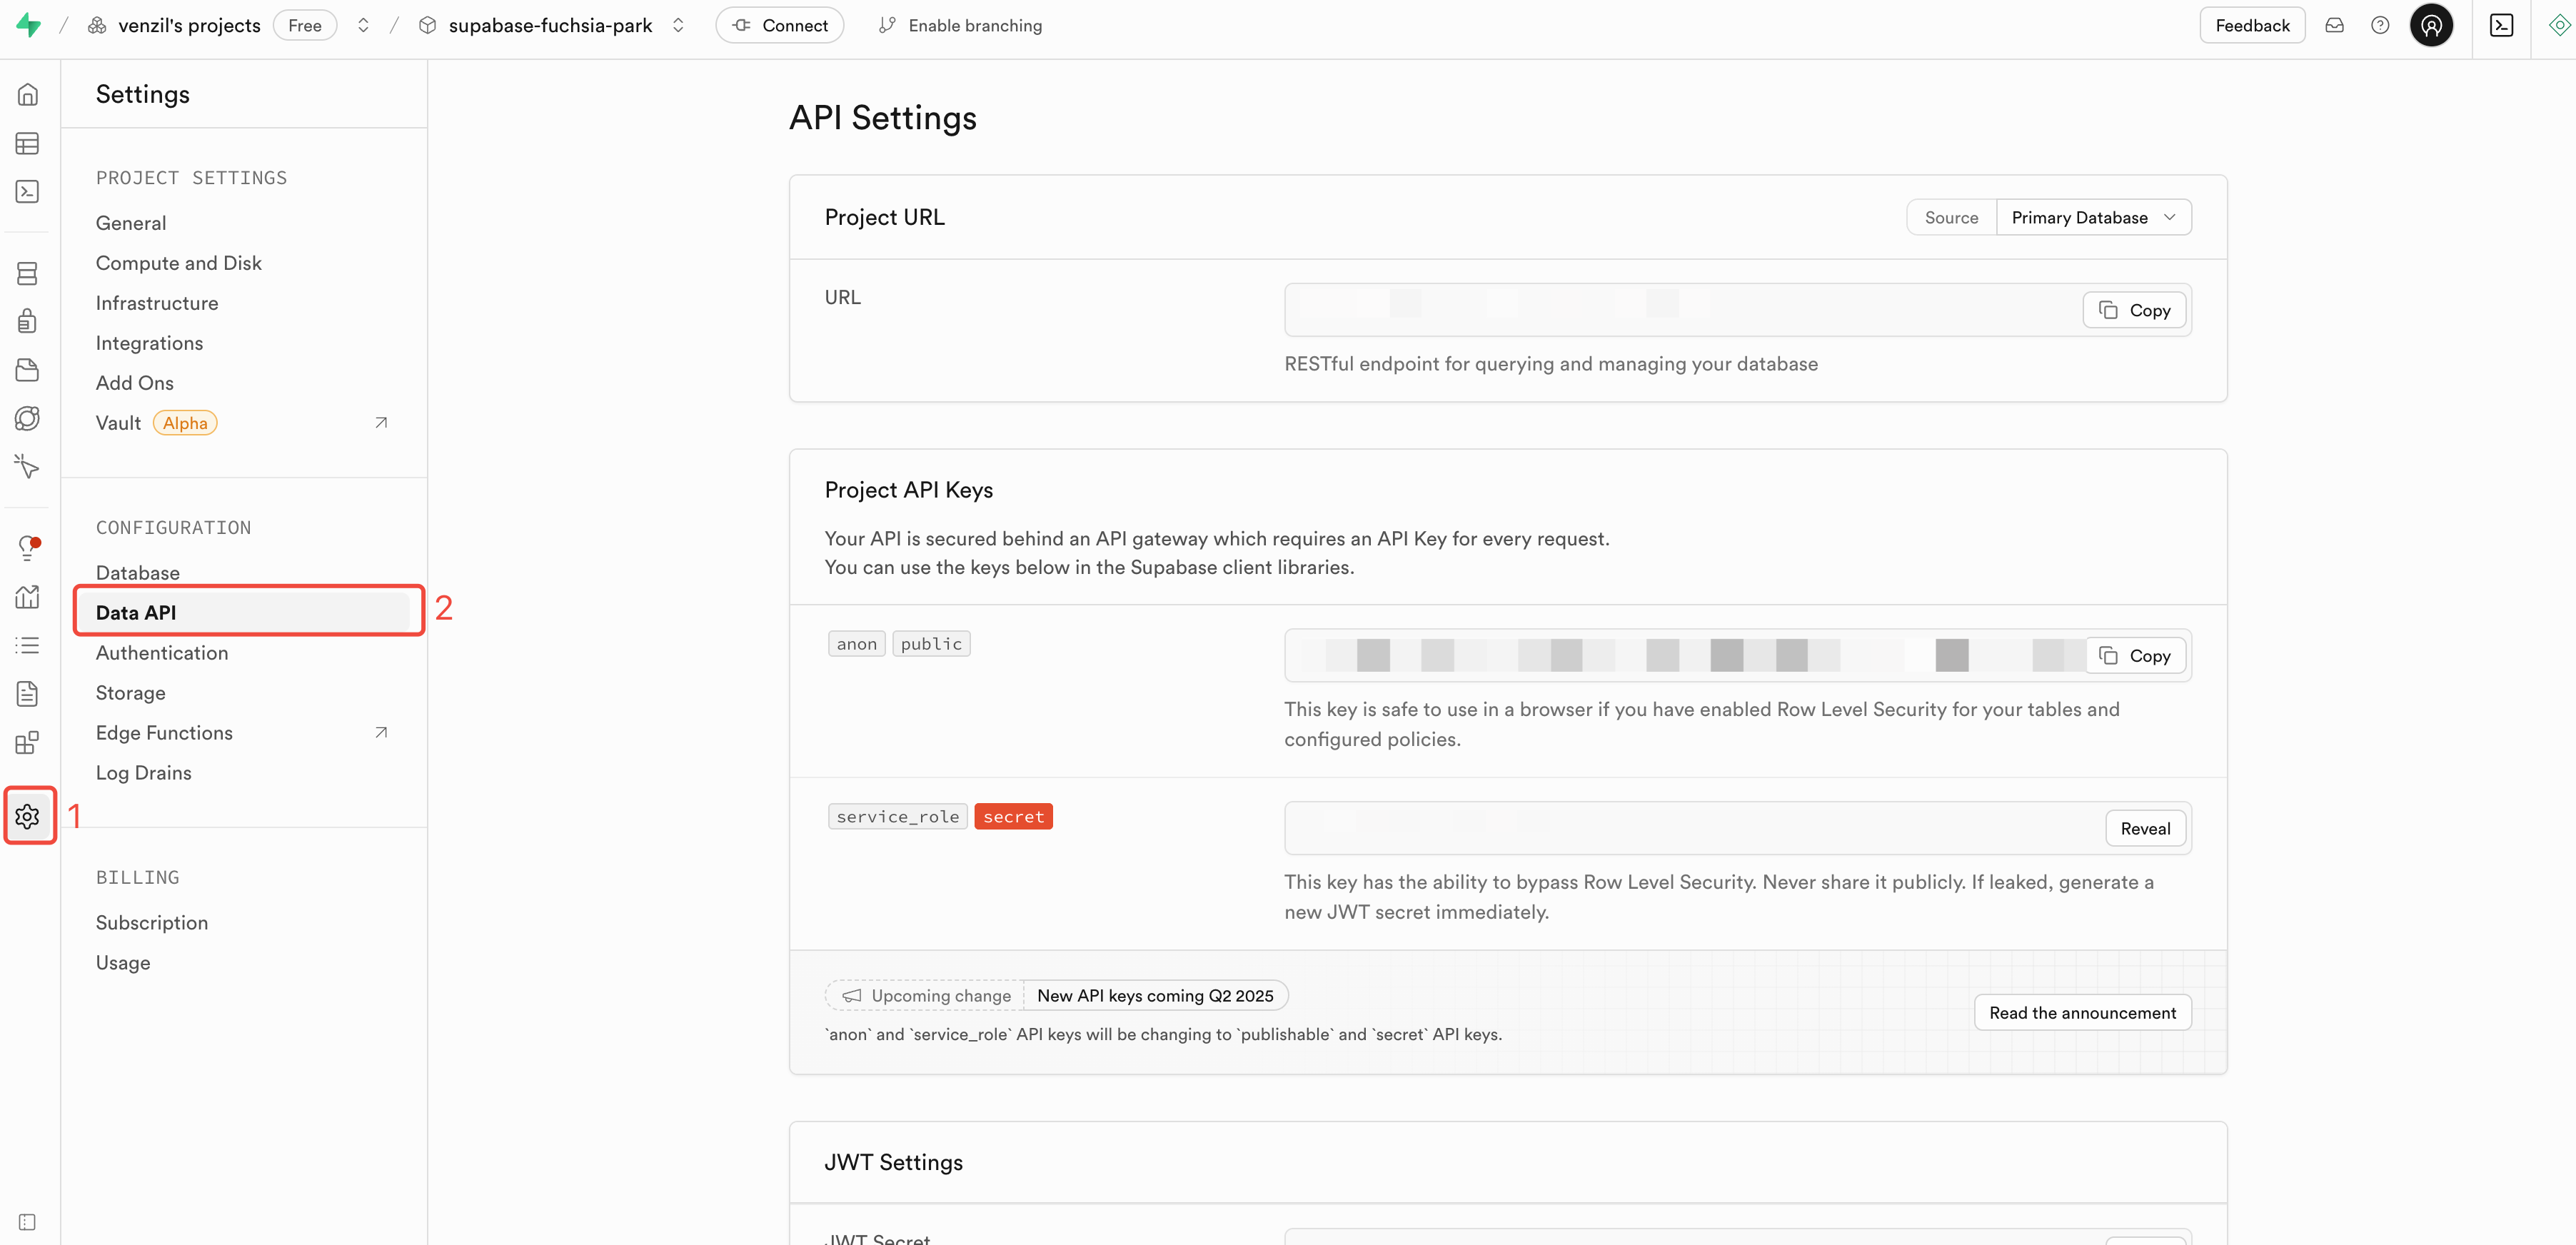
5. Creating a Service Connection
import { createClient } from "@supabase/supabase-js";const supabaseUrl = process.env.NEXT_PUBLIC_SUPABASE_URL;const supabaseKey = process.env.NEXT_PUBLIC_SUPABASE_ANON_KEY;export const supabase = createClient(supabaseUrl, supabaseKey);
6. Performing Data Operations
import { supabase } from '../utils/supabase'const data = await supabase.from('todos').select()
Note that setting RLS to disabled may result in data access failure.

Deploying to EdgeOne Pages
Publishing Code to Git
Step one: Create a New project in the remote repository. In GitHub, enter
Dashboard, click New, fill in the project name, and click Create repository to Create a Git project.
Associate local code with the remote repository, upload the local code, and execute the following commands in the local project root directory. You can also refer to the steps on Github to complete the process.
# Push your code to your git repository (e.g. GitHub, Gitee).git initgit add .git commit -m "First commit"git remote add origin "your Git address"git push -u origin master
Select a Deployment Project
Enter the EdgeOne Pages console, click
Create project -> Import Git repository, and select your project.
3. Add an Environment Variable
Configure Pages variables. The
Variable Name should be consistent with the variable names in the .env.local file of the local project, then fill in the Value.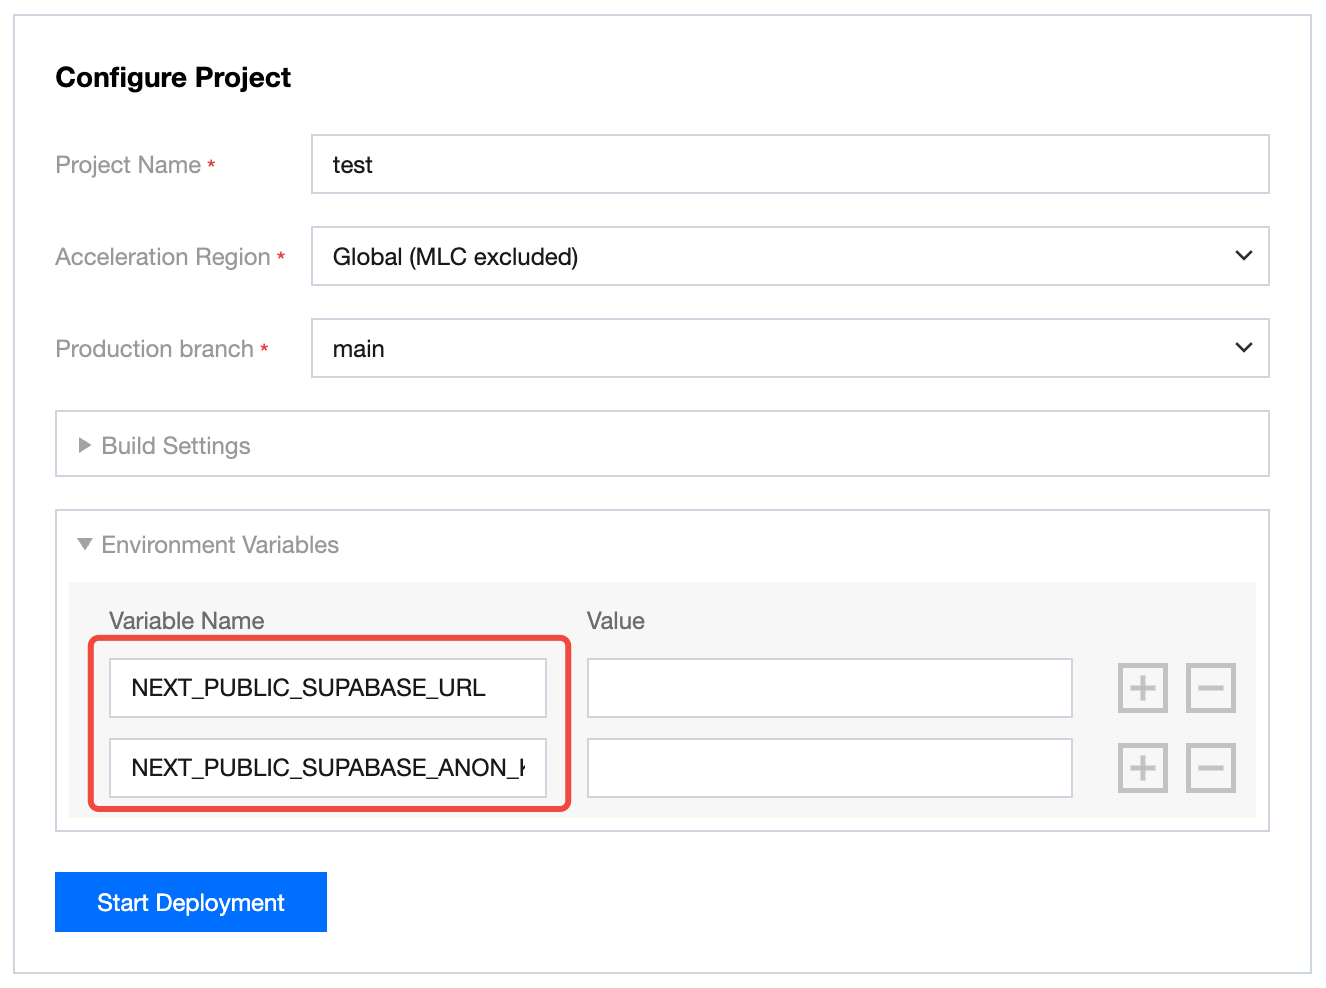
After filling in the parameters, click
Start Deployment to begin deployment, which will take 1-3 minutes. If the project fails during deployment, you can modify the project based on Build Logs and Build Summary information, or contact staff for resolution.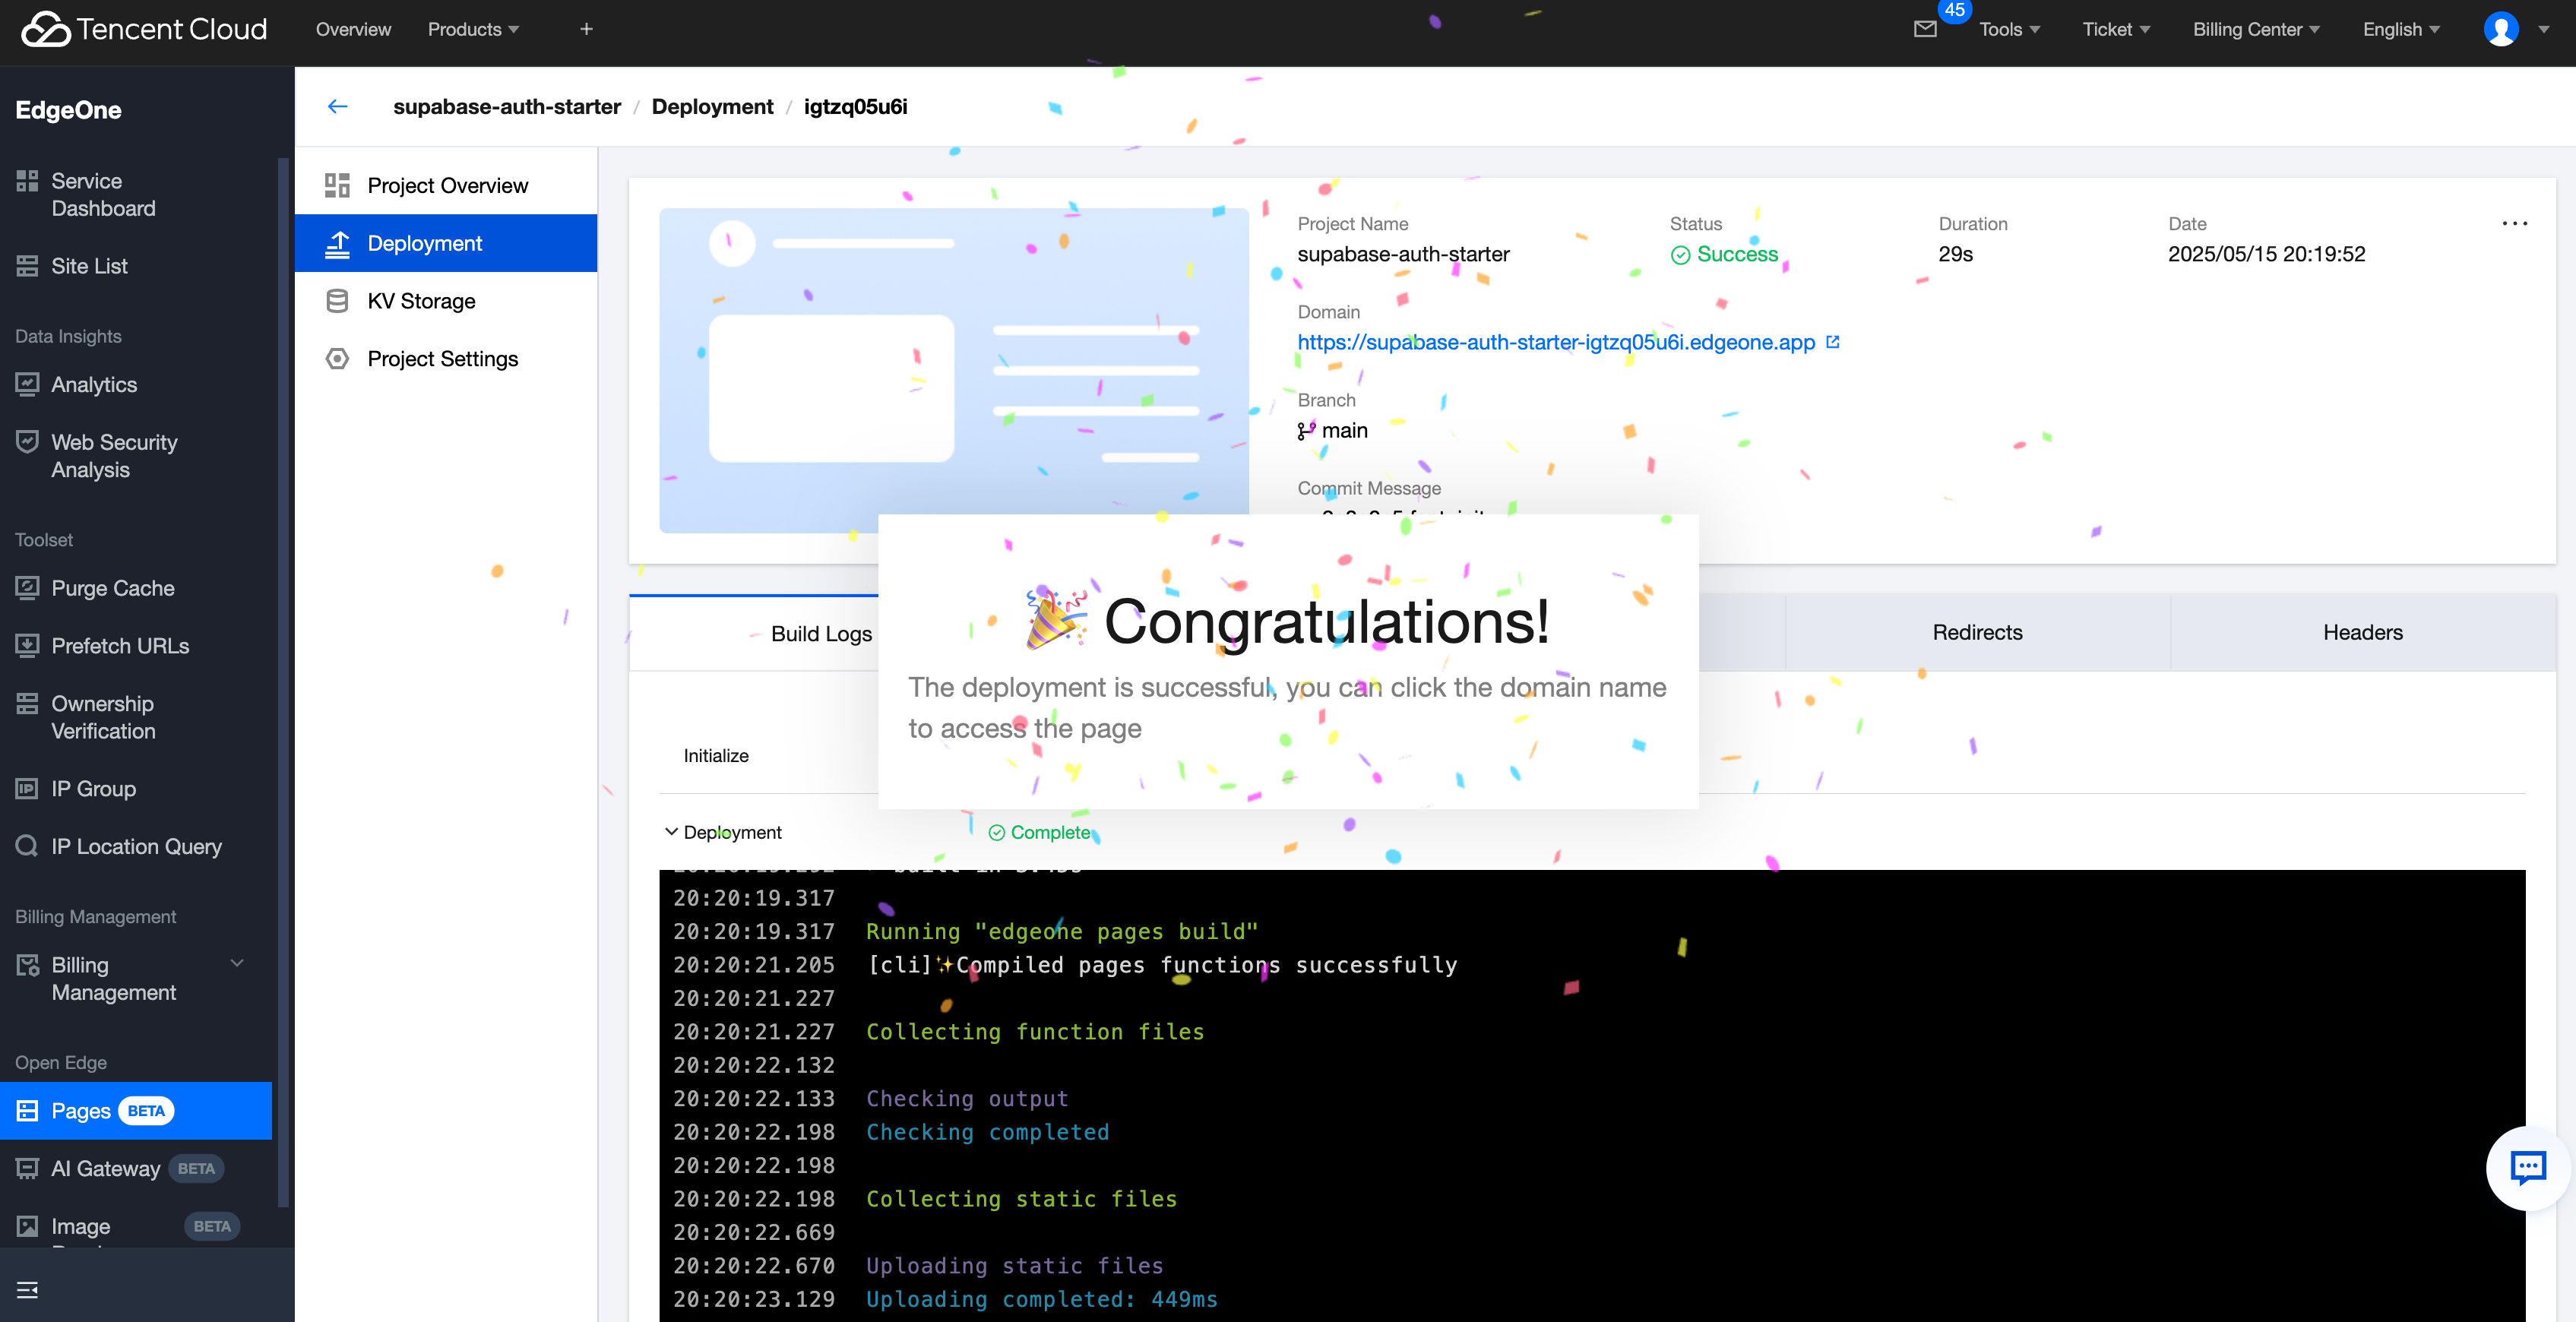
More Related Content
Learn more about Supabase: Supabase Operation Document