WooCommerce Integration
WooCommerce is the most popular e-commerce plugin for the WordPress platform, allowing any WordPress website to easily transform into a fully functional online store. As the official e-commerce solution recommended by WordPress (the world's most popular content management system with over 40% market share), WooCommerce provides comprehensive e-commerce features such as product management, order processing, and payment integration. With the increasing demands for performance and user experience from e-commerce websites, the industry widely adopts modern static site generators like Gatsby to optimize WooCommerce websites. By pre-rendering dynamic content into static pages, it maintains management convenience while significantly improving website performance and user experience.
Overview
This document describes how to integrate WooCommerce with the Gatsby framework based on the WordPress platform to build a high-performance e-commerce website. In this architecture, WordPress serves as the core of the content management system, WooCommerce provides e-commerce functionality, and Gatsby is responsible for performance optimization. Through this combination, you can simultaneously obtain WordPress's content management capability, WooCommerce's e-commerce features, and Gatsby's performance benefits, delivering a better shopping experience for your customers. This document will introduce in detail how to achieve the integration of WordPress + WooCommerce with Gatsby, as well as how to deploy and accelerate using EdgeOne Pages.
Getting Started
EdgeOne provides a complete WordPress + WooCommerce + Gatsby integration solution. You only need to download and configure the database to quickly deploy:
WordPress + WooCommerce backend: https://github.com/TencentEdgeOne/wp-ecommerce-docker-demo.git
Gatsby frontend template: https://edgeone.ai/pages/templates/gatsby-woocommerce-template
Download these two templates and deploy them according to the instructions to quickly build an e-commerce website.
The WooCommerce integration mainly includes the following three steps: configure WordPress and WooCommerce, generate static pages using Gatsby, and deploy to EdgeOne Pages. You can manually configure according to the following steps.
Configuring WordPress and WooCommerce
You can configure WordPress and WooCommerce in the following two ways:
Method One: Self-Deploy WordPress (The Recommended Way in This Document)
EdgeOne provides a pre-configured WordPress + WooCommerce Docker template that enables you to quickly complete self-deployment. This template already integrates a MySQL database and preconfigured WooCommerce, and comes with the following essential plug-ins pre-installed:
Advanced Custom Fields - for custom field management
WooCommerce - Core e-commerce functionality
JWT Authentication for WP-API - REST API certification
WPGraphQL - GraphQL API support
WPGraphQL for ACF - GraphQL support for ACF
WPGraphQL for WooCommerce (WooGraphQL) - GraphQL support for WooCommerce
WPGraphQL JWT Authentication - GraphQL API certification
First, clone the project to your local system:
git clone https://github.com/TencentEdgeOne/wp-ecommerce-docker-demo.gitcd wp-ecommerce-docker-demo
If you need to perform local verification on the deployment machine, you need to create a
.env file in the project root directory and configure the following environment variables:# Database configurationWORDPRESS_DB_PASSWORD=wordpress123MYSQL_ROOT_PASSWORD=somewordpressMYSQL_PASSWORD=wordpress123# GraphQL authentication configurationGRAPHQL_JWT_AUTH_SECRET_KEY=your-hwt-auth-secret-key# Site configurationWP_HOME_URL=http://localhost # Replace with your site URLWP_DOMAIN=localhost # Replace with your site domain nameWP_HOST=80 # Replace with your site port
After the configuration is complete, use Docker to start the project:
docker-compose up -d
Once the service startup is completed, you can access
http://your.site.ip/wp-admin/admin.php to enter the WordPress management interface.Note: This template comes pre-installed with a MySQL database and a configured WooCommerce, requiring no additional configuration. After your first login, please timely modify the default password.
In the WordPress backend, you need to create the following three pages:
highlight - used for showcasing featured productspromotion - used for showing promotional eventssample-page - used for showing sample content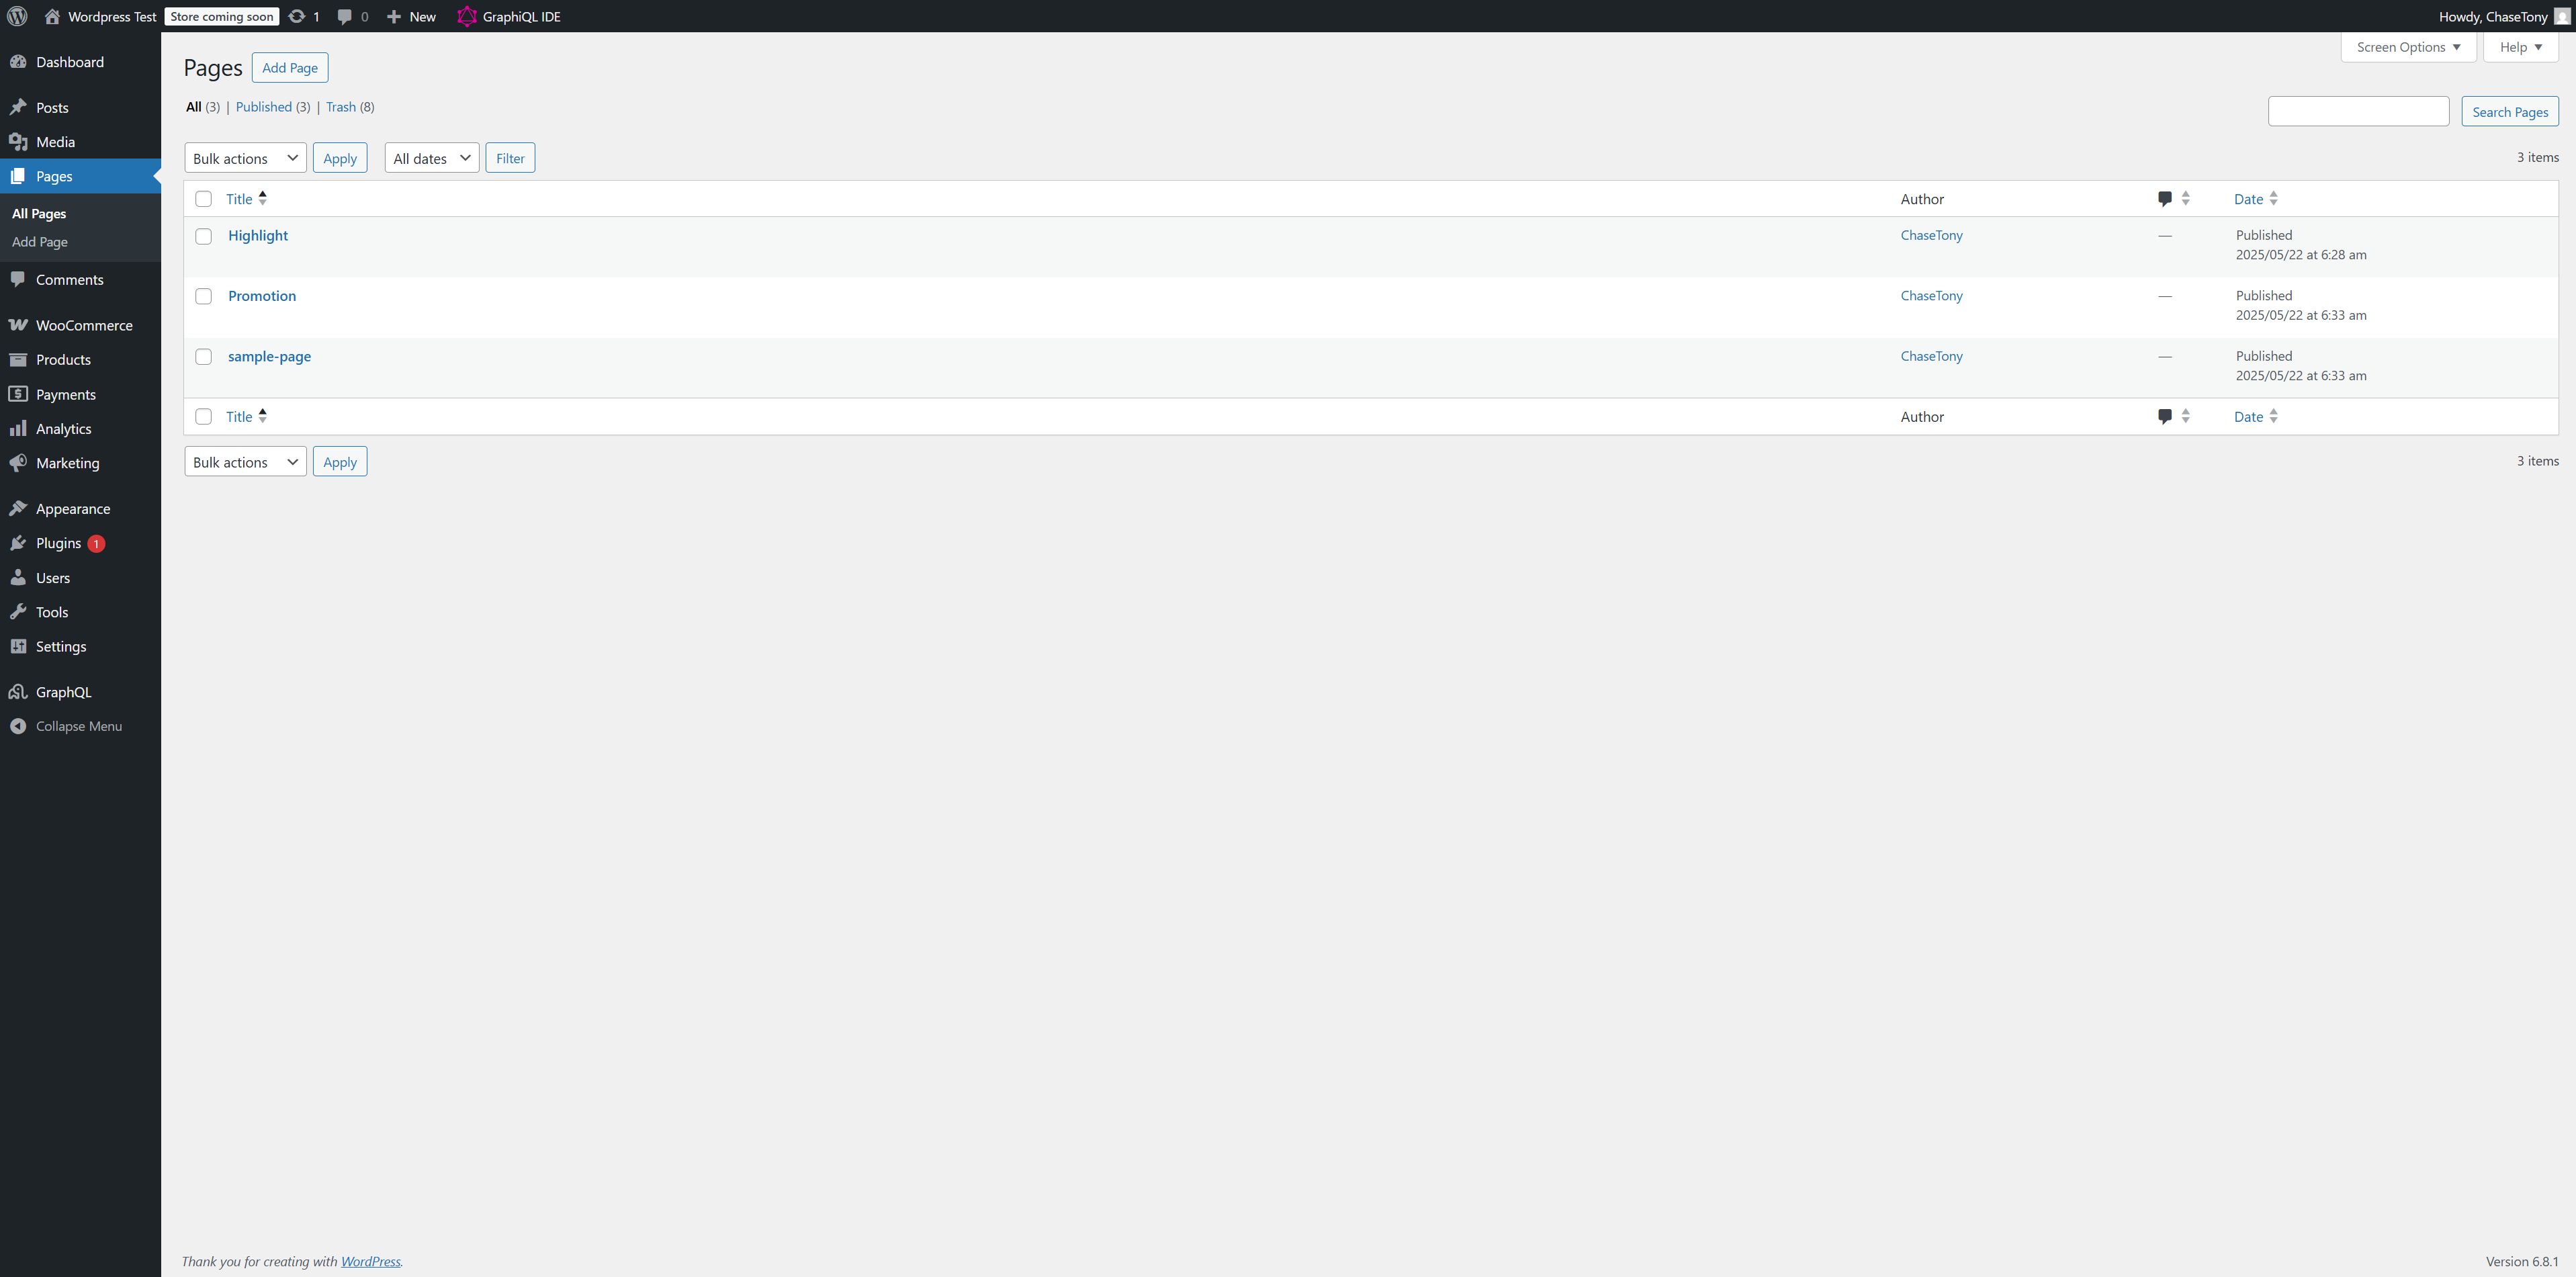
After creating a page, you need to configure Advanced Custom Fields:
1. Enter the "Custom Field" menu in the WordPress backend
2. Click the "Tools" tag
3. In the "Import Field Groups" section, select and upload the
acf-export-2025-02-13.json file (the file is located under the wordpress-data directory of the wp-ecommerce-docker-demo template project).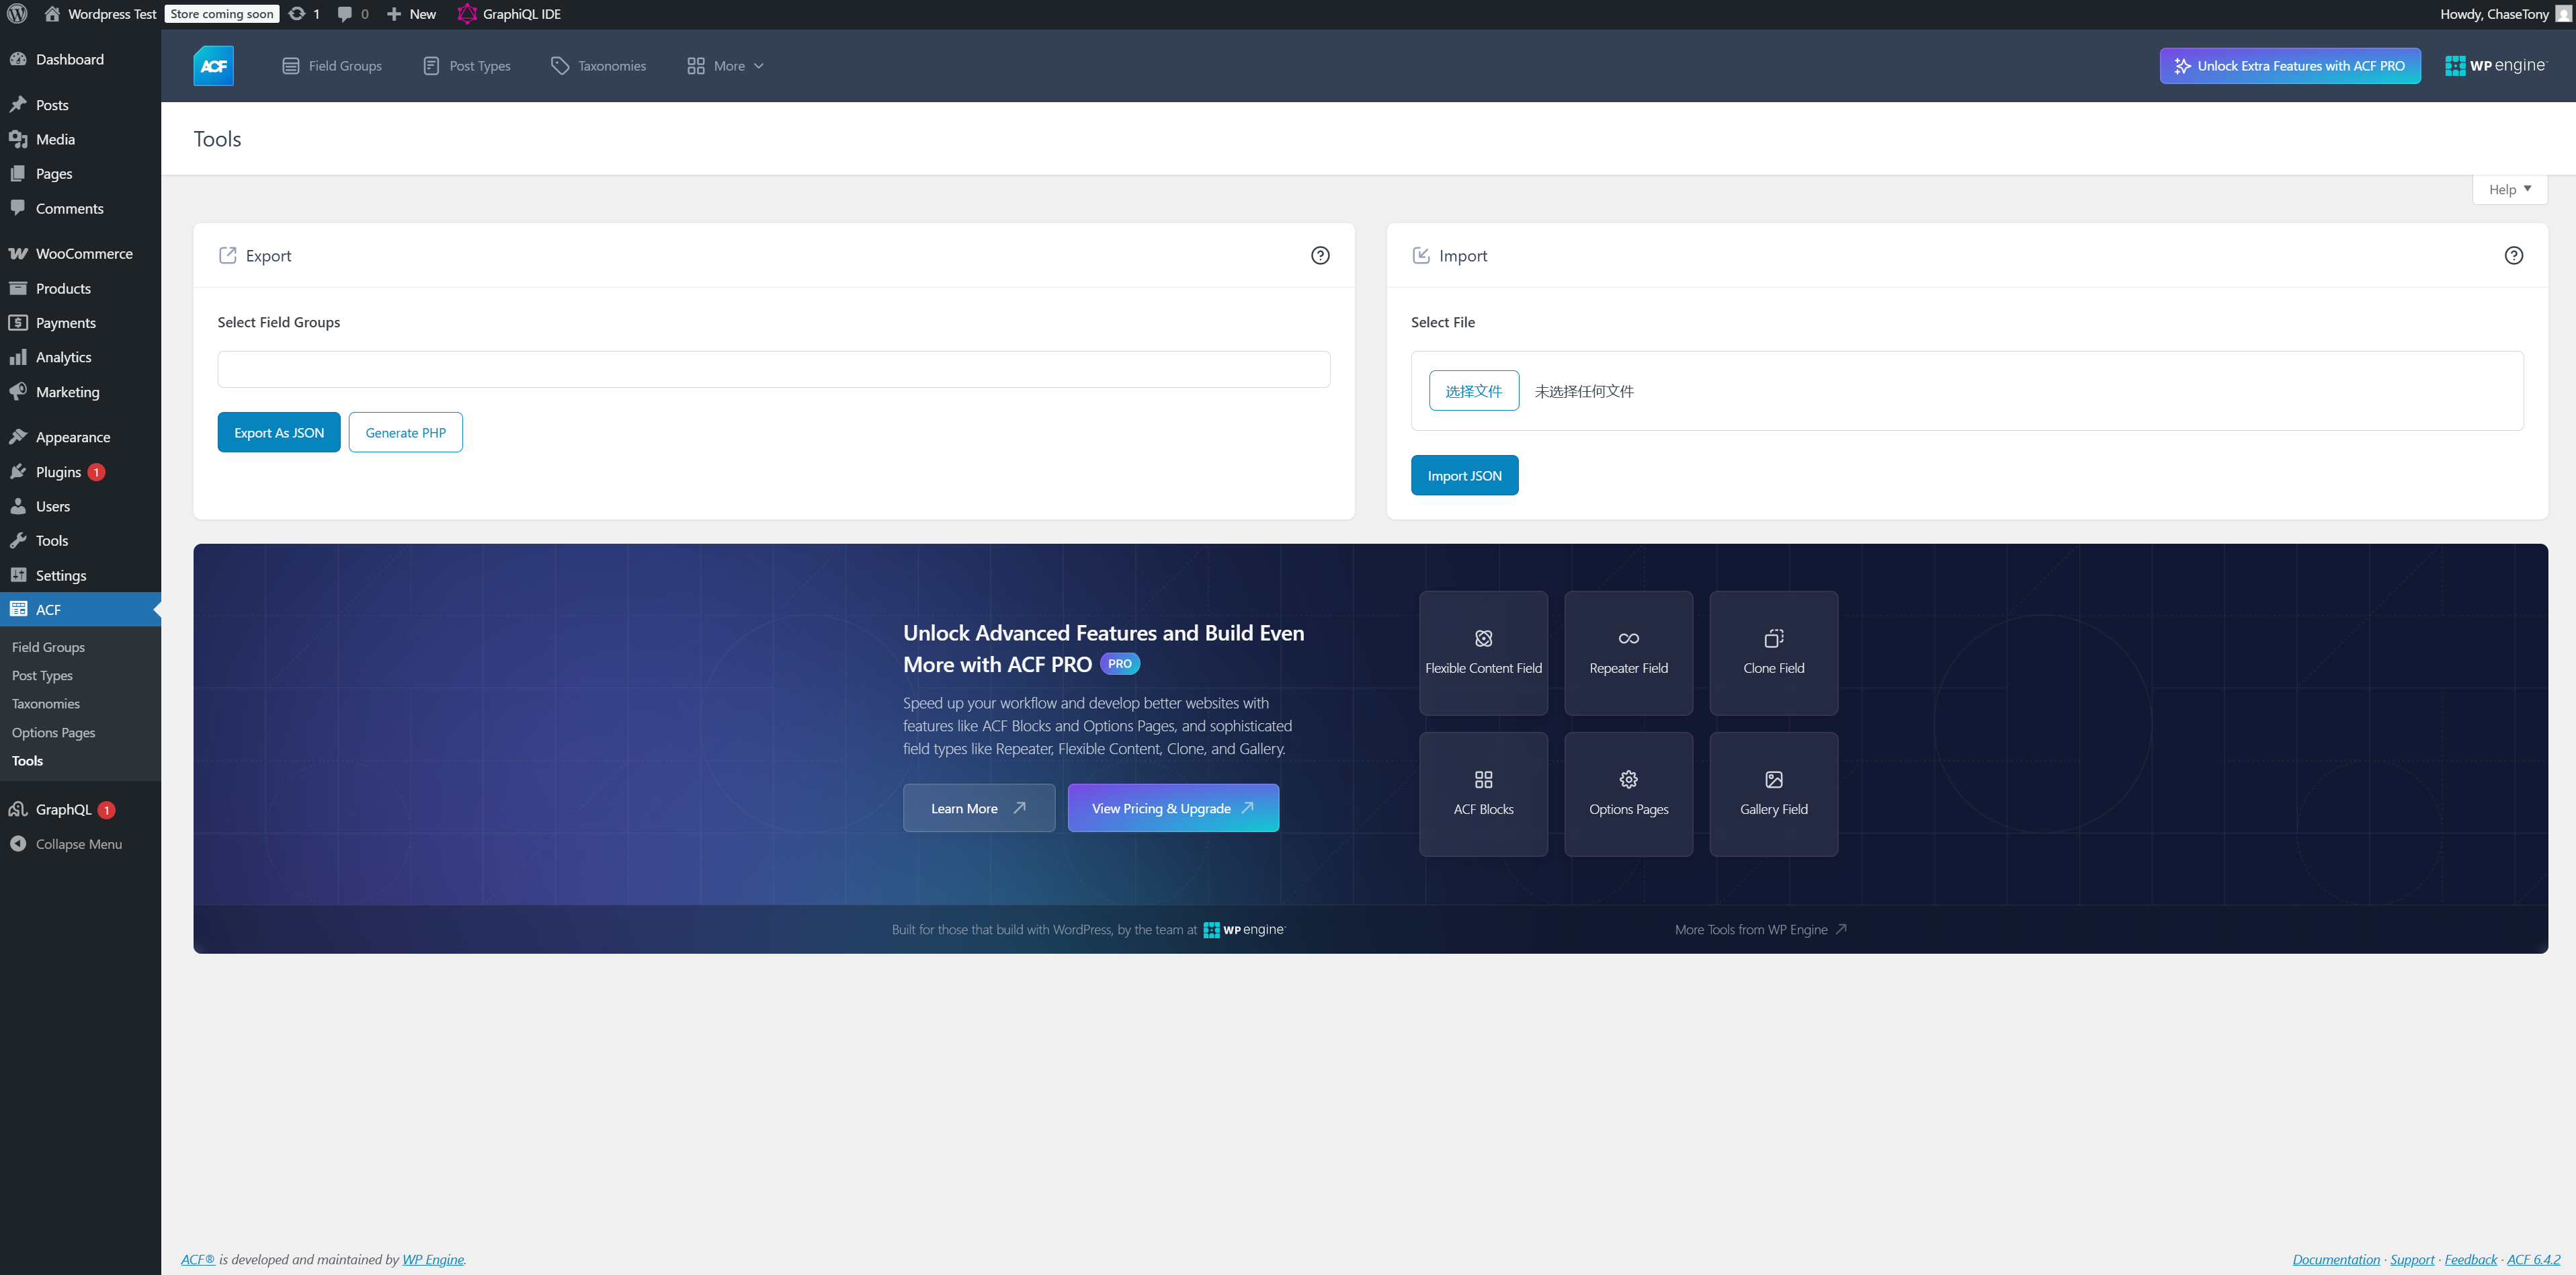
4. Click the "Import" button to complete the import.
5. After the import is complete, enter the "Field Groups" tag.
6. Associate the imported field groups with the corresponding page types for configuration.
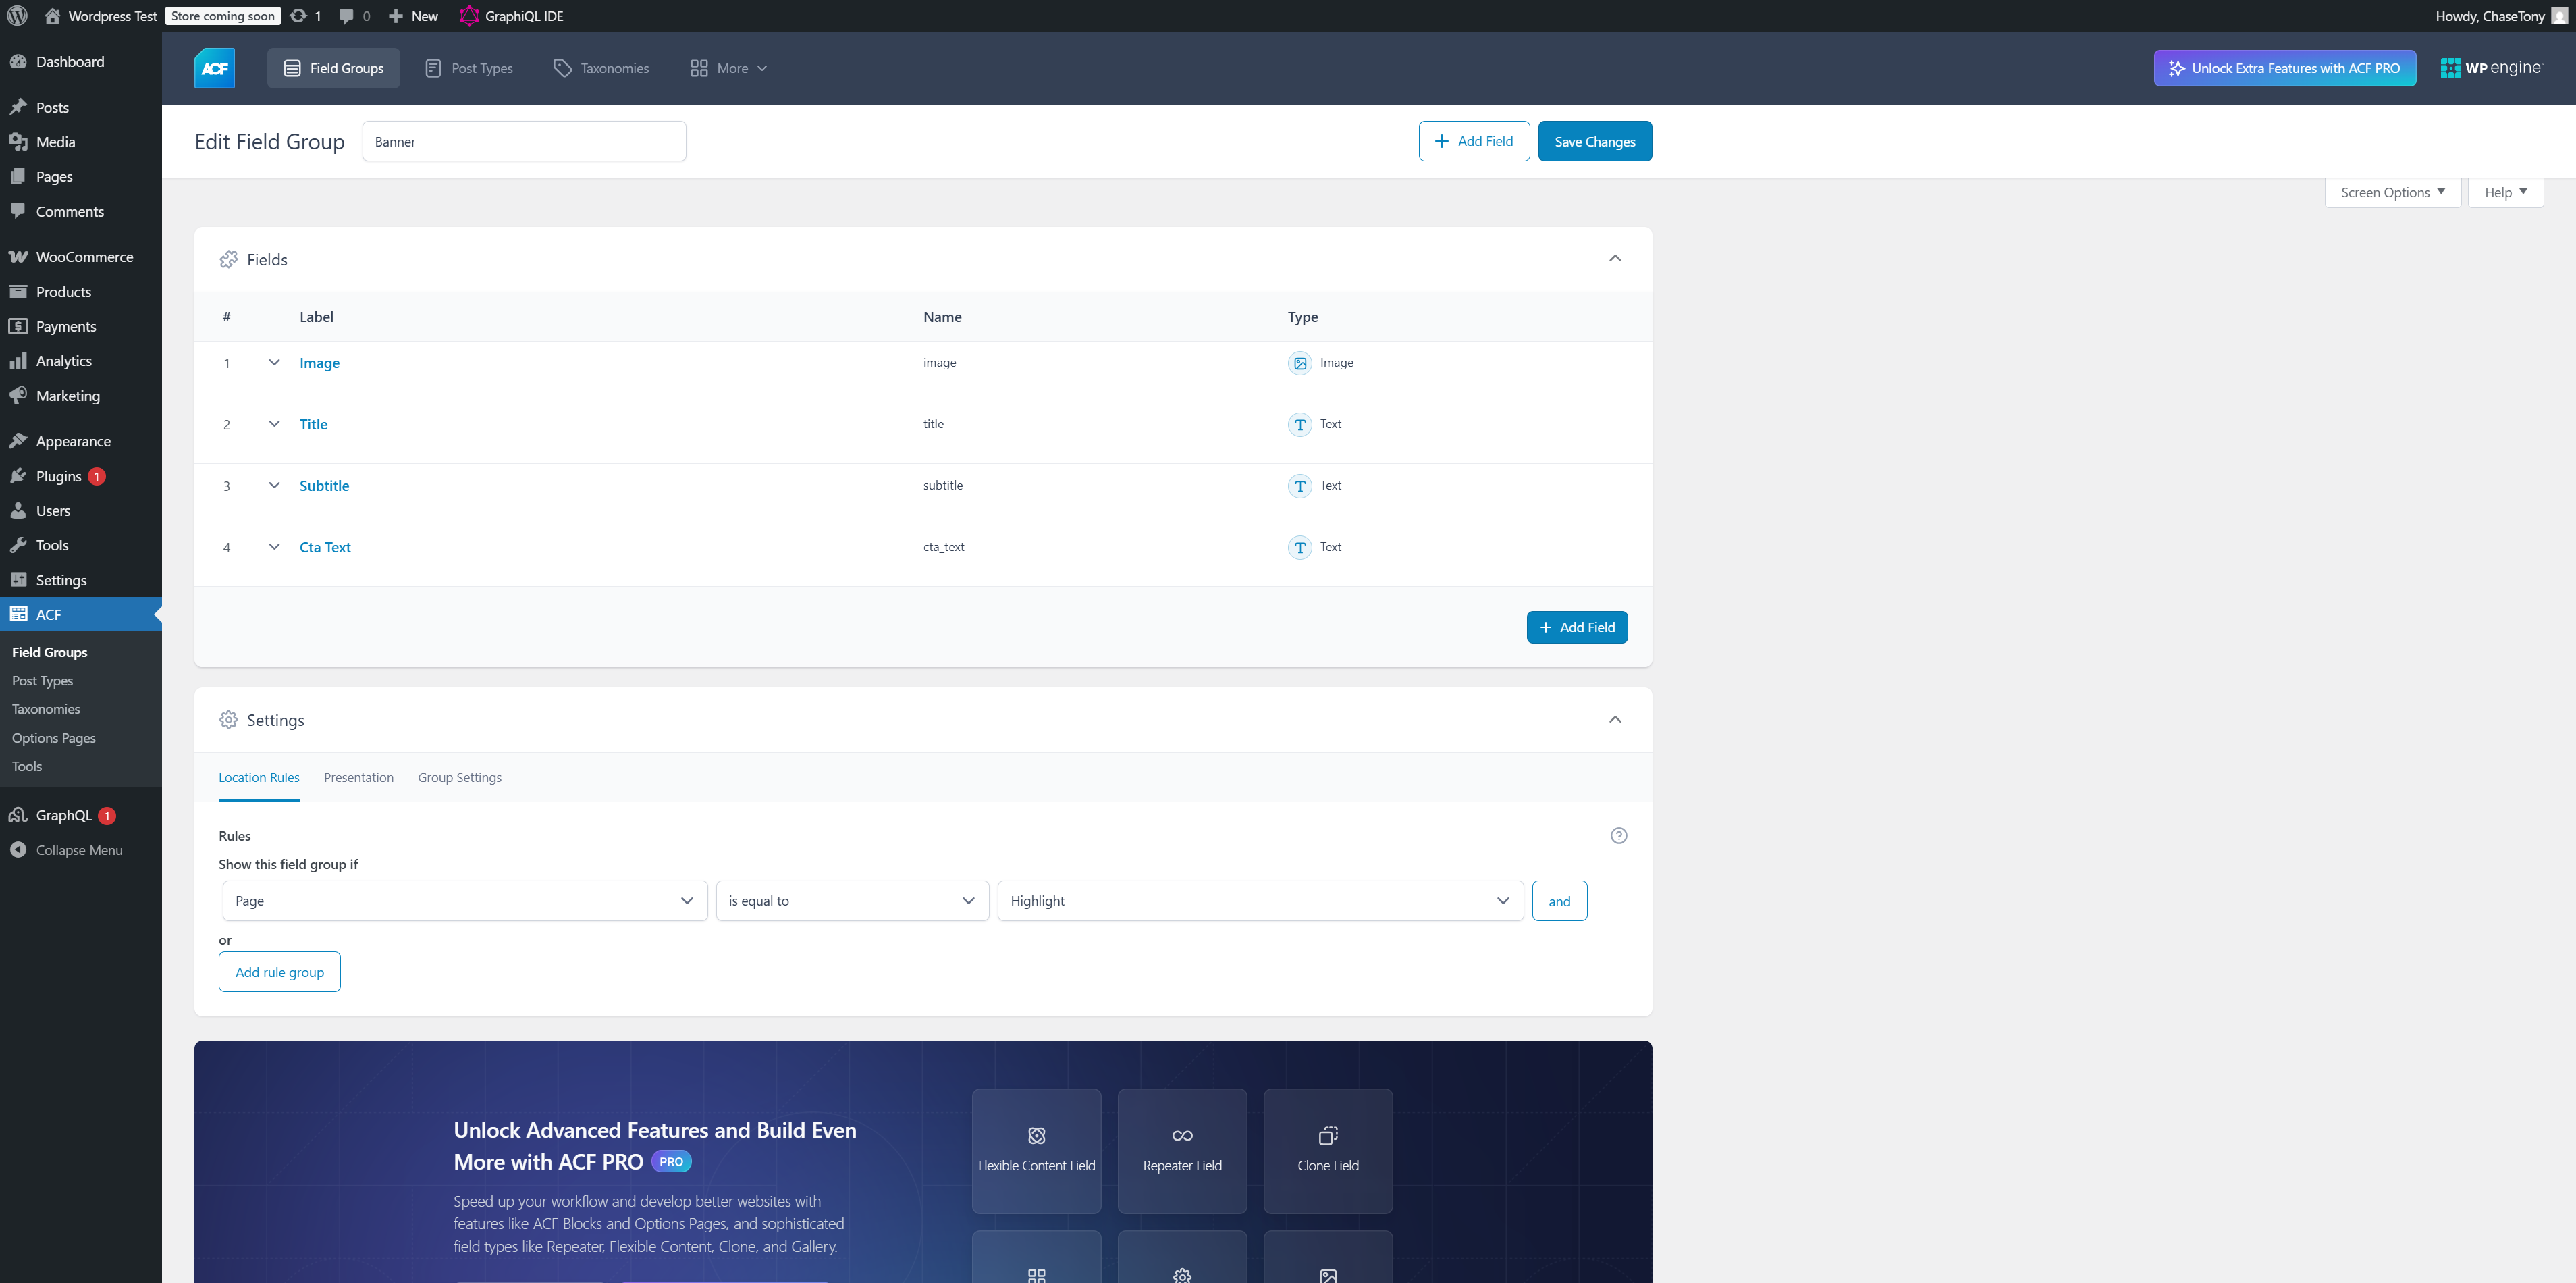
After completing the ACF configuration, you need to configure the Field Group to the corresponding pages. We can match them by name, and then the pages can use these custom fields.
Next, let's configure the WooCommerce item data. After logging in to the WordPress management interface, click in the left menu "WooCommerce" to enter the WooCommerce management console. Here, you can see all the data items that need to be configured.
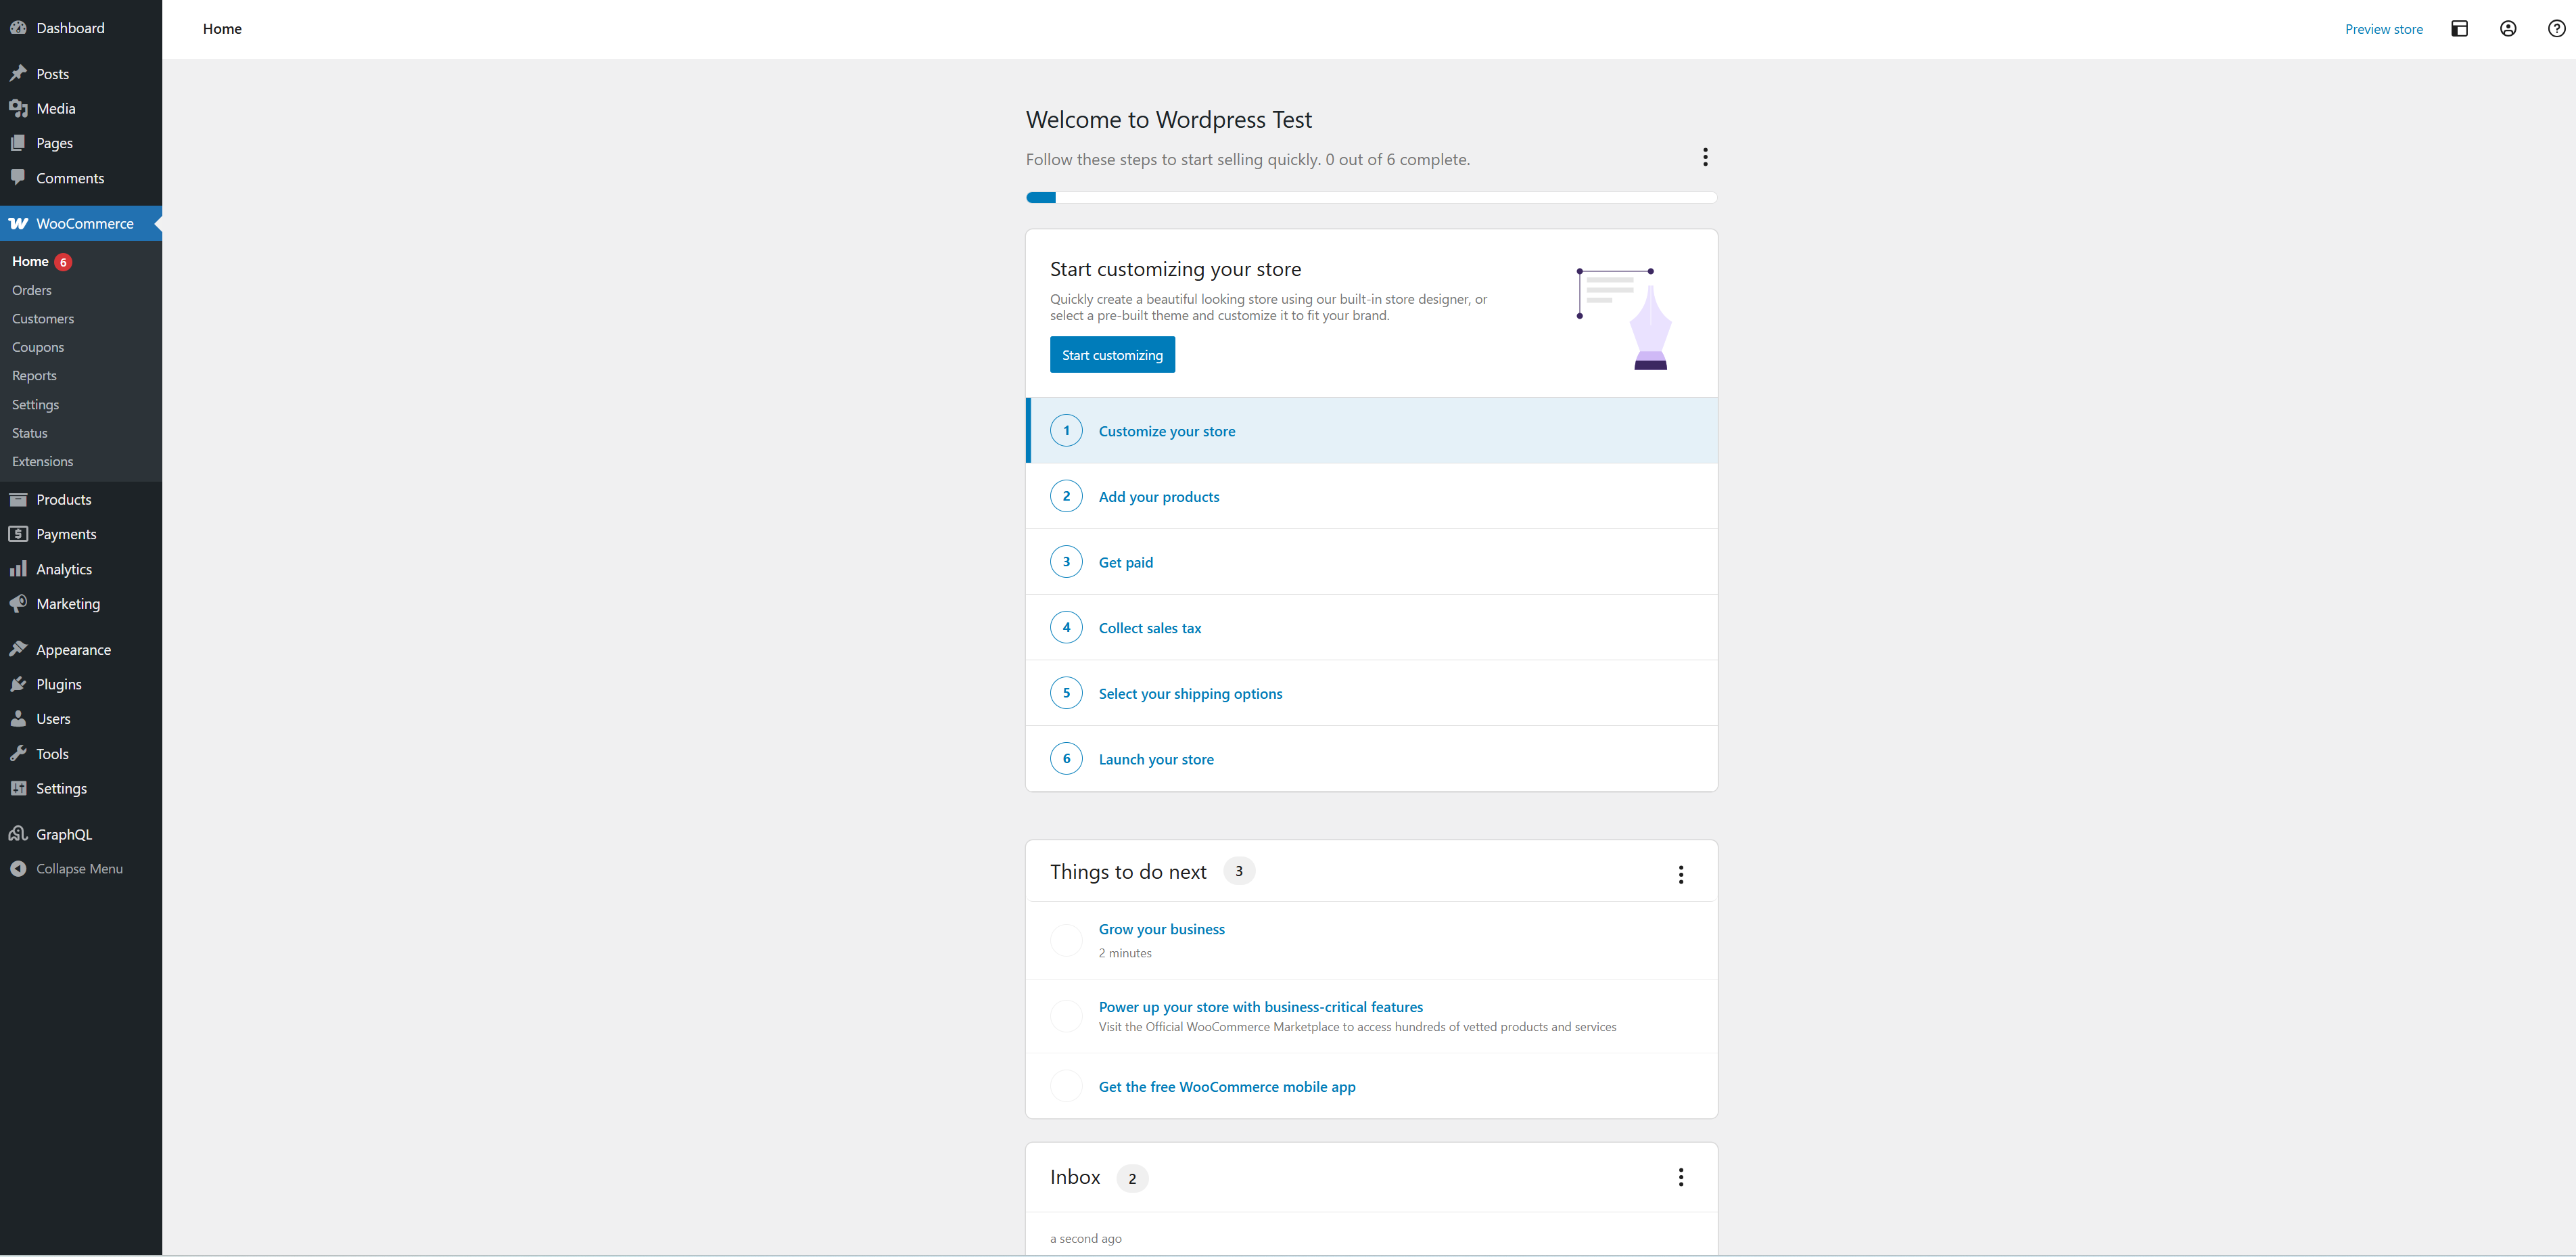
Since we use WordPress mainly to provide data APIs, and the front-end page will be implemented through the Gatsby project, you can skip the configuration of "Customize your store". Please focus on the configuration of basic features such as products, orders, and payments. If you have questions about WooCommerce's specific configuration, you can refer to WooCommerce Official Documentation.
Here we won't provide detailed explanations of specific data configuration details. You can configure them in the WooCommerce management interface as needed.
Data Verification
After the configuration is complete, we need to verify whether the WordPress and WooCommerce APIs can function normally to provide data. Since we have already installed the WPGraphQL and WooGraphQL plug-ins, we use the GraphQL method for data verification.
1. WordPress Data Validation
query GetPages {pages(first: 1) {nodes {idtitlecontentacf {hero_titlehero_descriptionfeatured_products}}}}
Sample return data:
{"data": {"pages": {"nodes": [{"id": "cGFnZS8x","title": "Highlight","content": "page content...""acf": {"hero_title": "Welcome to Our Store","hero_description": "Discover our featured products","featured_products": [1, 2, 3]}}]}}}
2. WooCommerce Data Validation
query GetProducts {products(first: 1) {nodes {idnametypestatuspriceregularPricesalePricedescriptionimages {nodes {idsourceUrlaltText}}categories {nodes {idnameslug}}}}}
Sample return data:
{"data": {"products": {"nodes": [{"id": "cHJvZHVjdC8x","name": "Premium Headphones","type": "SIMPLE","status": "PUBLISH","price": "199.99","regularPrice": "249.99","salePrice": "199.99","description": "High-quality wireless headphones with noise cancellation.","images": {"nodes": [{"id": "cG9zdC8y","sourceUrl": "https://your-store.com/wp-content/uploads/headphones.jpg","altText": "Premium Headphones"}]},"categories": {"nodes": [{"id": "Y2F0ZWdvcnkvMQ==","name": "Electronics","slug": "electronics"}]}}]}}}
You can test the GraphQL API by accessing
http://your-wordpress-url/graphql. If you can normally access the data in the above example, it indicates that the GraphQL API configuration is correct and can be provided for external access.
Method Two: Use Official WordPress.Com Hosting (For Beginners)
1. Access WordPress.com, register and create a new site.
2. In the site admin backend, go to "Plugins" > "Install Plugin"
3. Search and install all plugins installed via "method one" in WordPress.
Whether it's managed deployment or self-deployment, the configuration process for WordPress as a headless CMS is basically similar. It is used to manage content and provide API interfaces. We only need to refer to the configuration of "method one" above. Additionally, although managed deployment eliminates server maintenance and environment setup, major cloud services now offer excellent support for WordPress, making self-deployment quite convenient as well.
Payment Callback Configuration
Before starting to generate static files, we need to specifically explain the configuration of payment callbacks. This is because our frontend is a static website generated using Gatsby, and the payment process requires real-time processing of payment status updates. WooCommerce supports international payment gateways such as Stripe, PayPal, and Square. You only need to configure the appropriate payment method in the WooCommerce backend, set the necessary API parameters and callback address.
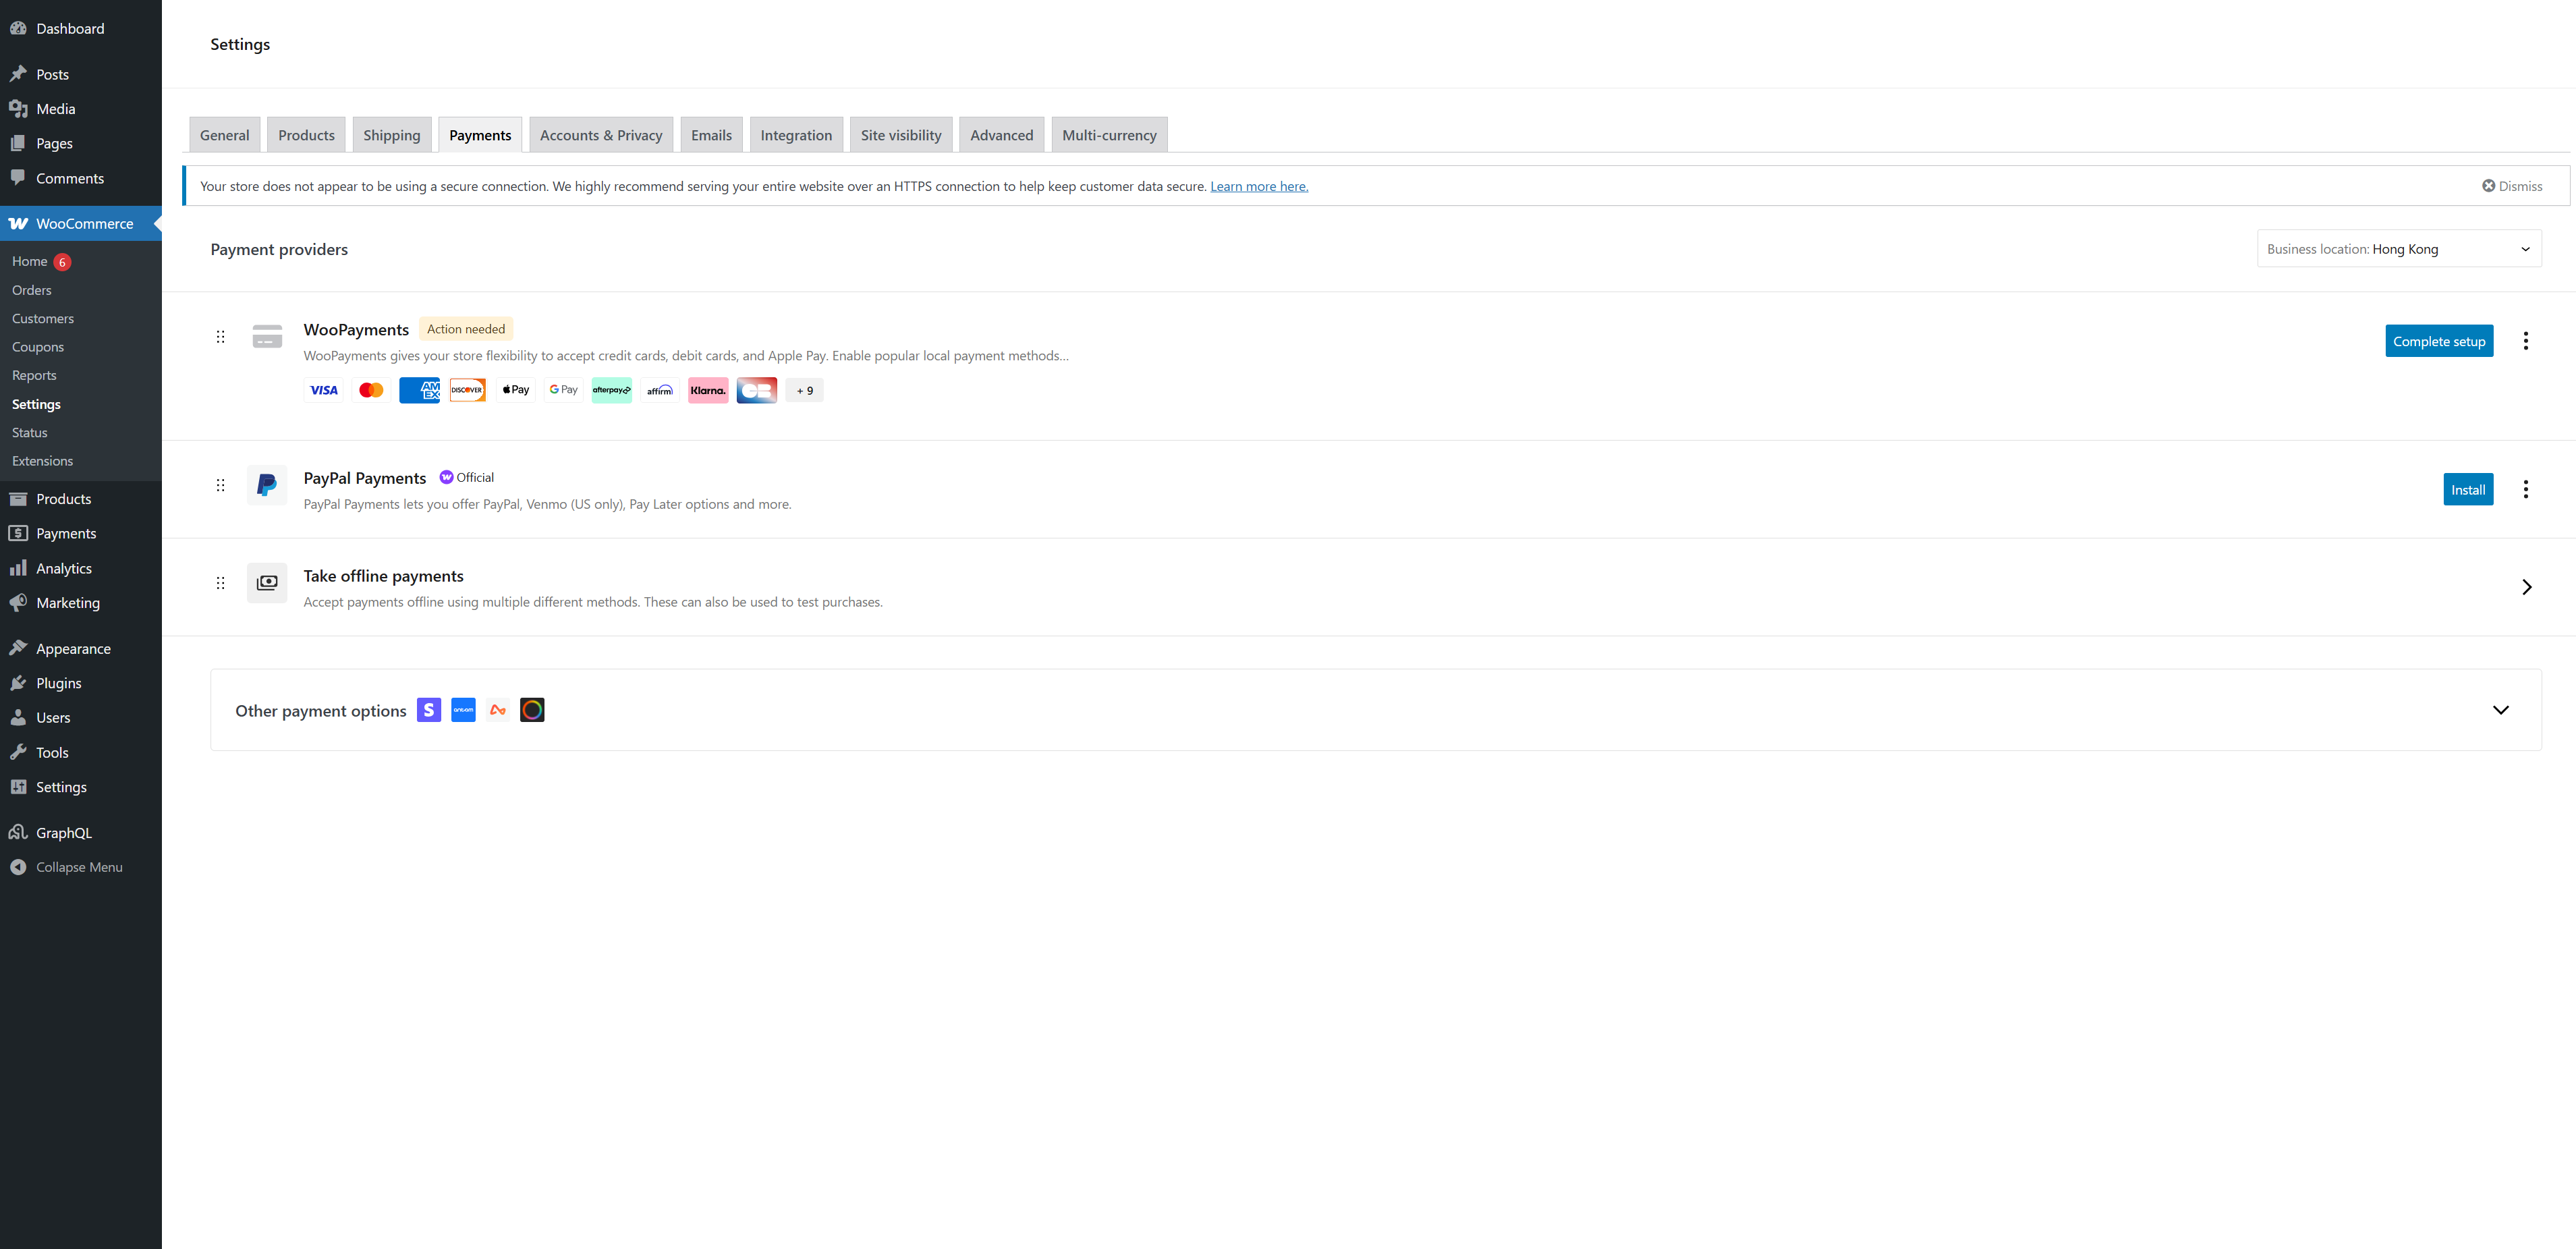
For frontend queries of payment status, WooCommerce provides three methods: REST API, GraphQL, and Webhook. Since the Gatsby template provided by EdgeOne uses GraphQL for data queries, this example uses the GraphQL method.
query GetOrderStatus($id: ID!) {order(id: $id) {statuspaymentMethoddatePaid}}
Example query result:
{"data": {"order": {"status": "completed","paymentMethod": "paypal","datePaid": "2024-03-20T10:30:00"}}}
If you need more details about GraphQL queries, you can refer to the WPGraphQL documentation and the WooGraphQL documentation.
Generating Static Files
EdgeOne provides a static site template based on Gatsby. You can retrieve it using the following command:
git clone --depth 1 --single-branch https://github.com/TencentEdgeOne/pages-templates.git tempmv temp/examples/gatsby-woocommerce-template .rm -rf tempcd gatsby-woocommerce-templatenpm install
Now I will introduce the key configuration points in the project.
All GraphQL query statements are located in the
src/queries/PagesQuery.js file, including queries for products, orders, page content, ACF fields, etc. If you need to customize query content, you can modify the GraphQL query statements here.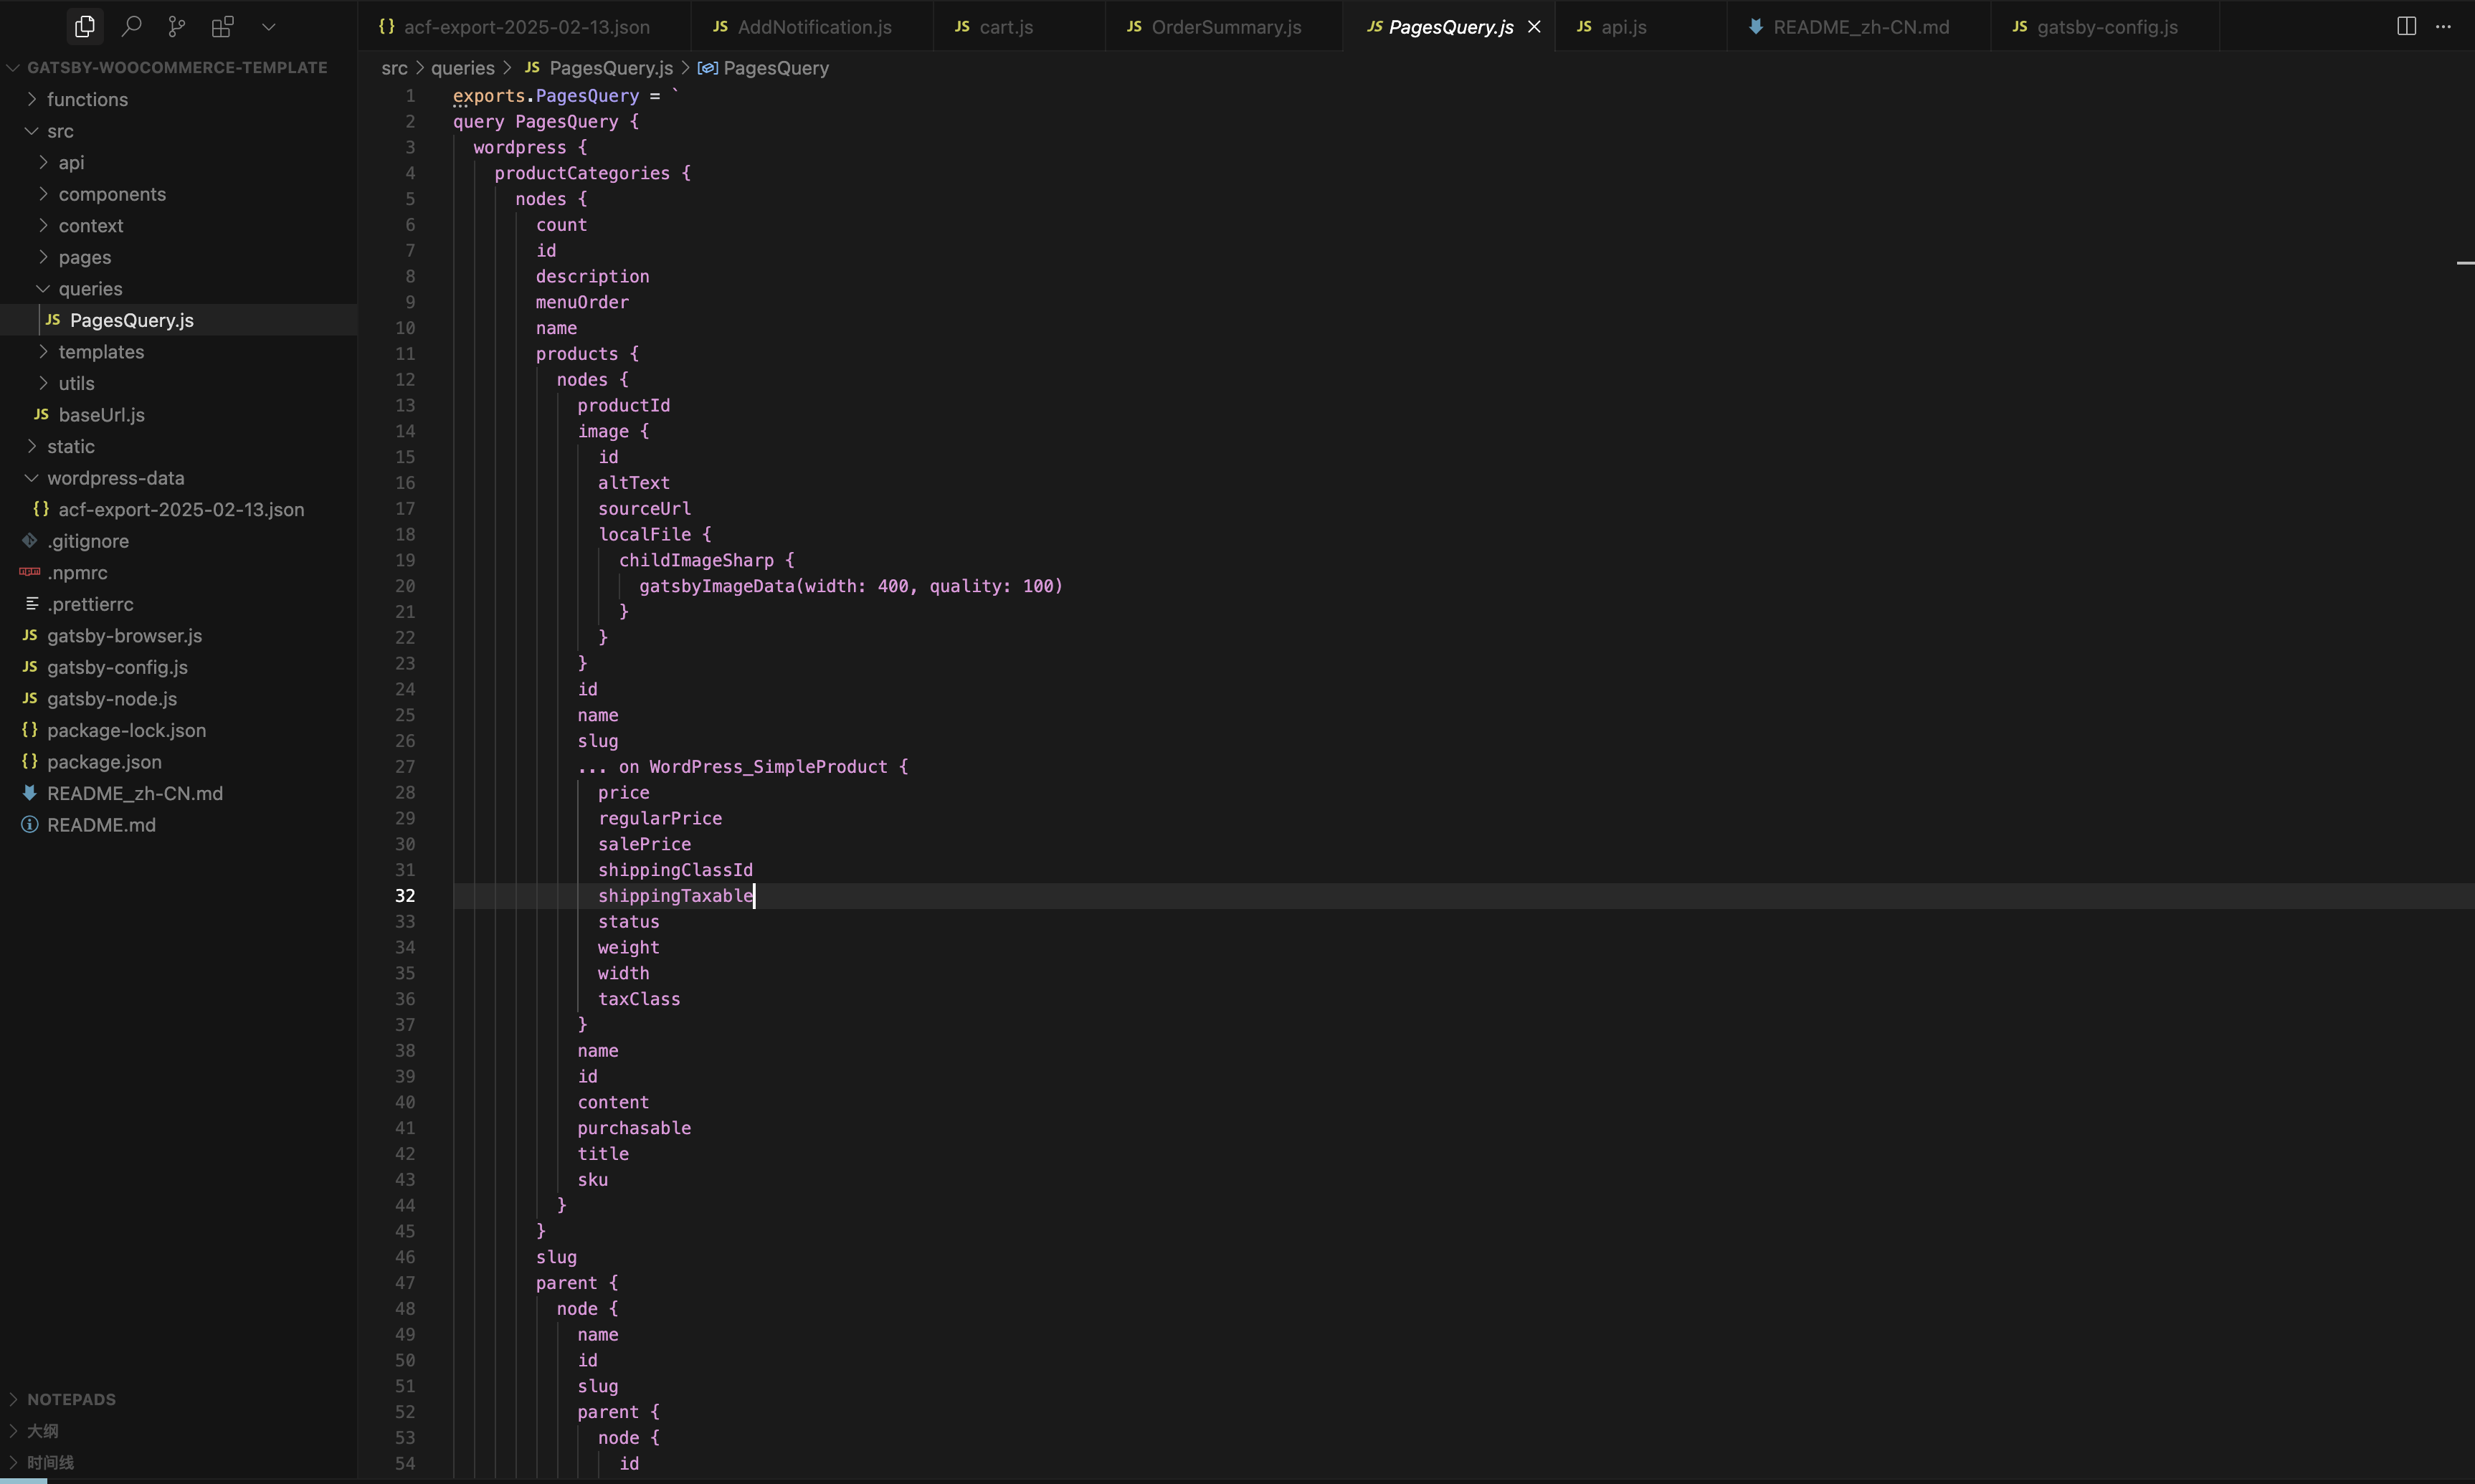
Components related to payment are located in
src/components/OrderSummary/OrderSummary.js. When making a payment, the following key information will be configured:await checkout({shipping: customer.shipping,billing: customer.billing,paymentMethod: 'cod',});
Configured here:
Shipping address information (shipping)
Billing address information (billing)
Payment method
This payment request will call the checkout object in the
src/api/api.js file to execute a specific payment operation. The final GraphQL query statement is located in the functions/common/queries/Checkout.js file. If you need to modify the payment logic, you can make changes here.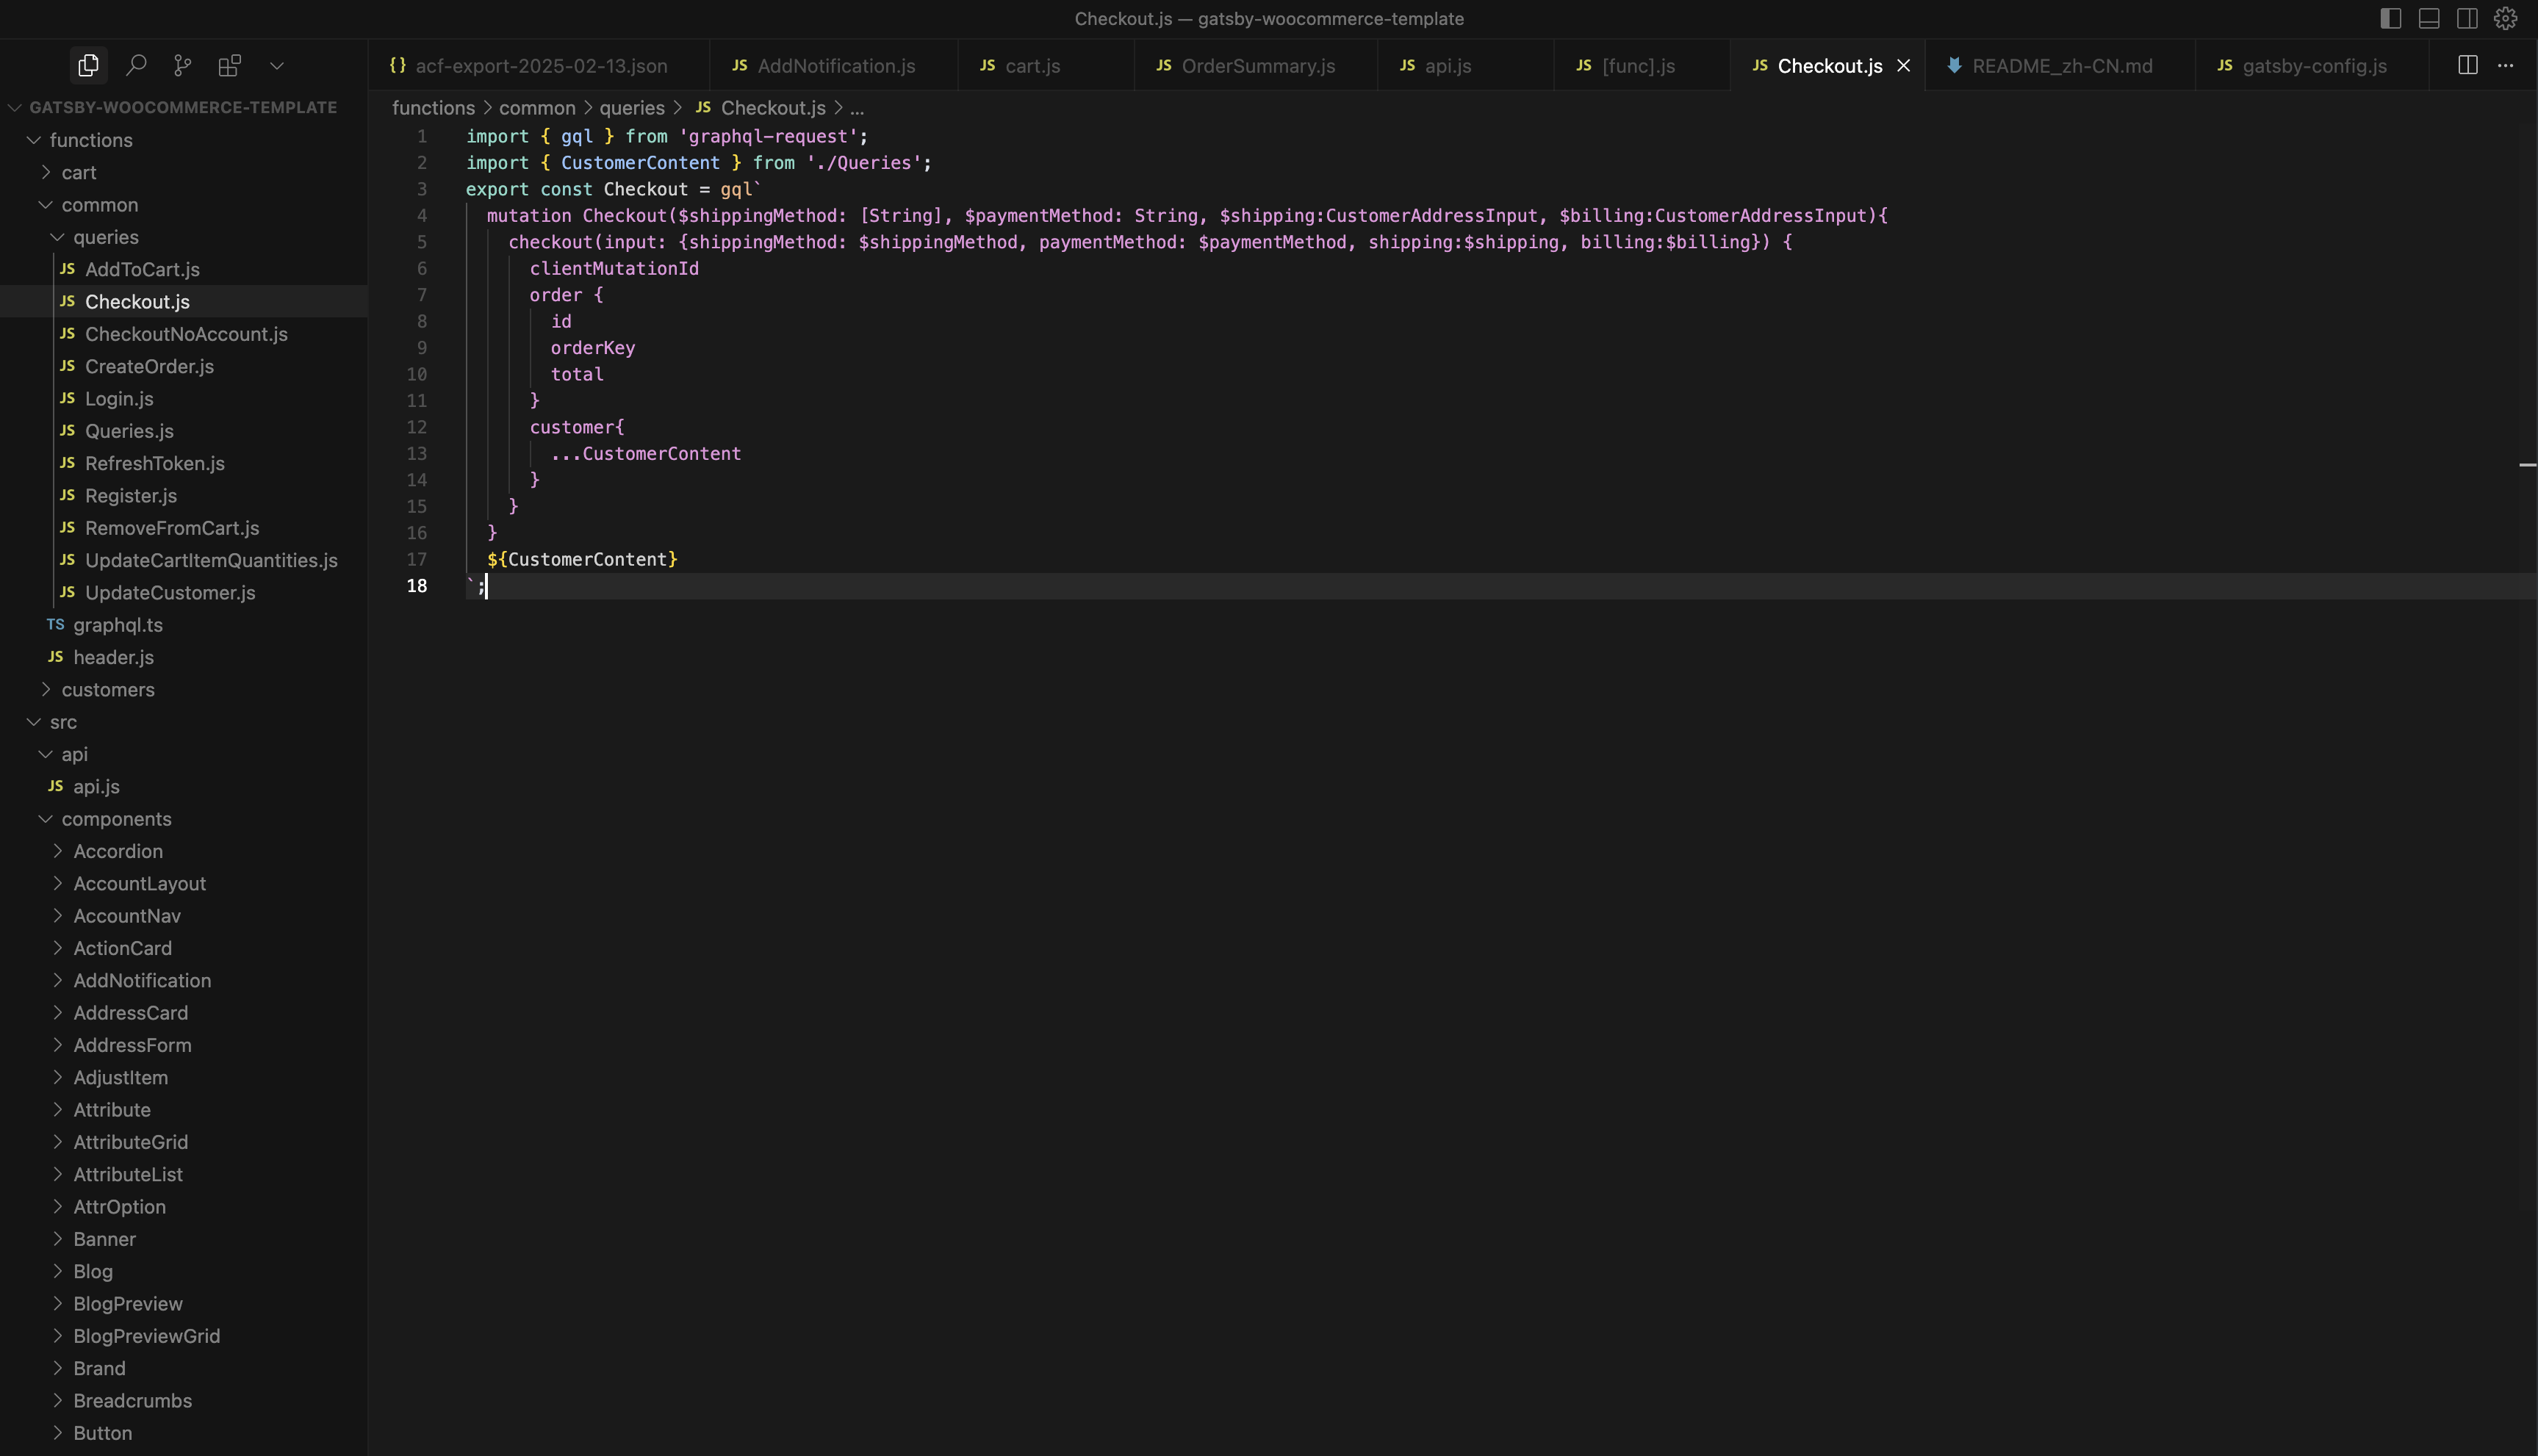
If you need to modify the API interaction of other information, you can modify the GraphQL statements in other files under the
functions/common/queries directory.After understanding the basic structure and key configuration of the project, let's see how to start the project. Starting the template is very simple. You only need to set the
WP_URL parameter to point to your WordPress site address. When deploying to the cloud, this parameter will be configured as an environment variable. Now let's first verify the project locally.Create a
.env file in the project root directory and fill in the following content:WP_URL=http://your-wordpress-urlGATSBY_ENV=dev
Then install dependencies and start the Gatsby project, preview locally:
npm installgatsby develop && edgeone pages dev --fePort=8000
fePortparameter needs to match Gatsby's running port to ensure proper domain authentication handling.

We have completed the configuration of the WordPress + WooCommerce content management system, the retrieval of the frontend template, and the verification of the local environment. Next, we only need to deploy the code to EdgeOne Pages, and your website can officially go live.
Deploying to EdgeOne Pages
1. Publishing Code to Git
Submit the code to the git repository to complete the deployment. Assuming you have created the
gatsby-woocommerce-template project and associated the current directory with it, use the following command to submit:git add .git commit -m "Initial commit"git push origin main
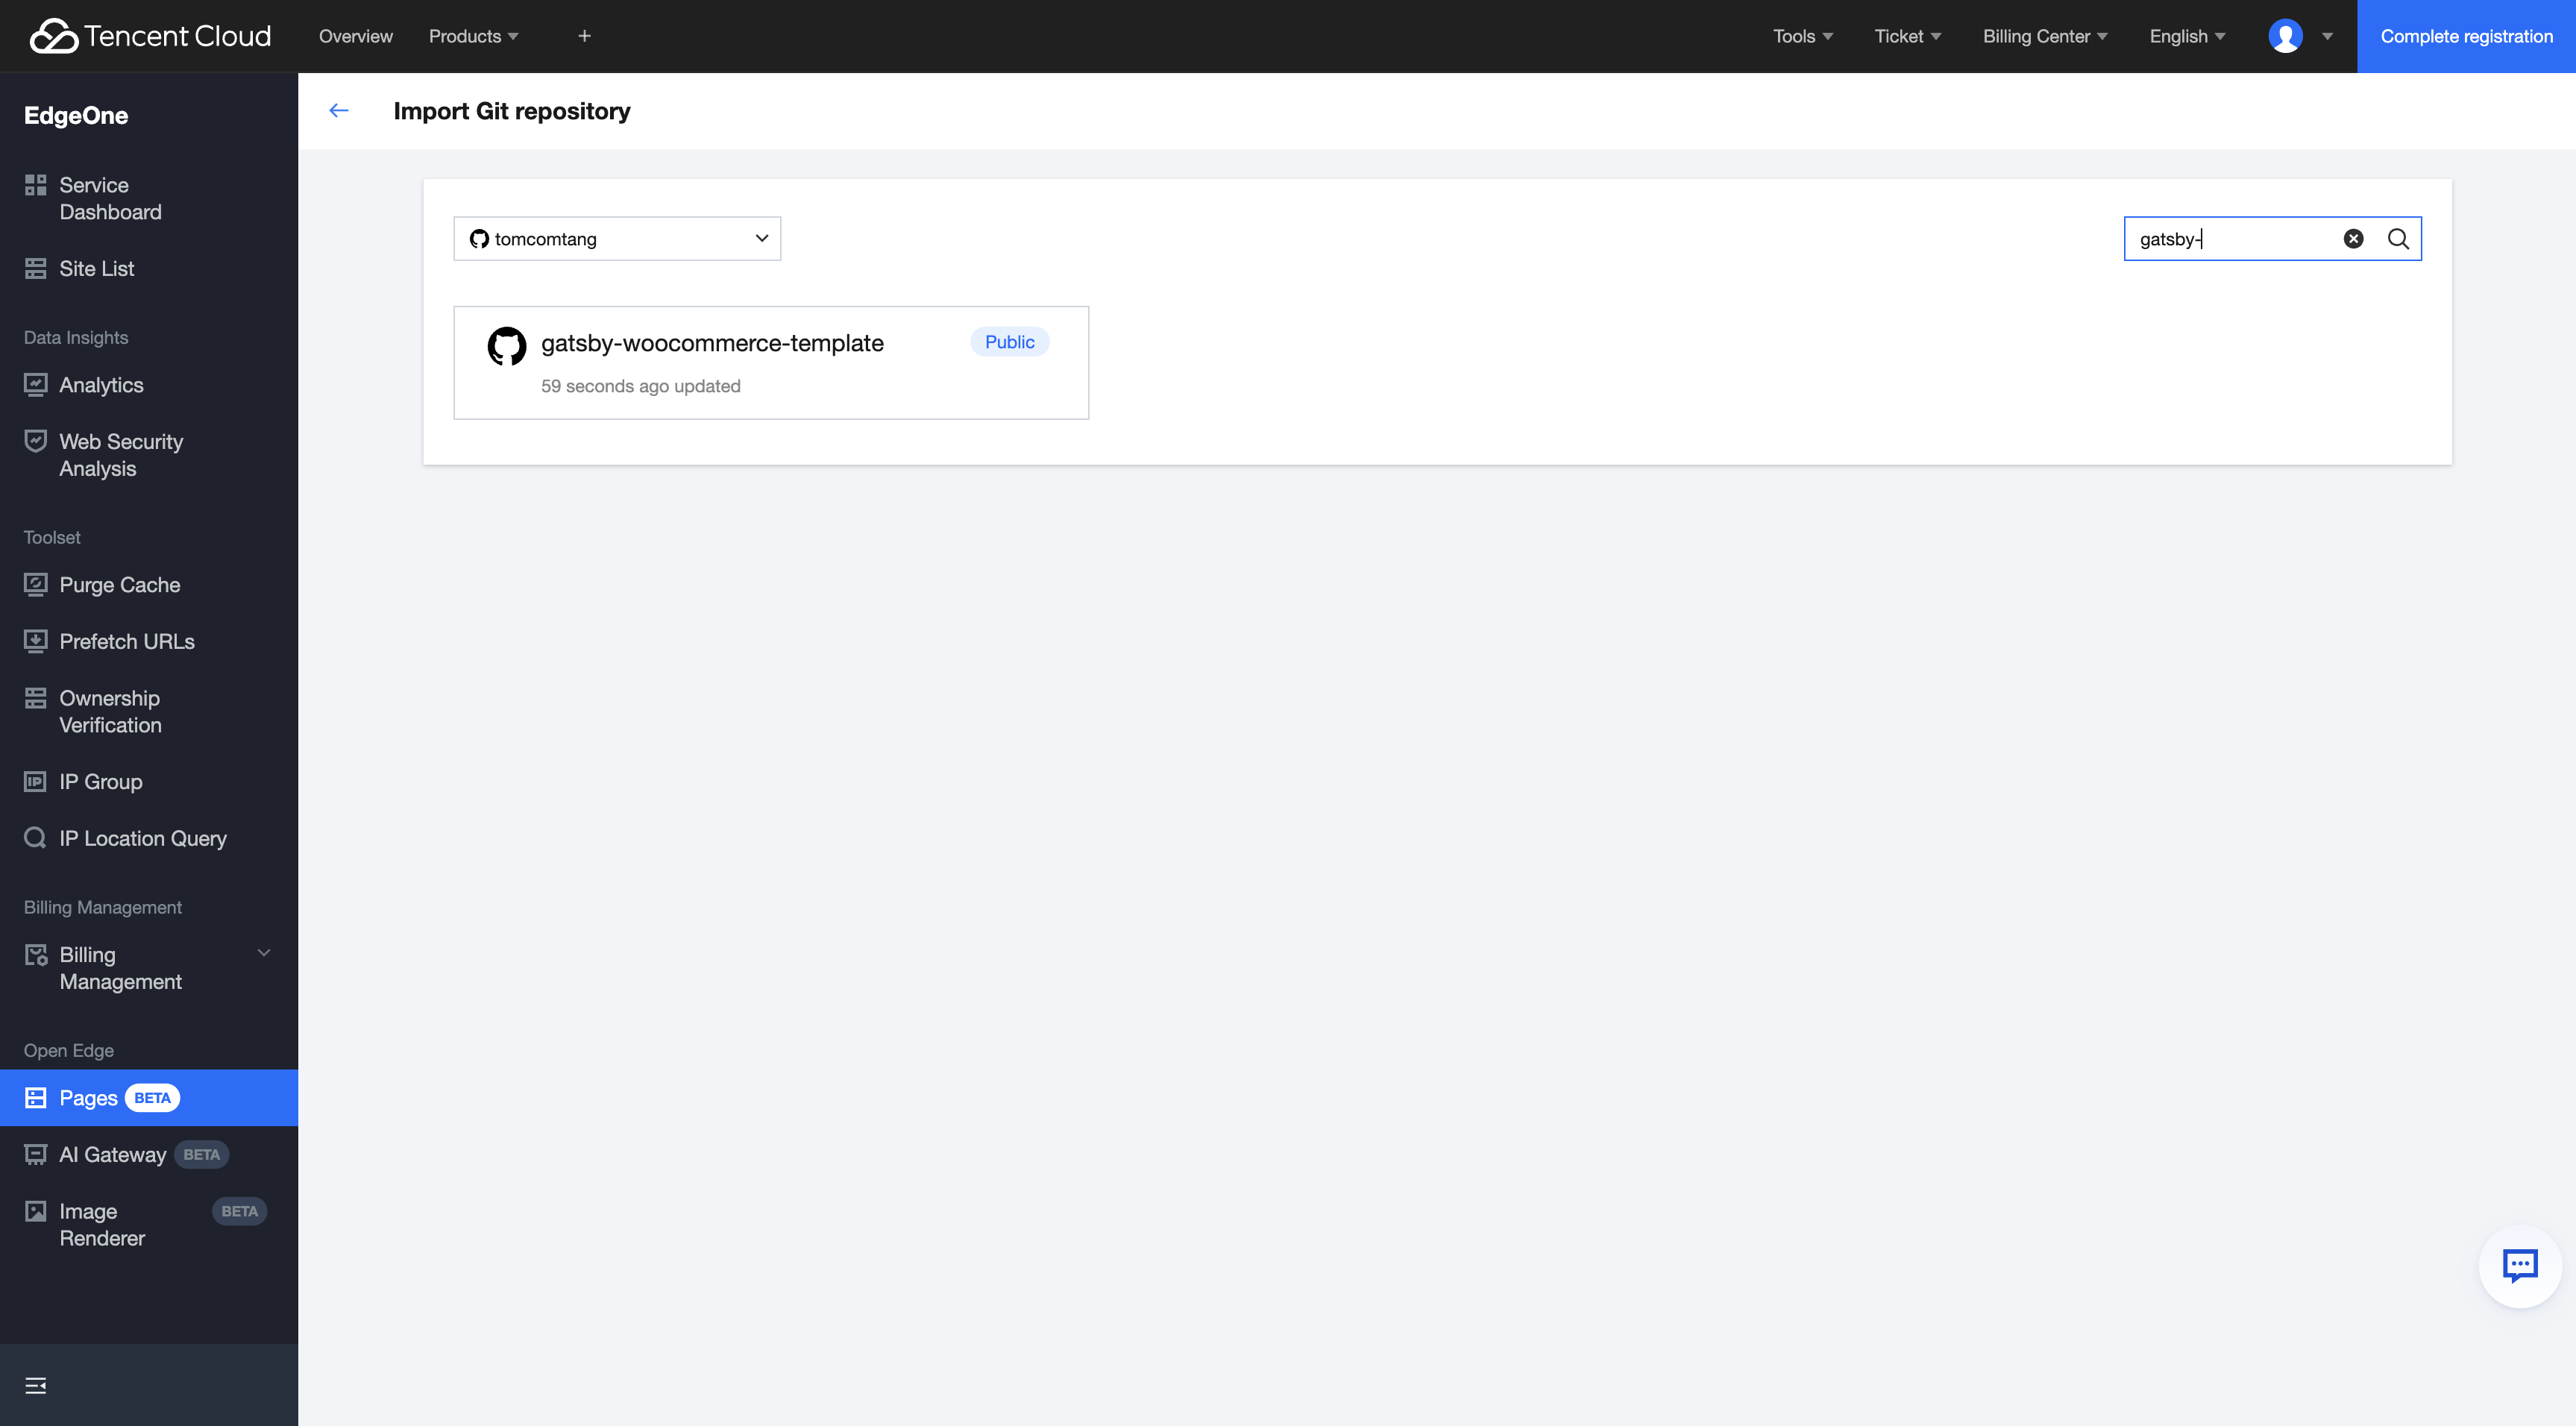
2. Importing a Project Into Pages
After submission, if you are already an EdgeOne Pages user and have associated your GitHub account, just access the console to deploy the corresponding project.
3. Adding an Environment Variable
Click on gatsby-woocommerce-template, then on the deployment page, click "Environment Variables" and configure the following environment variables respectively:
WP_URL: Enter your WordPress site addressGATSBY_ENV: Set to production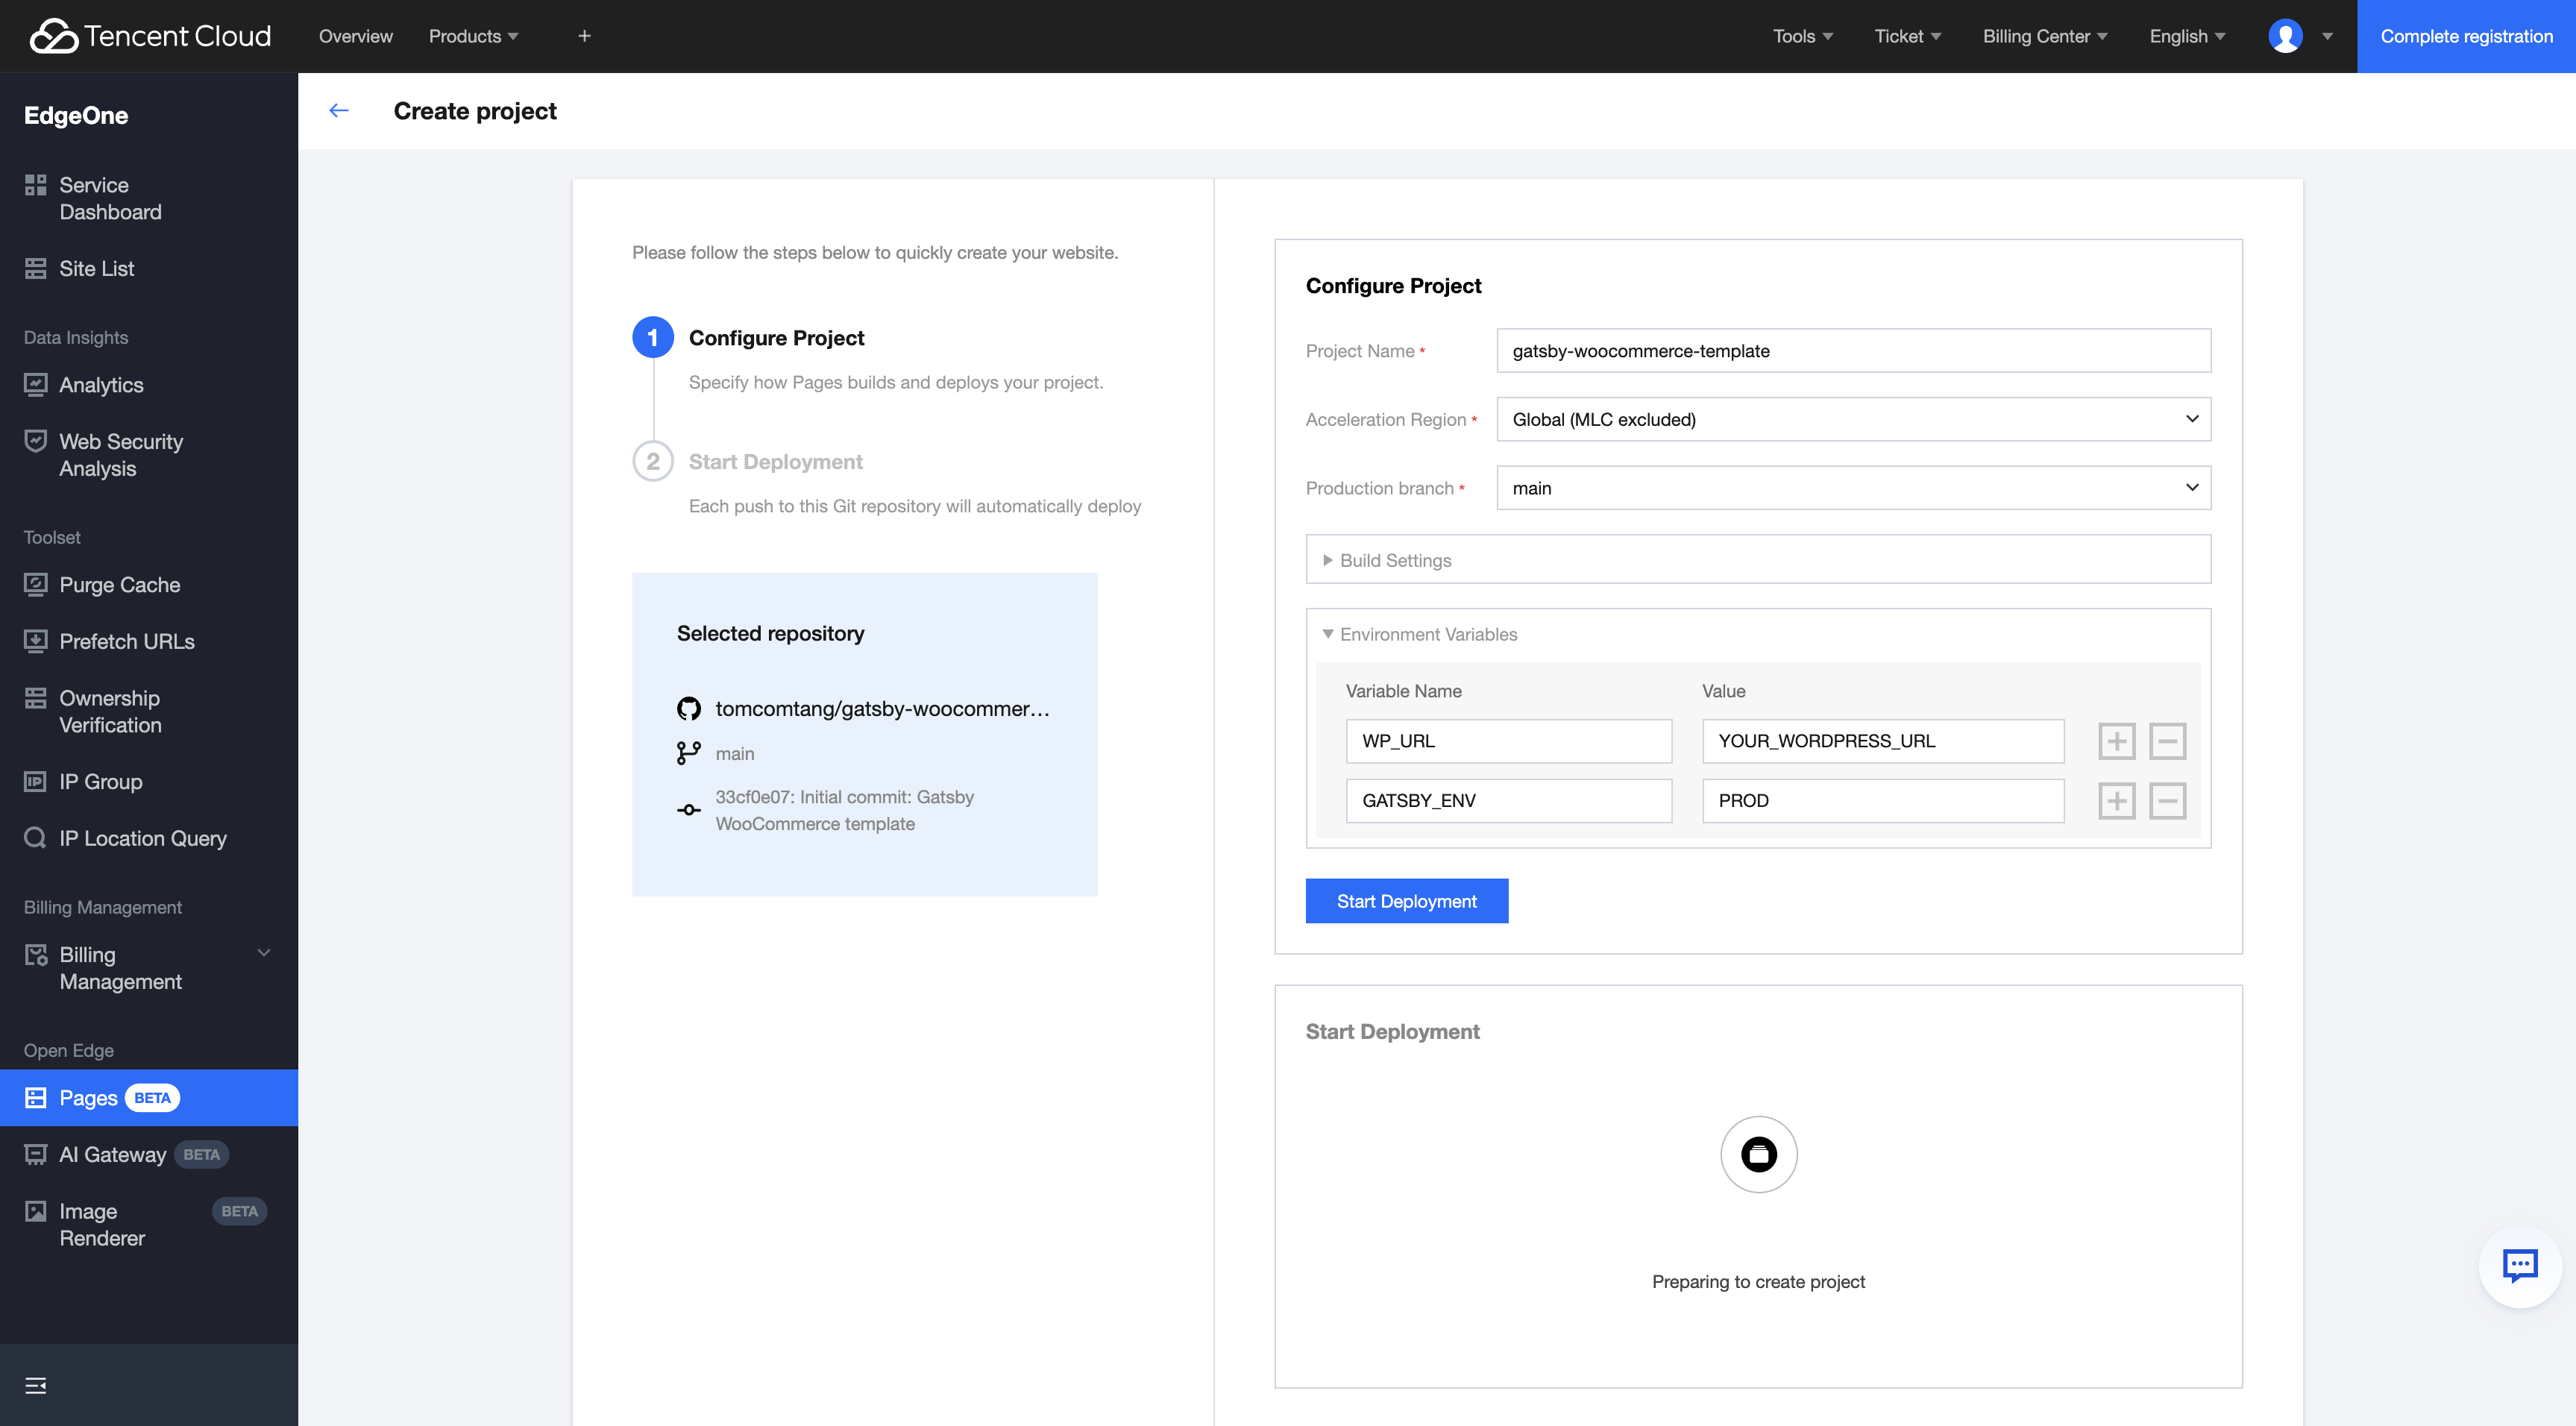
After the configuration is complete, click the "Start Deployment" button. Wait until the deployment is complete, and the deployment success interface will be displayed.
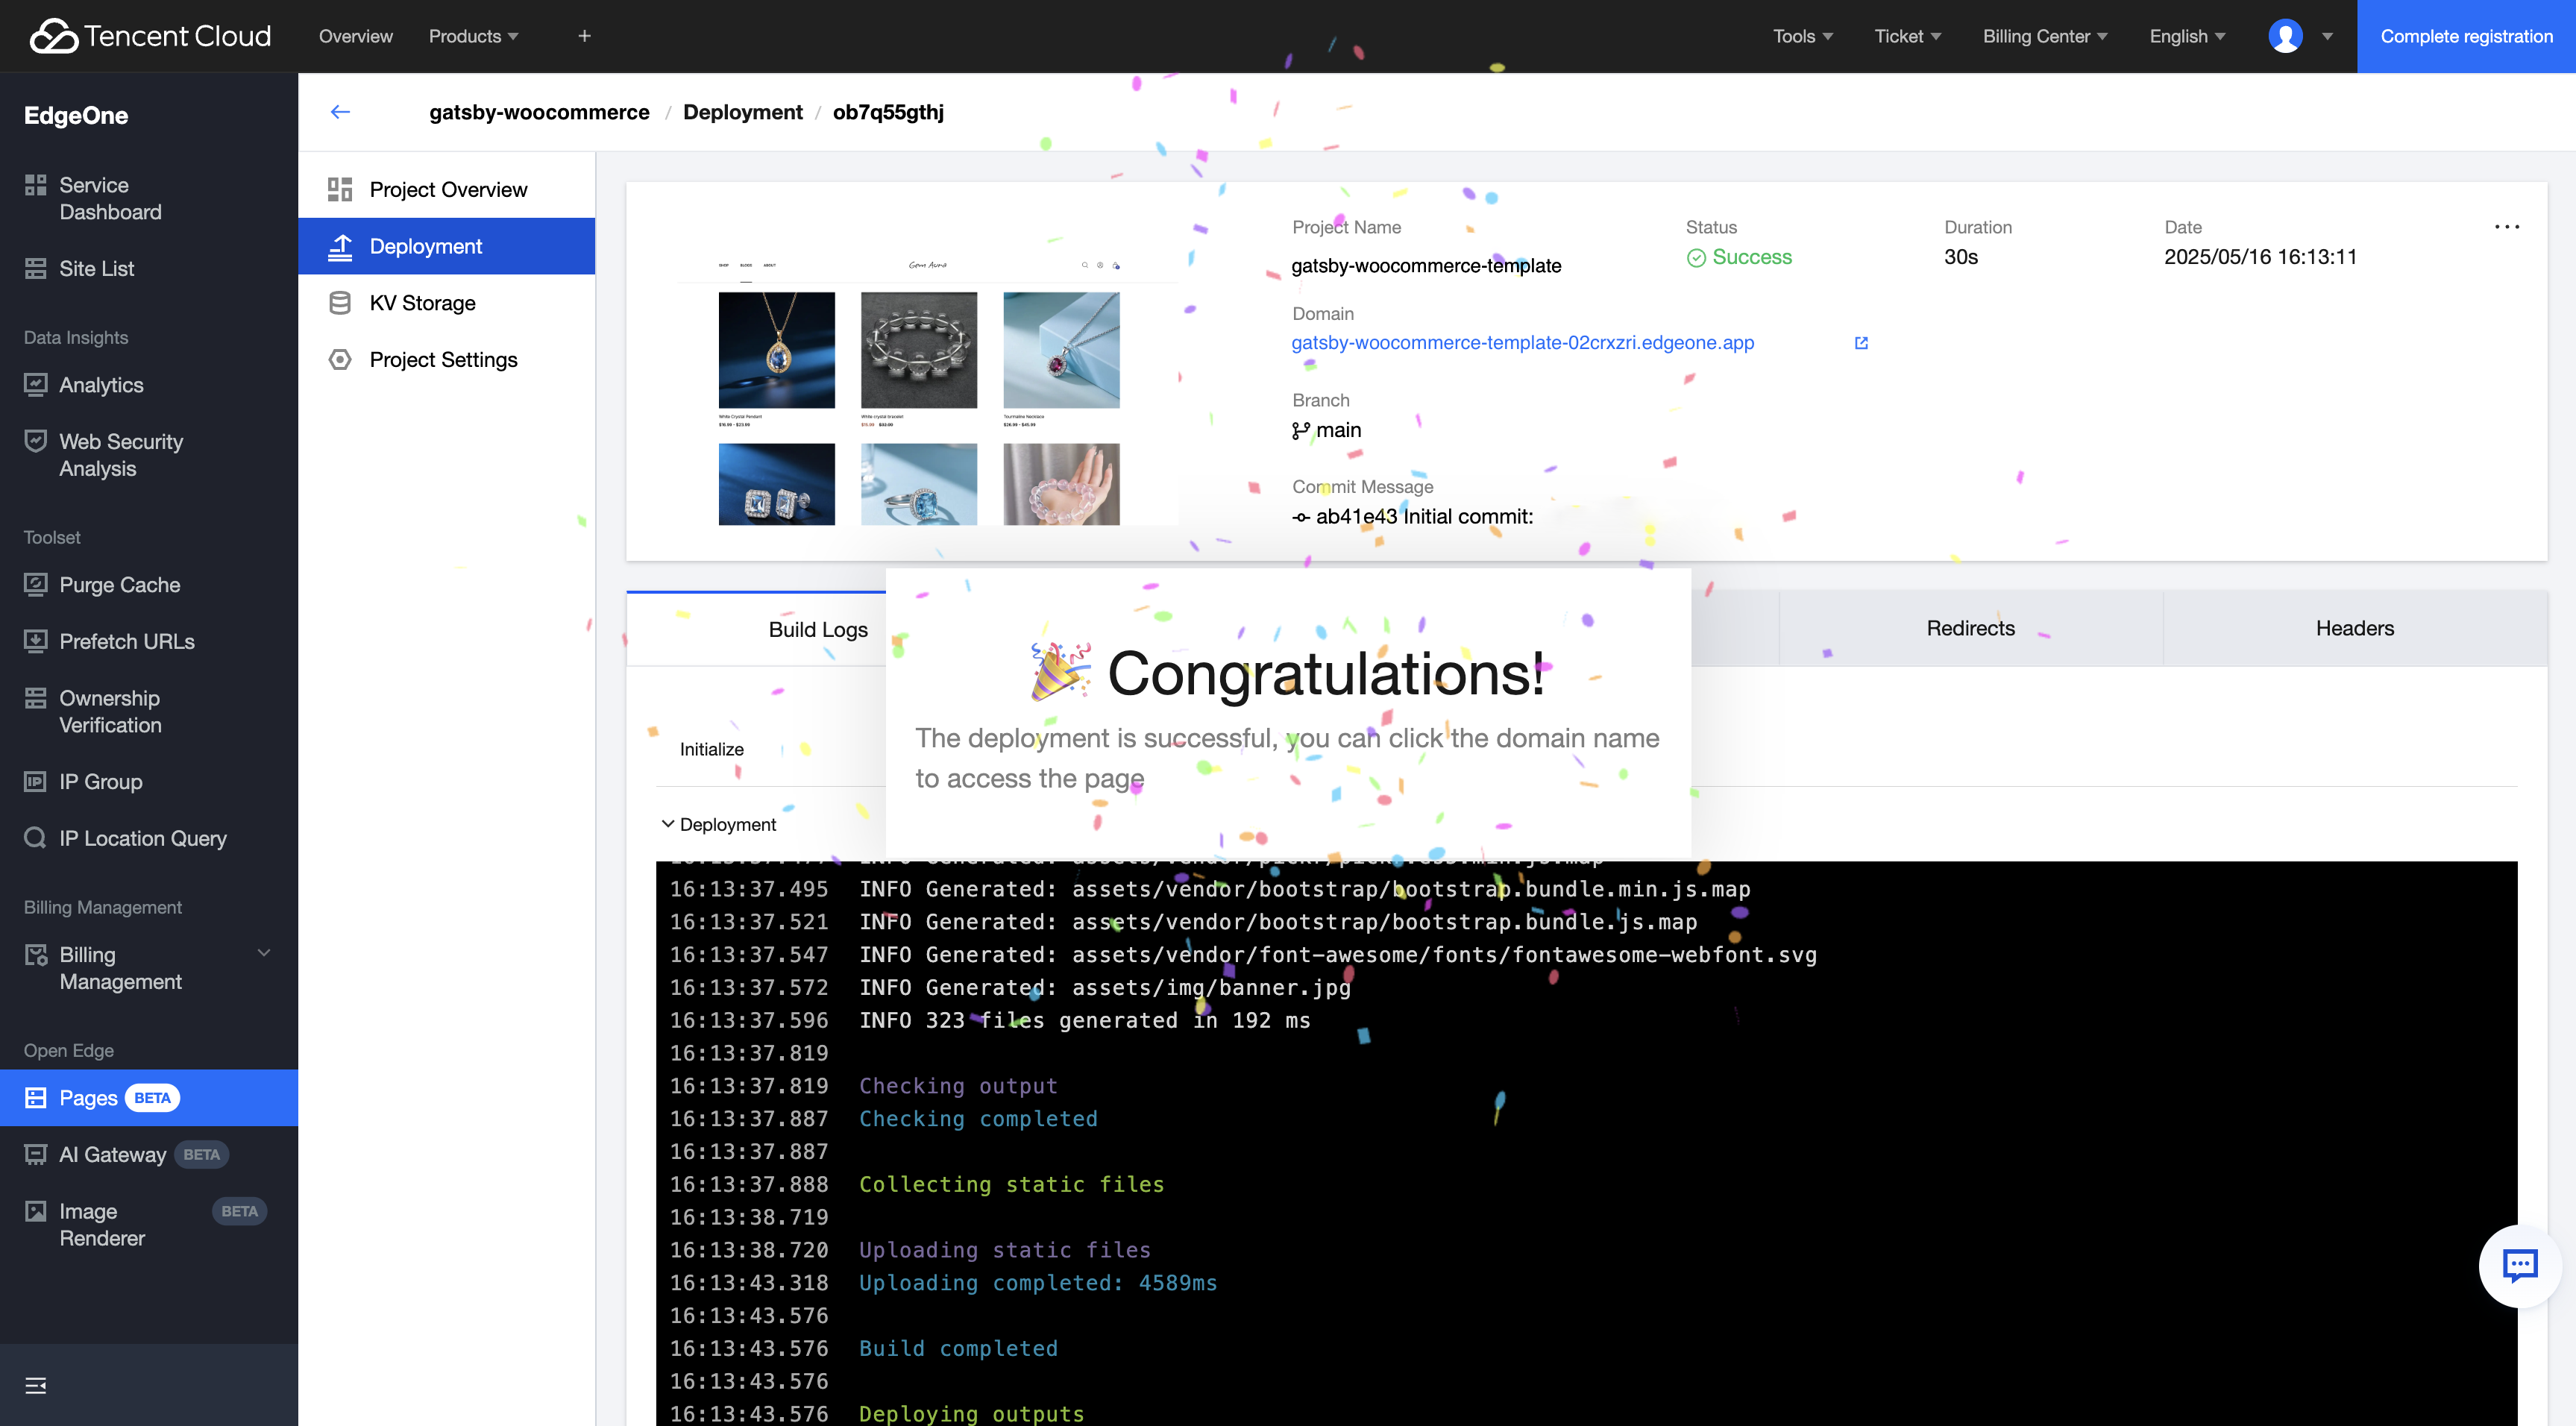
We have now completed the full deployment process of the WordPress + WooCommerce solution. With this solution, you can:
Use WordPress + WooCommerce to manage content and products, and enjoy its powerful CMS and e-commerce features
Leverage Gatsby to generate high-performance pages and obtain ultimate access speed
Realize automatic deployment through EdgeOne Pages Simplify ops
Obtain global CDN acceleration, enhance user experience
More Related Content
View more WordPress integration solutions: WooCommerce templates provided by EdgeOne Pages
Learn more about Gatsby features: Gatsby Official Documentation
Explore more WooCommerce features: WooCommerce Official Documentation
Customize website style: Gatsby Style Guide