

Shopify Integration
Shopify is a leading global e-commerce platform that provides businesses and individuals with solutions to create, manage, and scale online stores. It is known for its ease of use, scalability, and powerful features, enabling quick creation of professional online stores while supporting multi-channel sales, payment gateway integration, order management, and marketing tools. Whether for startups or large brands, Shopify meets the needs of merchants of different scales and helps users easily launch and optimize their e-commerce businesses through extensive developer resources and global support.
Overview
This document mainly introduces how to build a high-performance website based on the Shopify Storefront API and integrated with the Next.js framework. With EdgeOne Pages' one-click deployment capability, you can quickly complete the integration of Shopify and Next.js while obtaining global CDN acceleration to achieve the best performance and user experience of your website.
Getting Started
EdgeOne Pages provides a complete Shopify + Next.js integration solution template. You can click the deploy button in the template for quick deployment.
This document's integration introduction mainly includes the following three steps: configure Shopify, generate pages using Next.js, and deploy to EdgeOne Pages. If you want to learn about the specific implementation principles of this solution, or need to perform customized development according to your own requirements, you can continue reading the detailed configuration steps below.
Configuring Shopify
Shopify provides the StoreFront API to implement Headless commerce. EdgeOne Pages edge functions call the StoreFront API to request user information, shopping cart information, etc., and display it on the frontend.
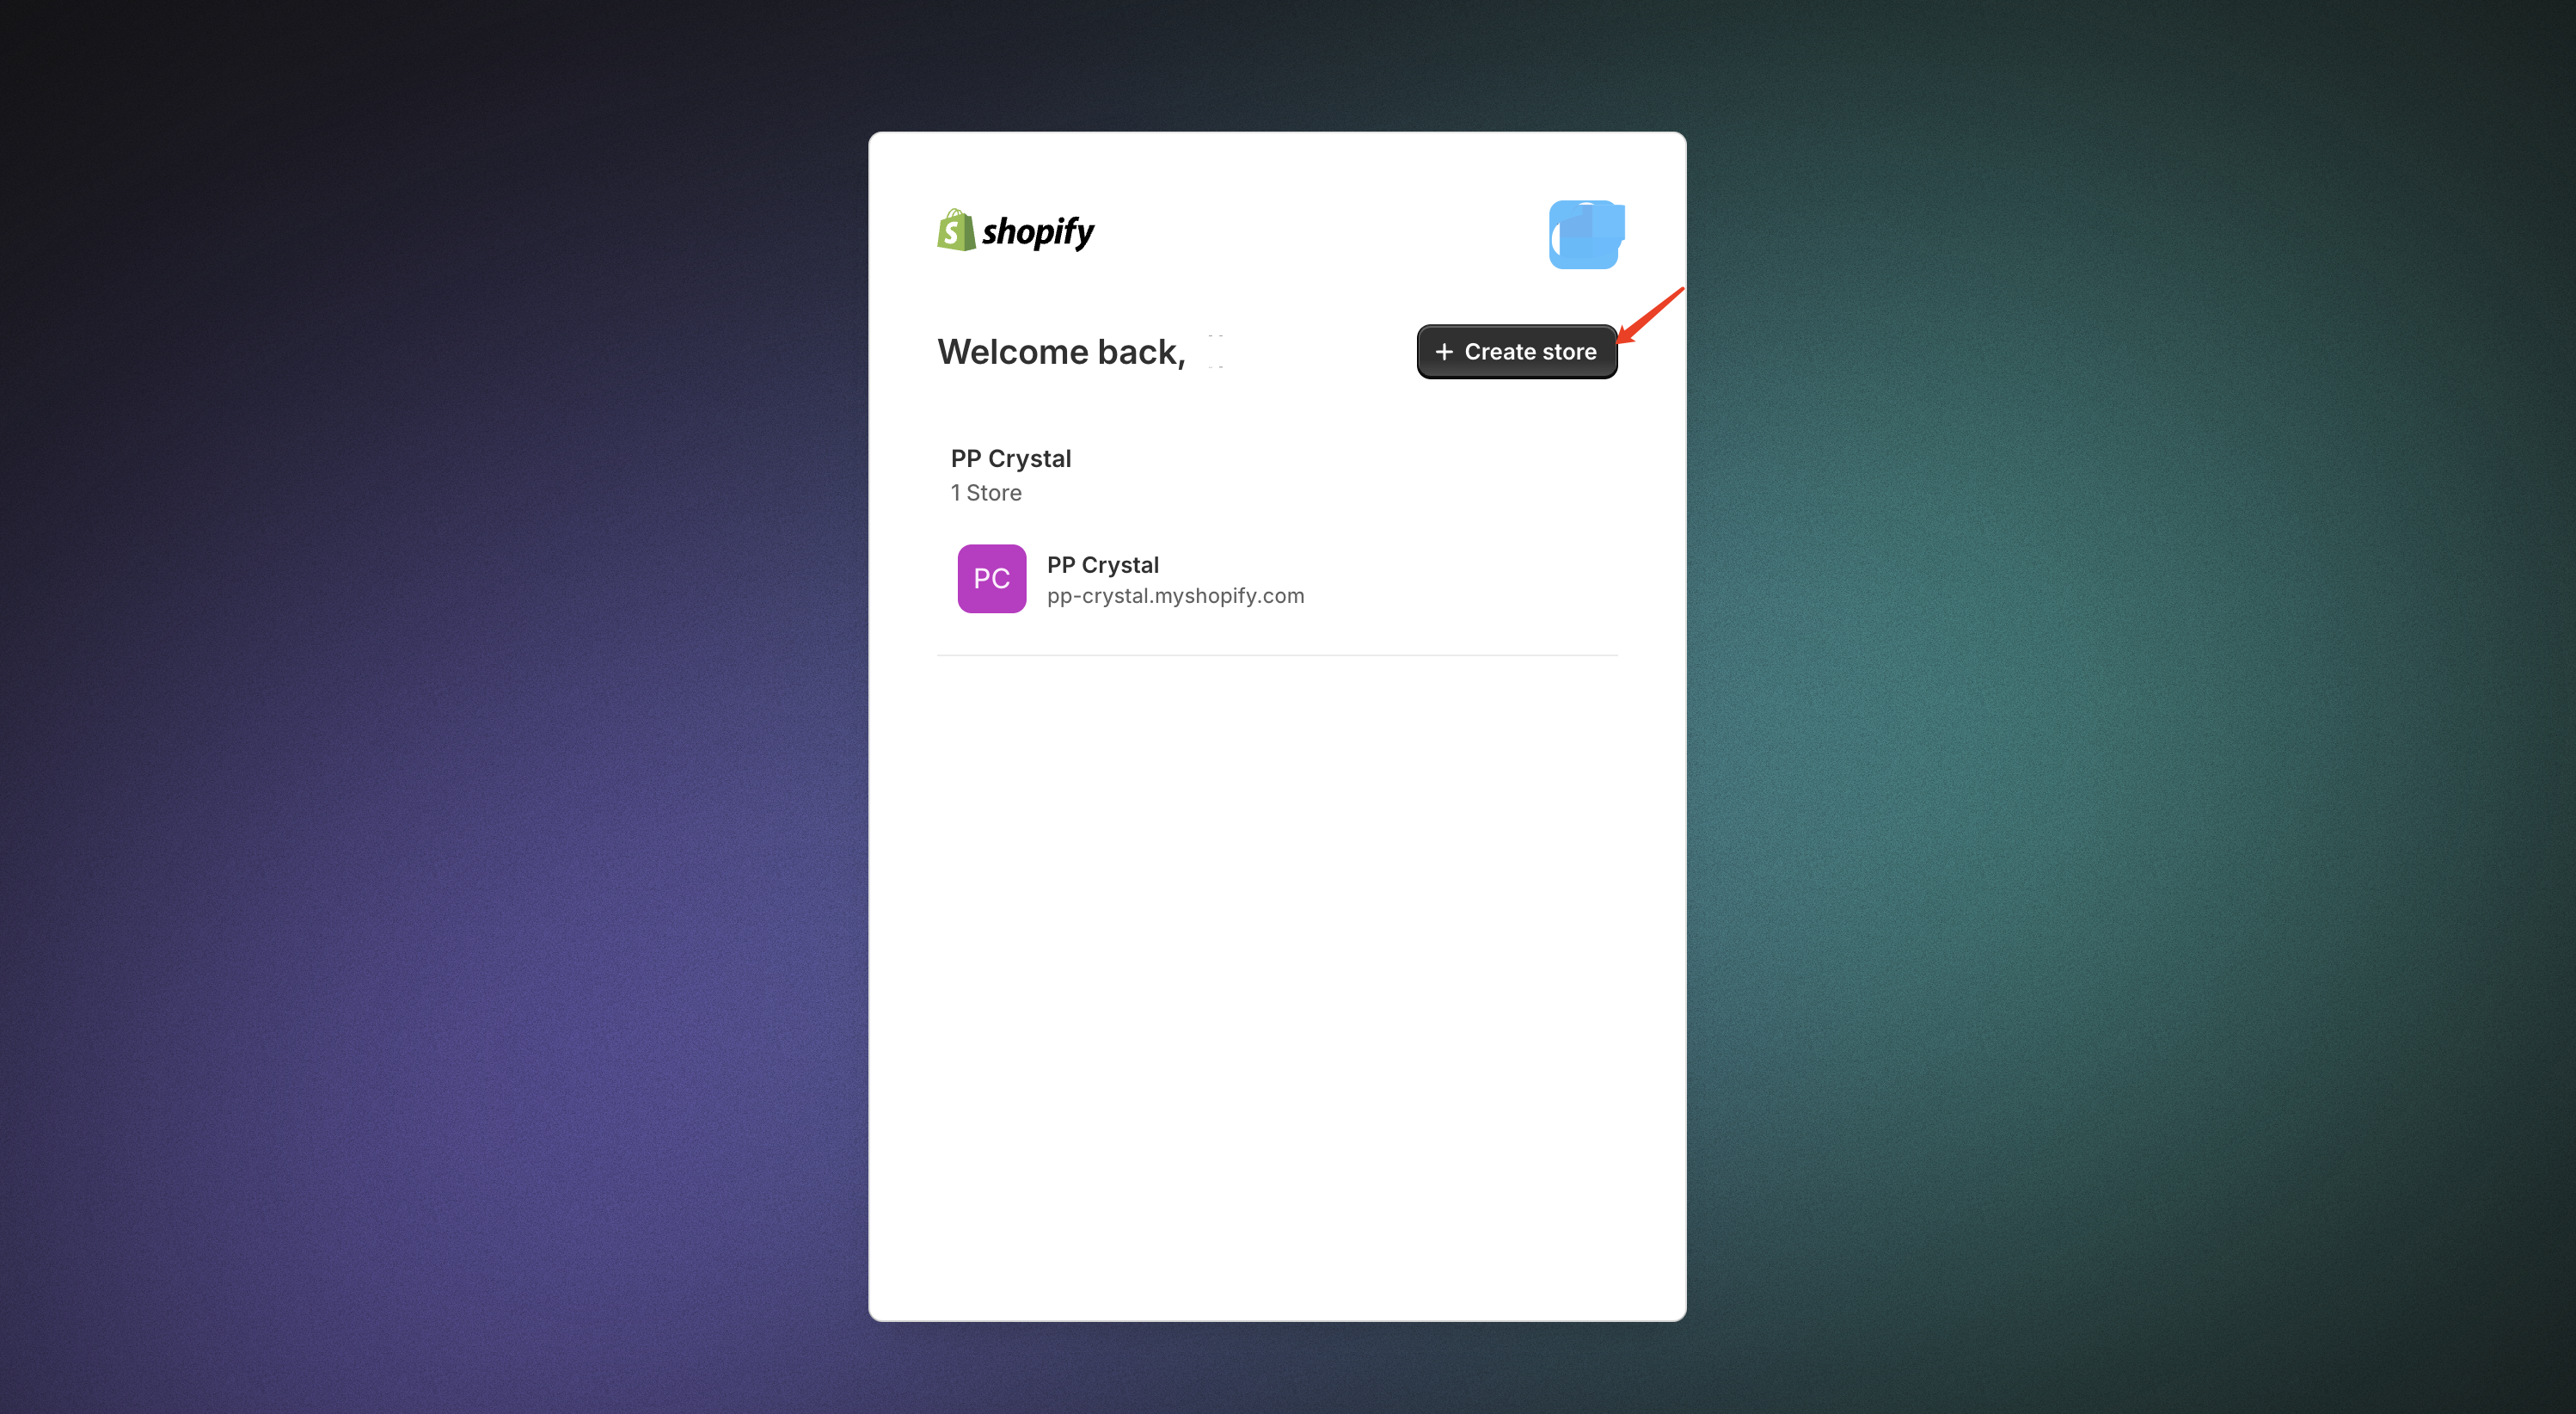
1. Create a Store
Enter Shopify Dev to register a new account, create a store, and then access your store's admin backend after creation.

2. Adding a Product
Add your products under
Products.
3. Installing a Headless Theme
Since a custom e-commerce website implemented using the Storefront API has its own store domain name, it needs to install Shopify Headless Theme to connect the built-in pages of Shopify with your custom site.
After downloading the theme from the Github repository, enter the store console: https://${your-shopify-store-subdomain}.myshopify.com/admin/themes.
Click
Add Theme -> Upload zip file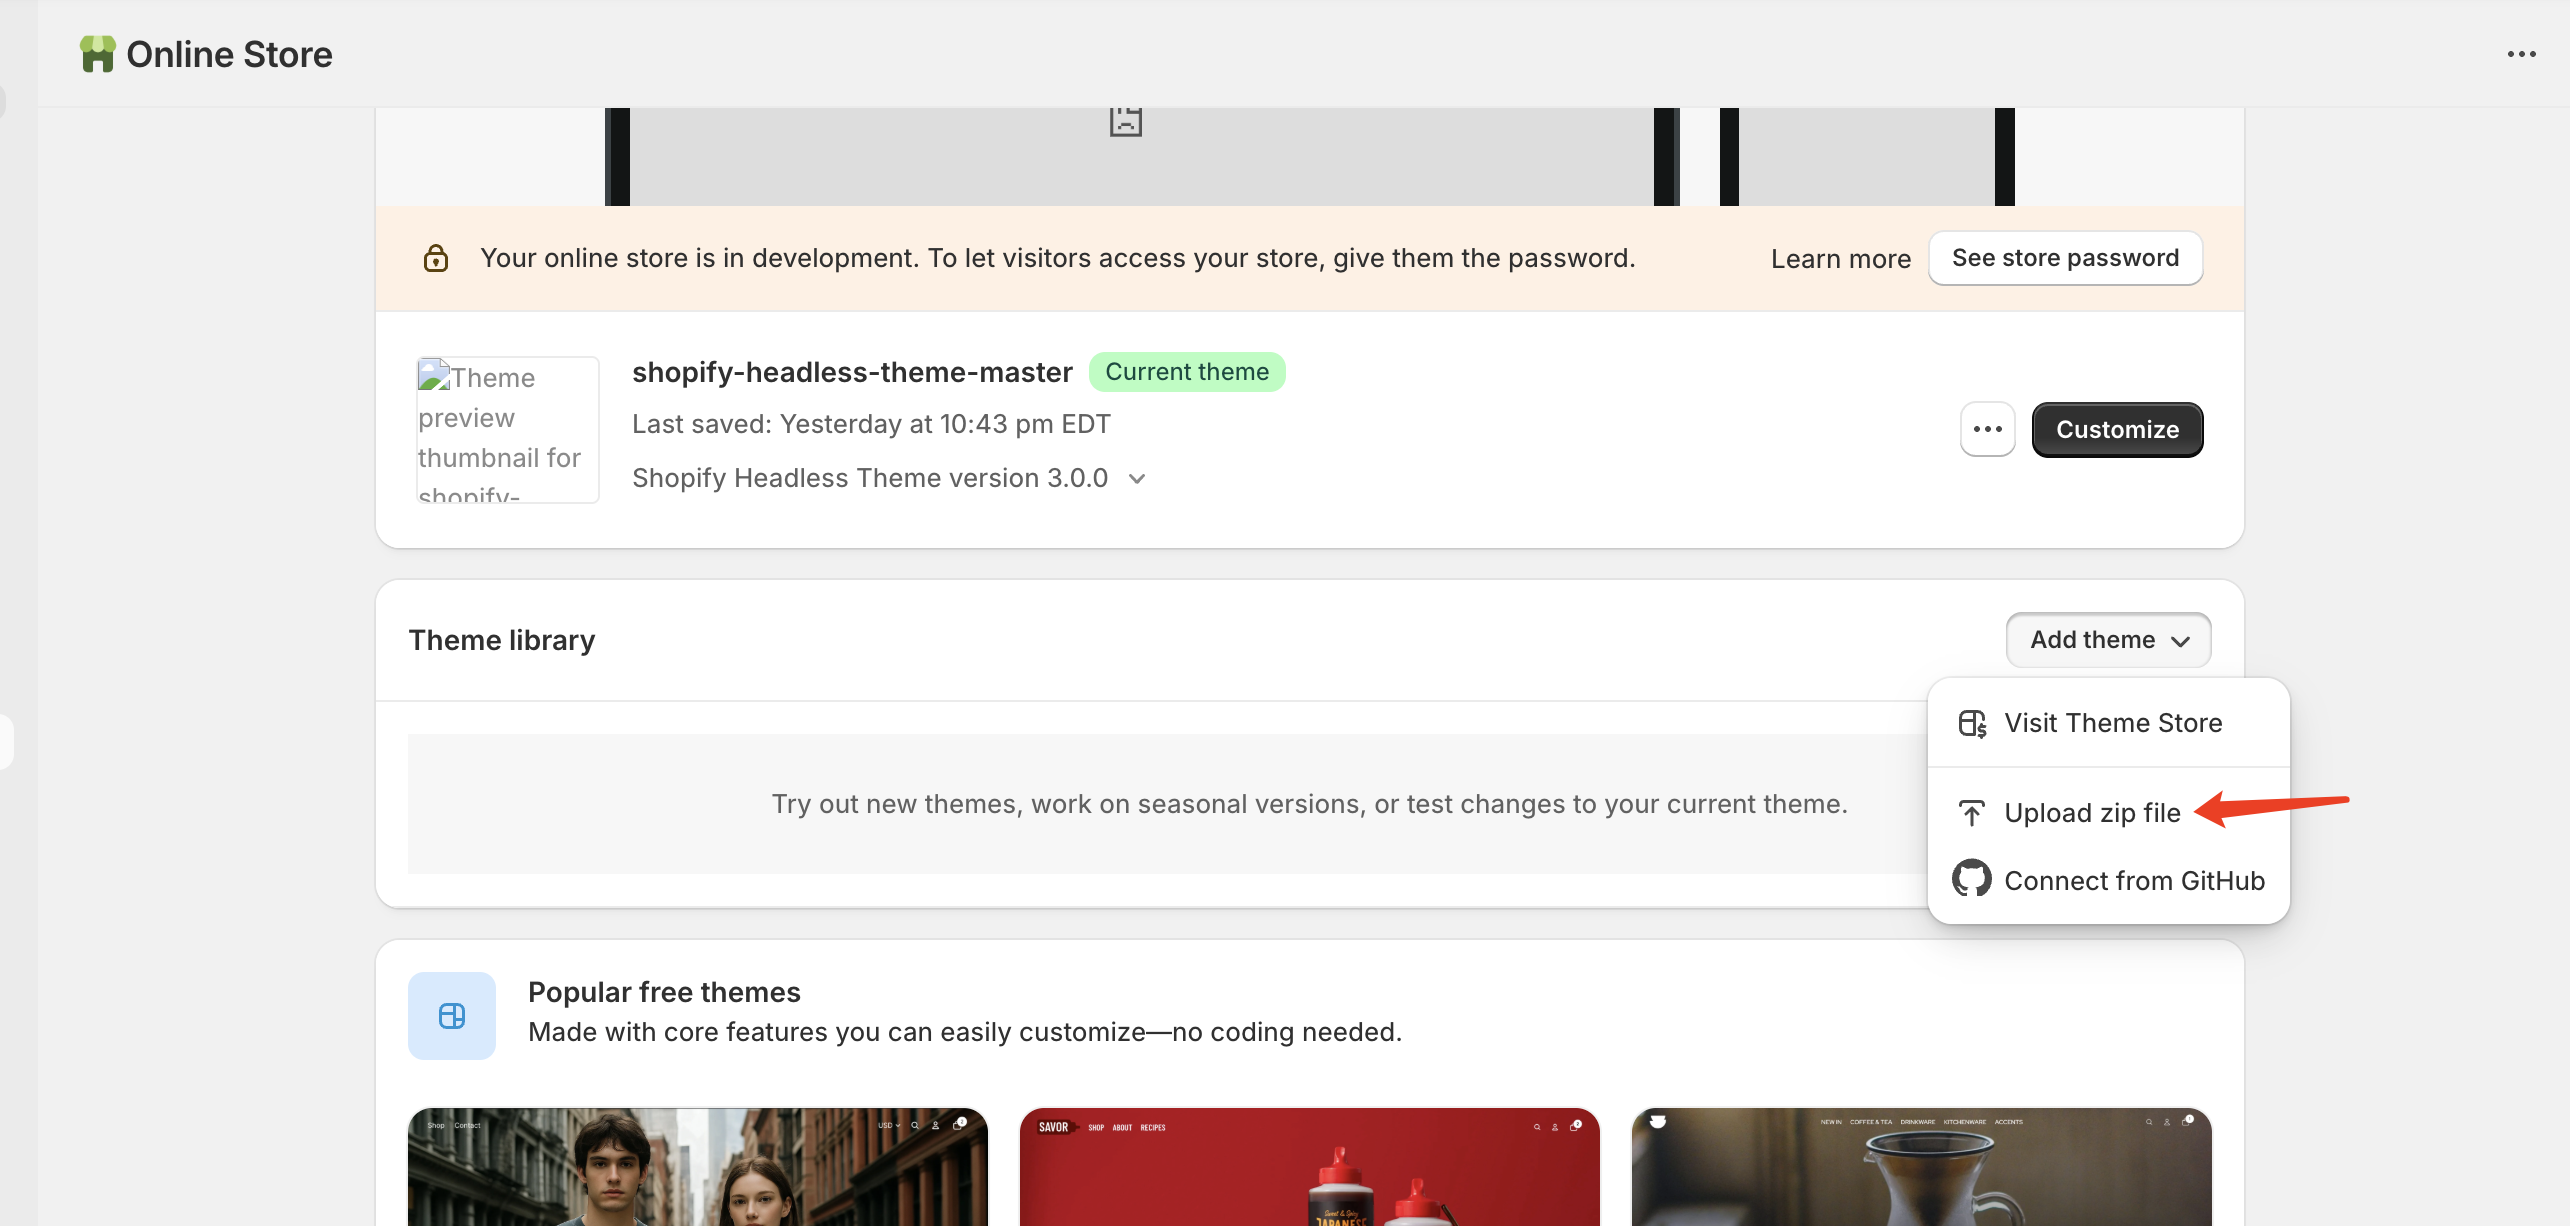
Select the downloaded theme package
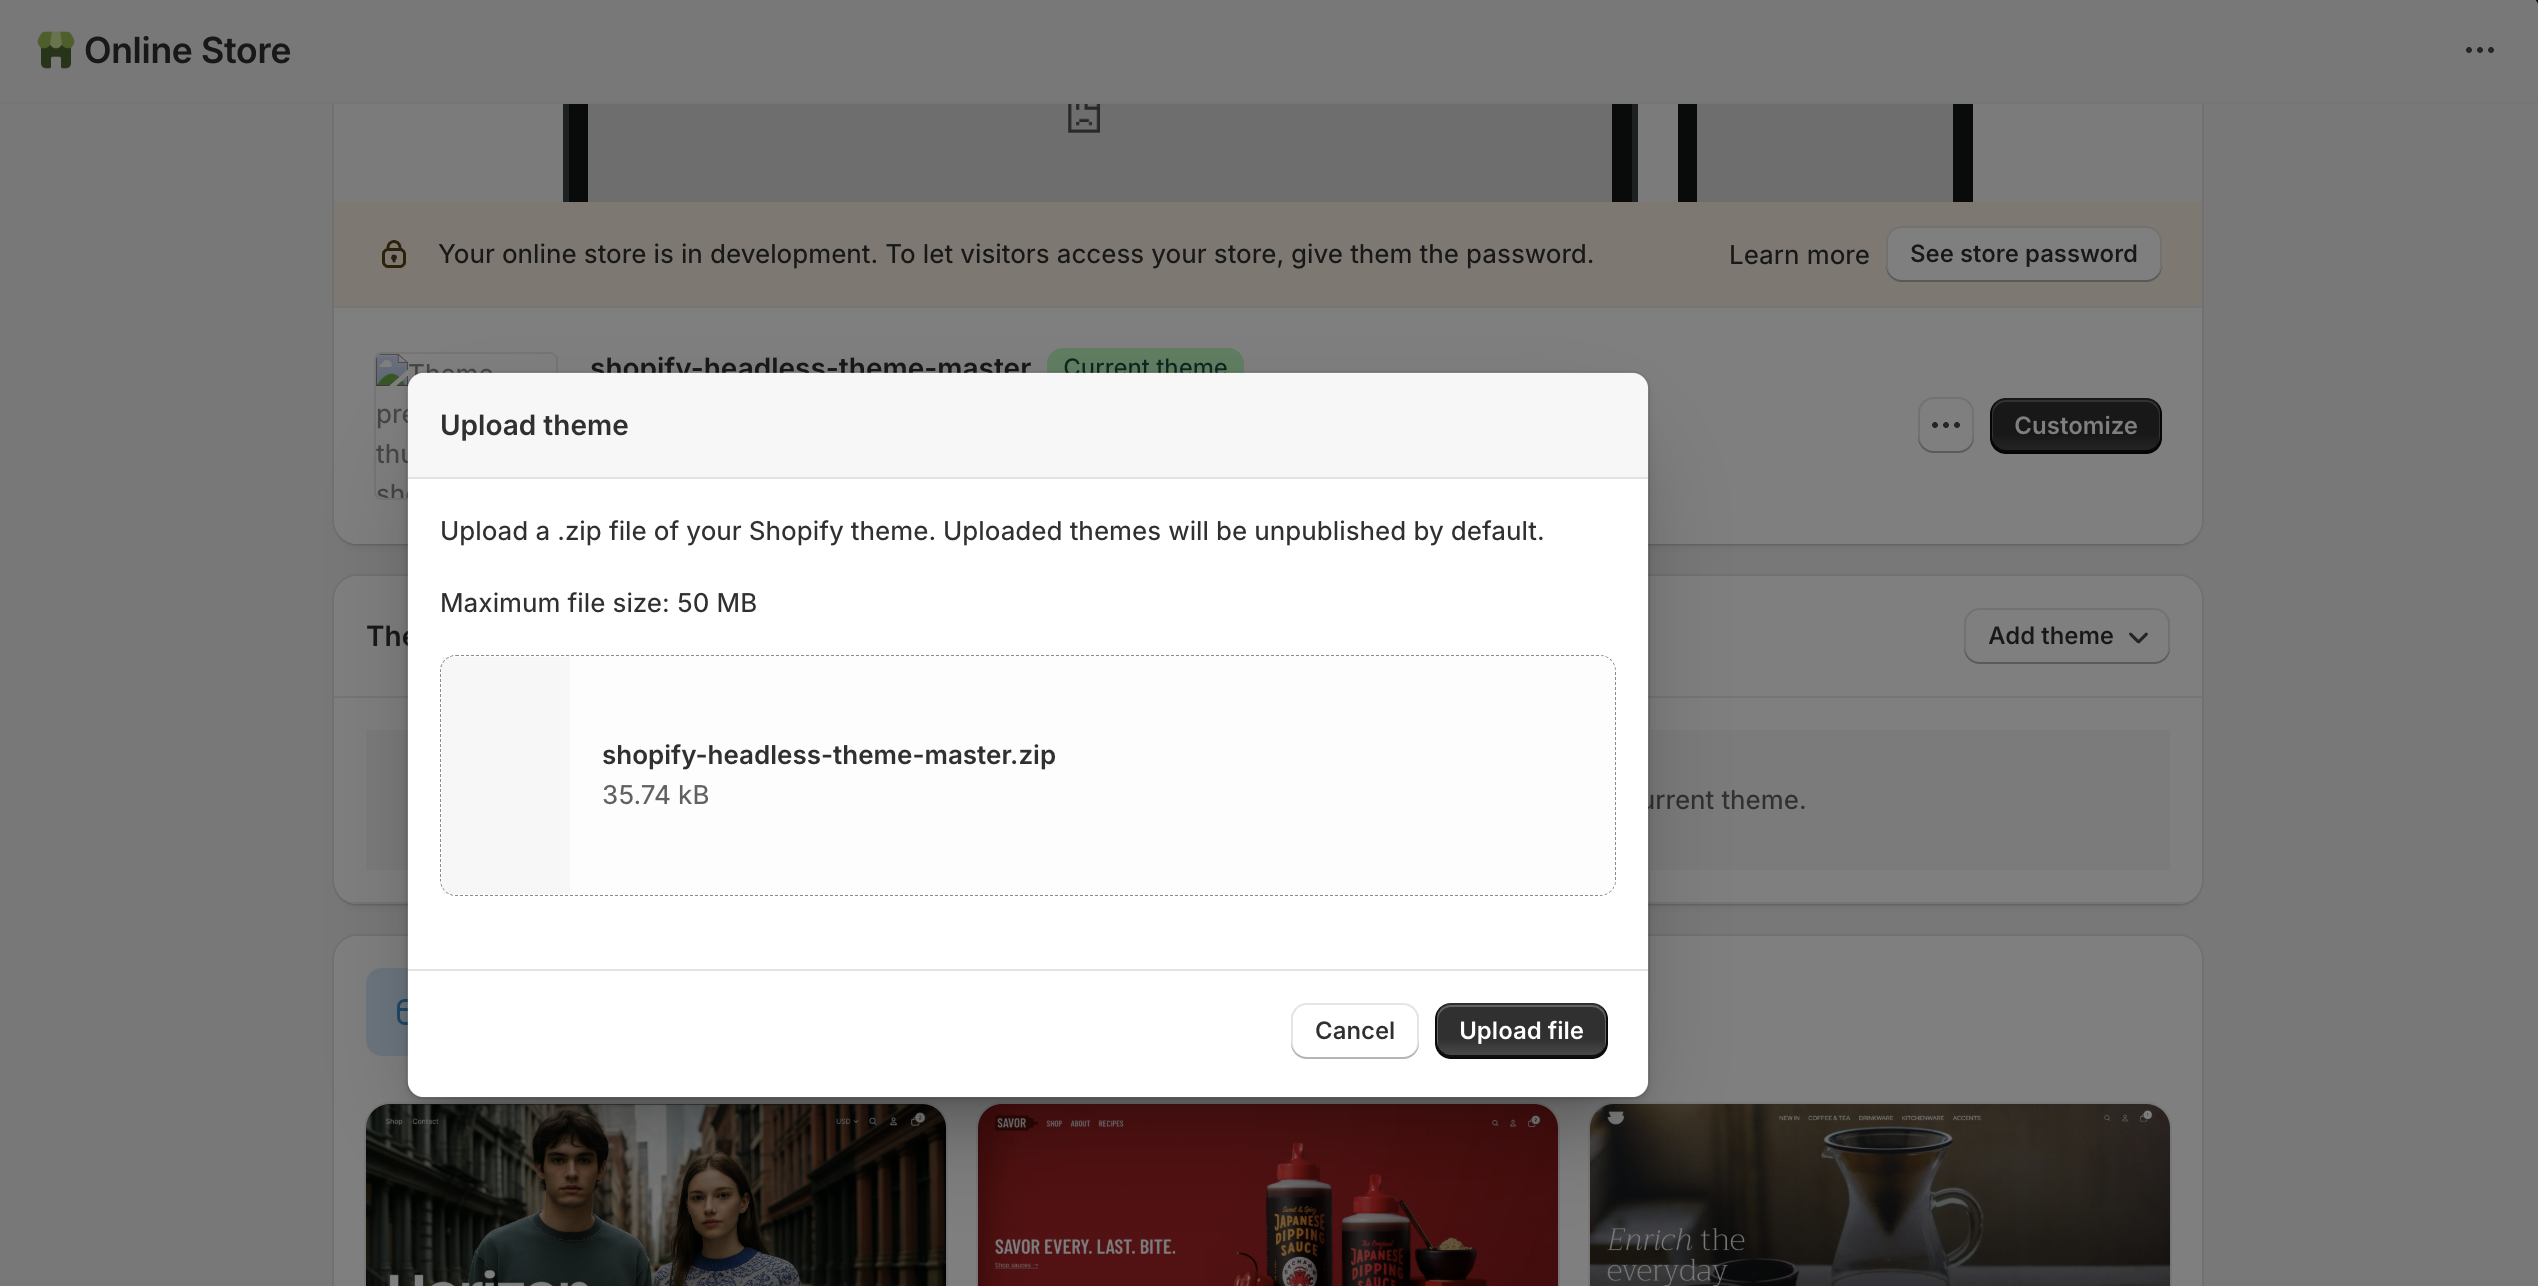
After uploading, click
Customize to enter the customization interface.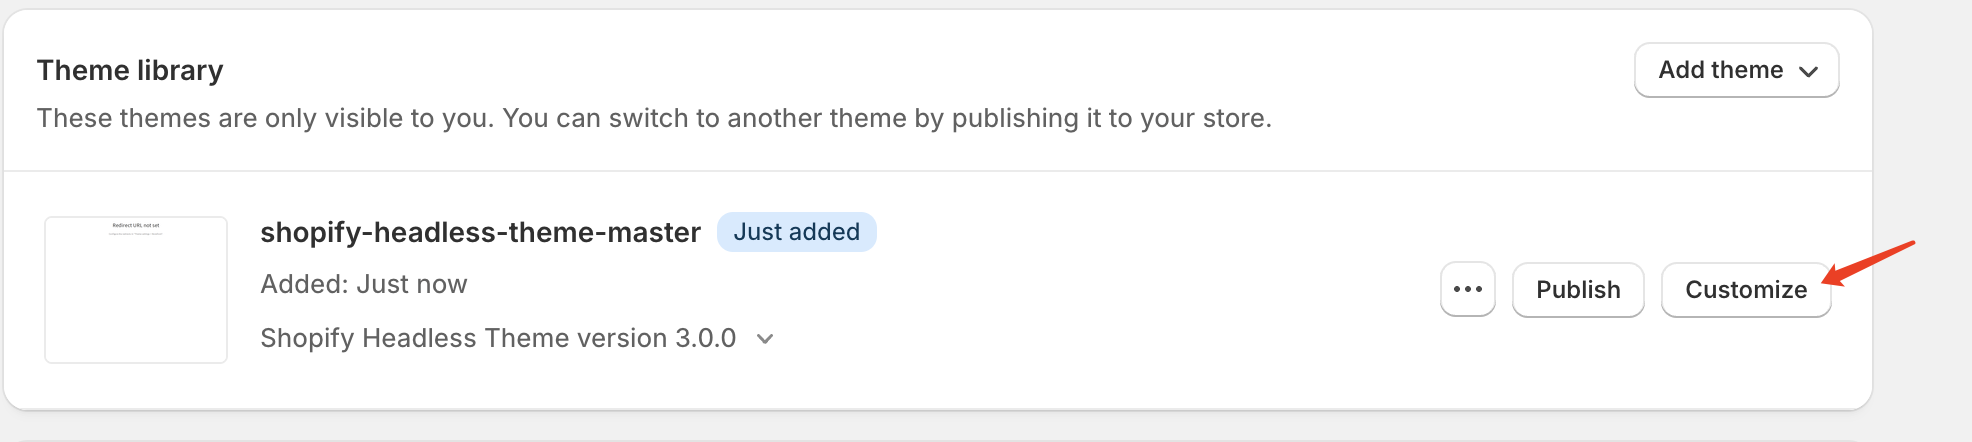
In the settings interface, enter your site domain name, then click
Save to save, and click Publish to publish.
At this point, the theme is successfully activated.
4. Prepare Environment Variables
Click
Sales channels in the menu bar, a search box will pop up, and click App and sales channel setting at the bottom.
Click
Develop apps in the top right corner.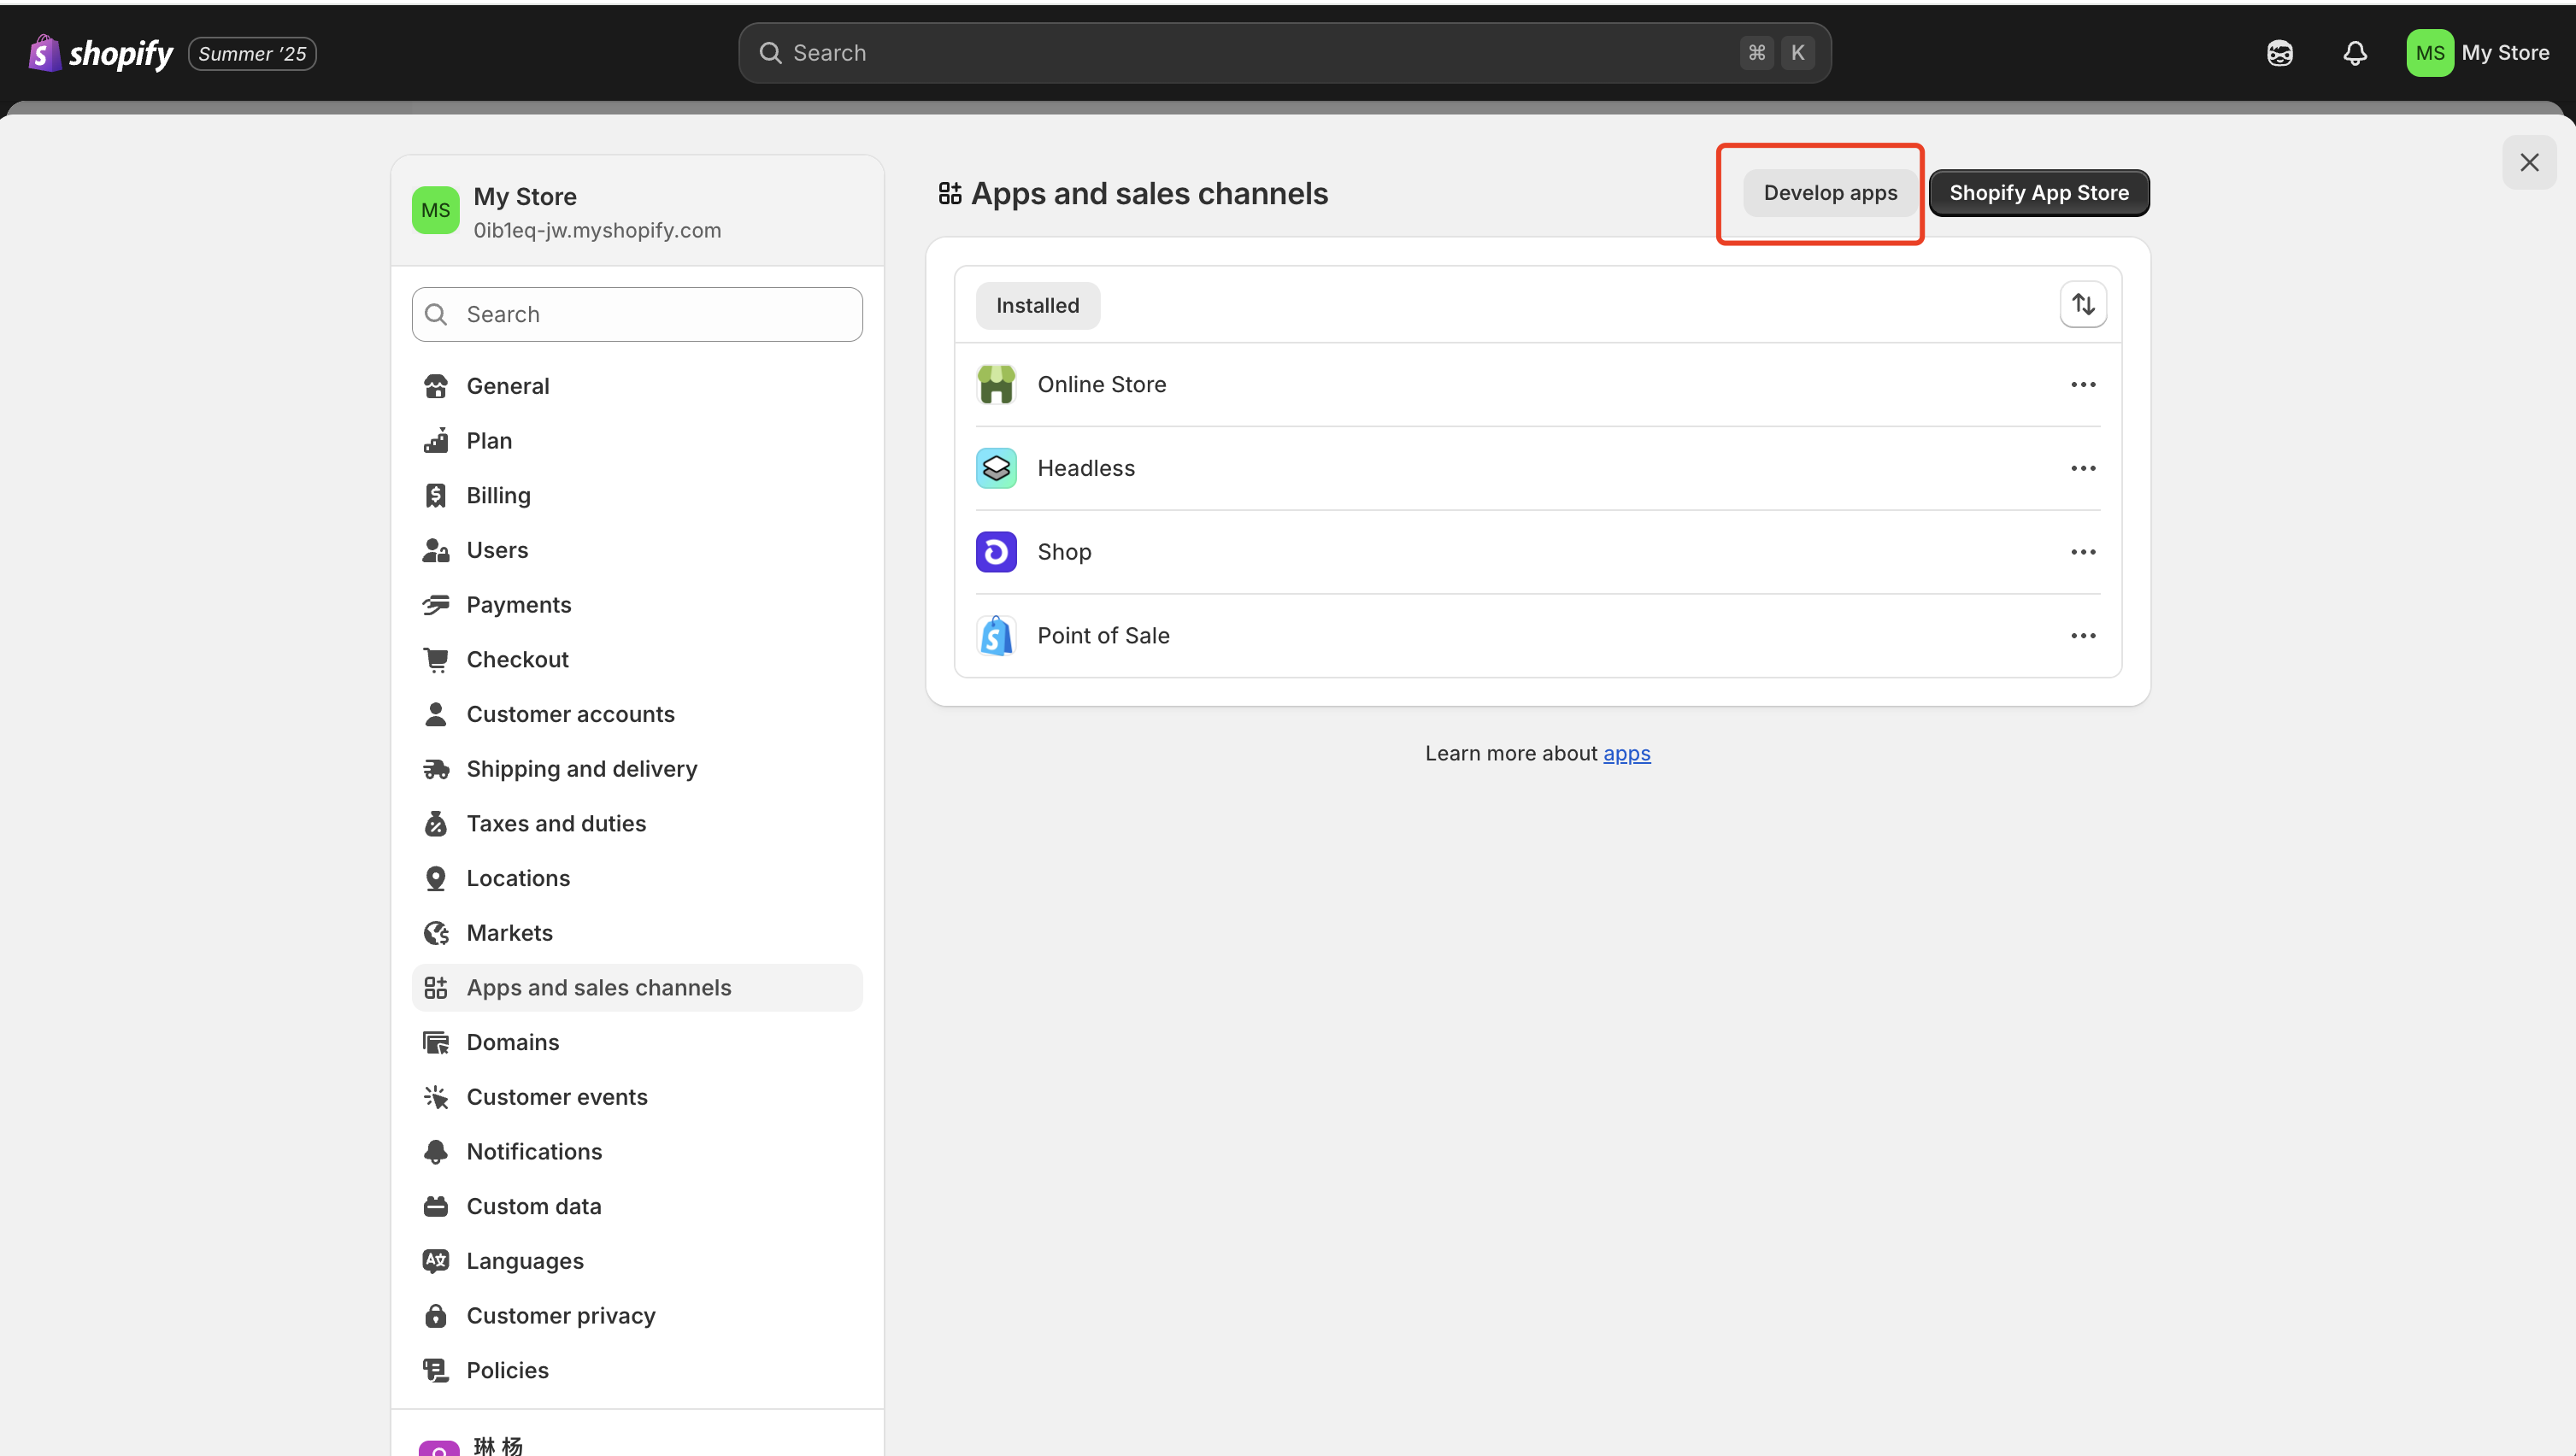
Initial entry requires enabling application development functionality:

Click to create an app, enter the name, and then click
Create app.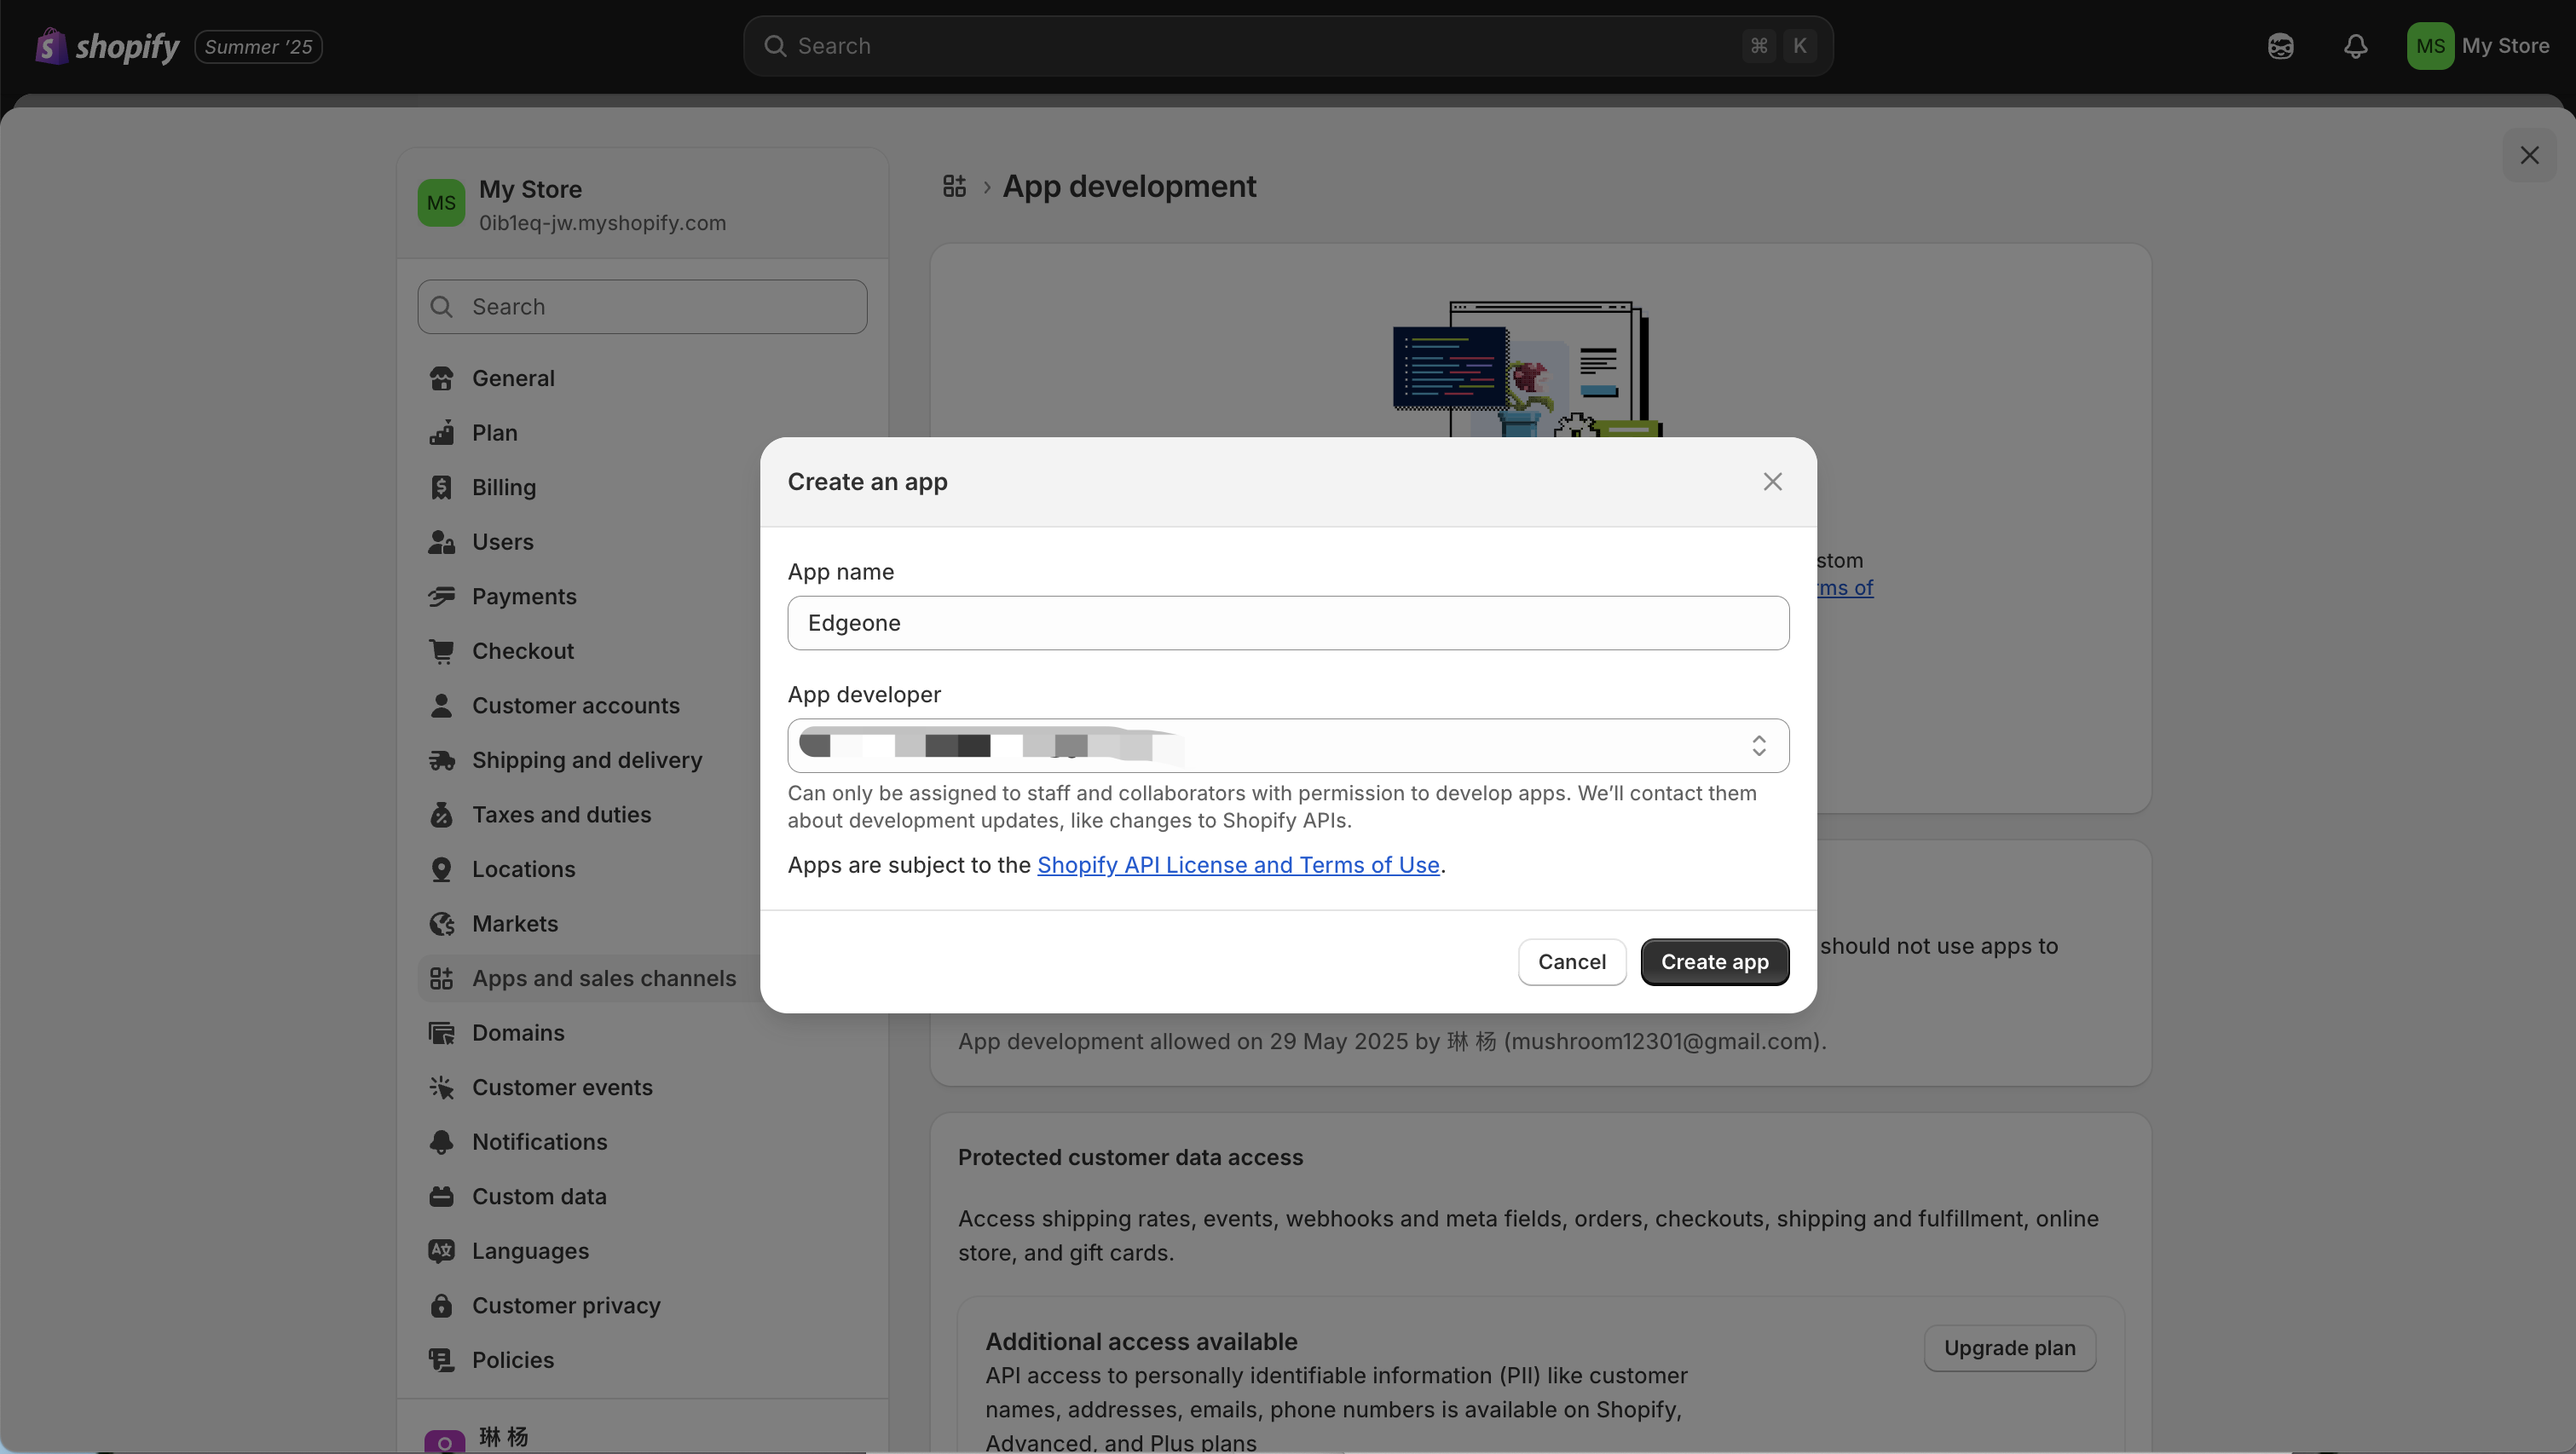
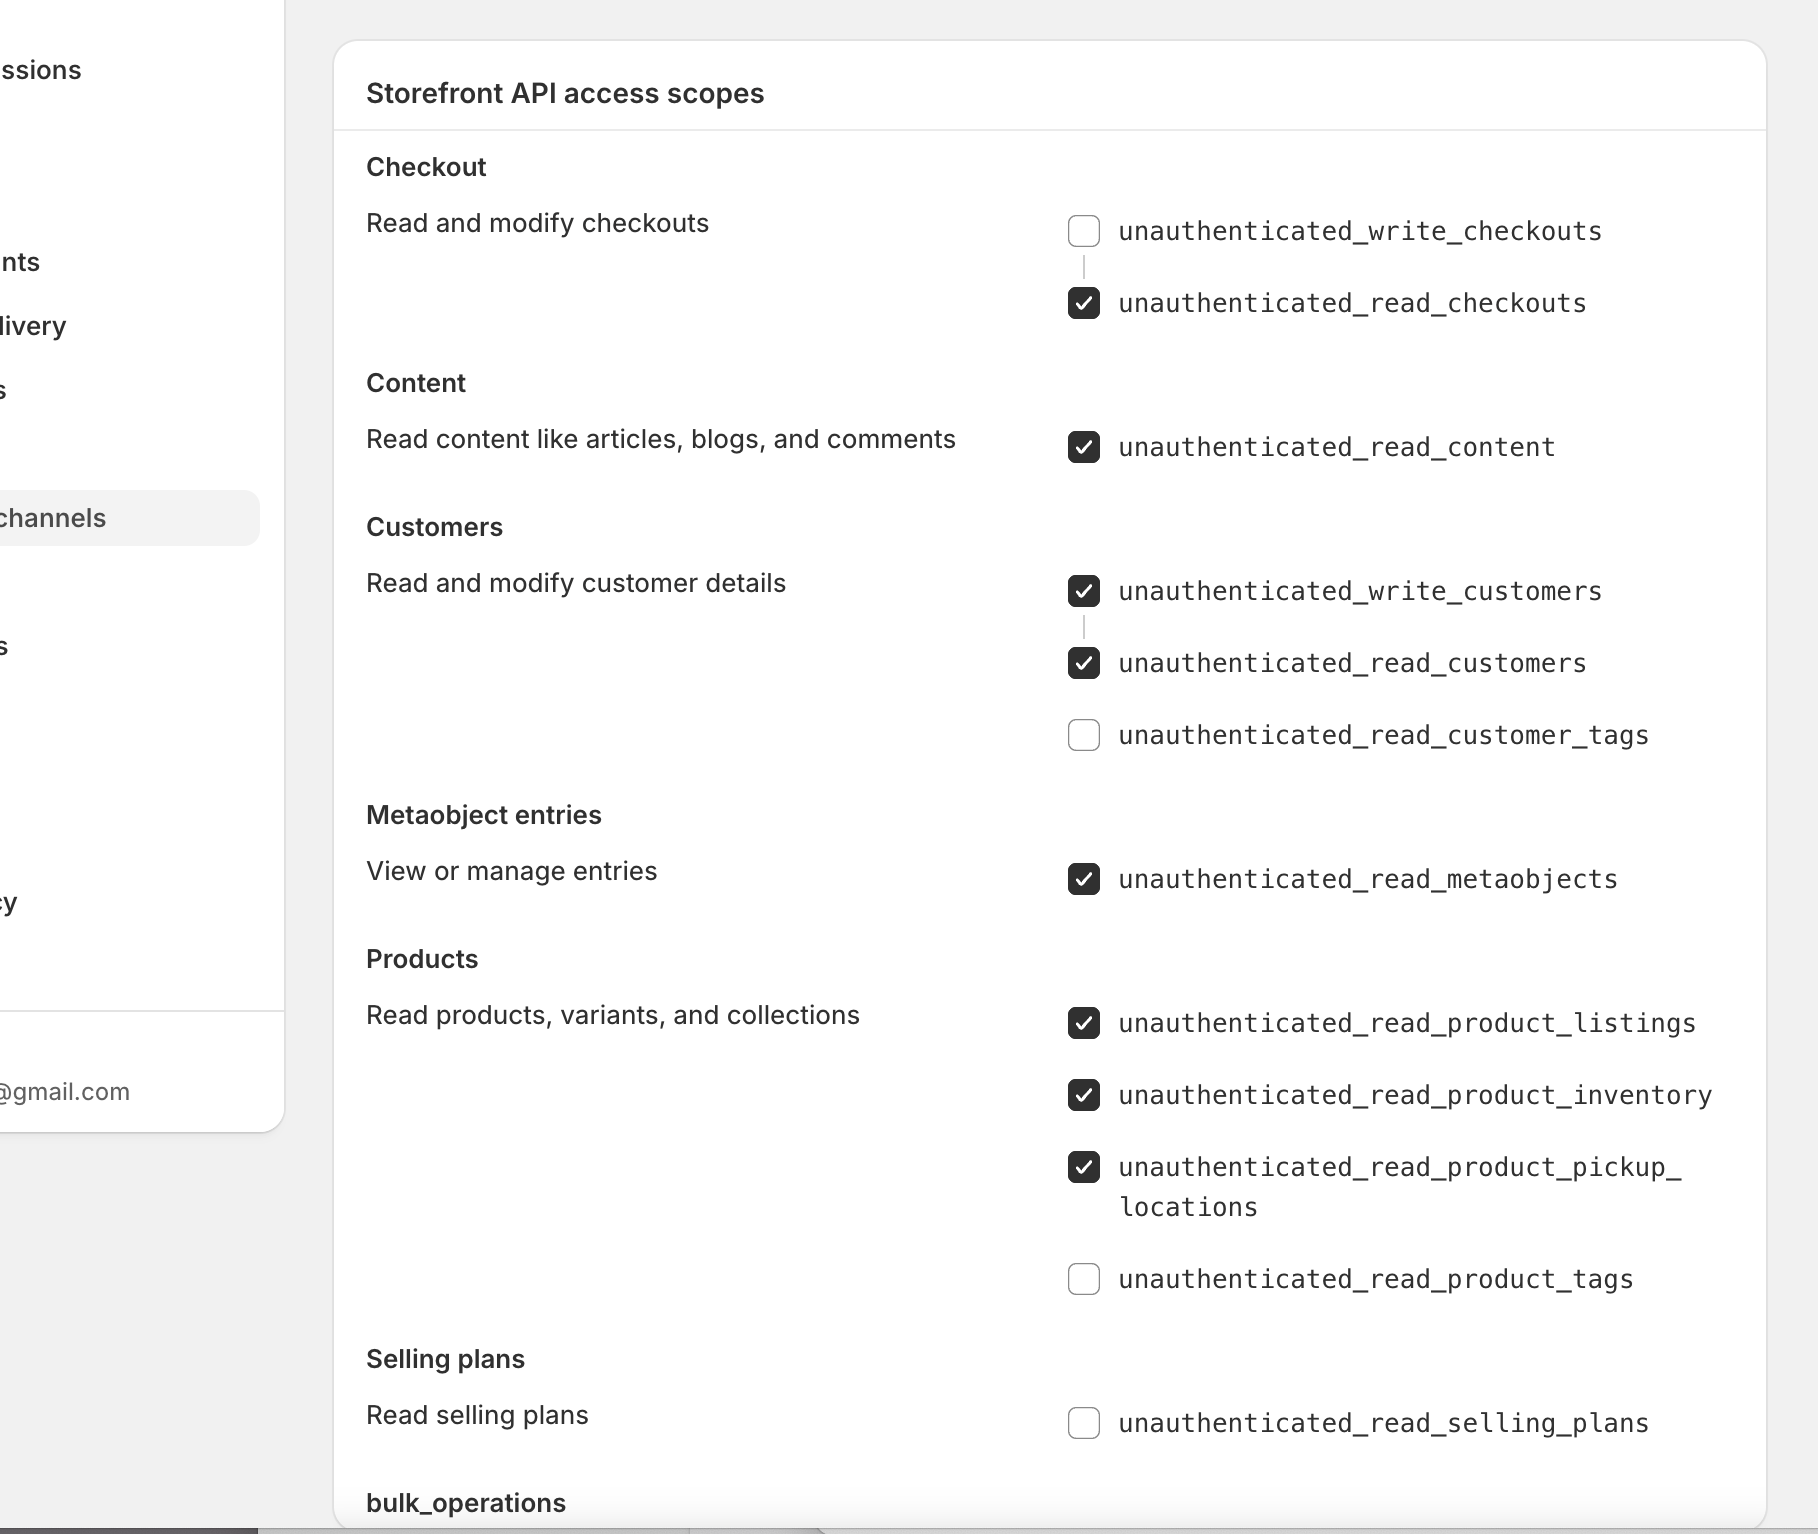
After creating the App, enter the configuration interface, click
Configure Storefront API scopes, and configure permissions.
For permission configuration, see the following:
After the configuration is complete, save. Enter the API Credentials tab. Install the application to get the
Storefront API Access Token.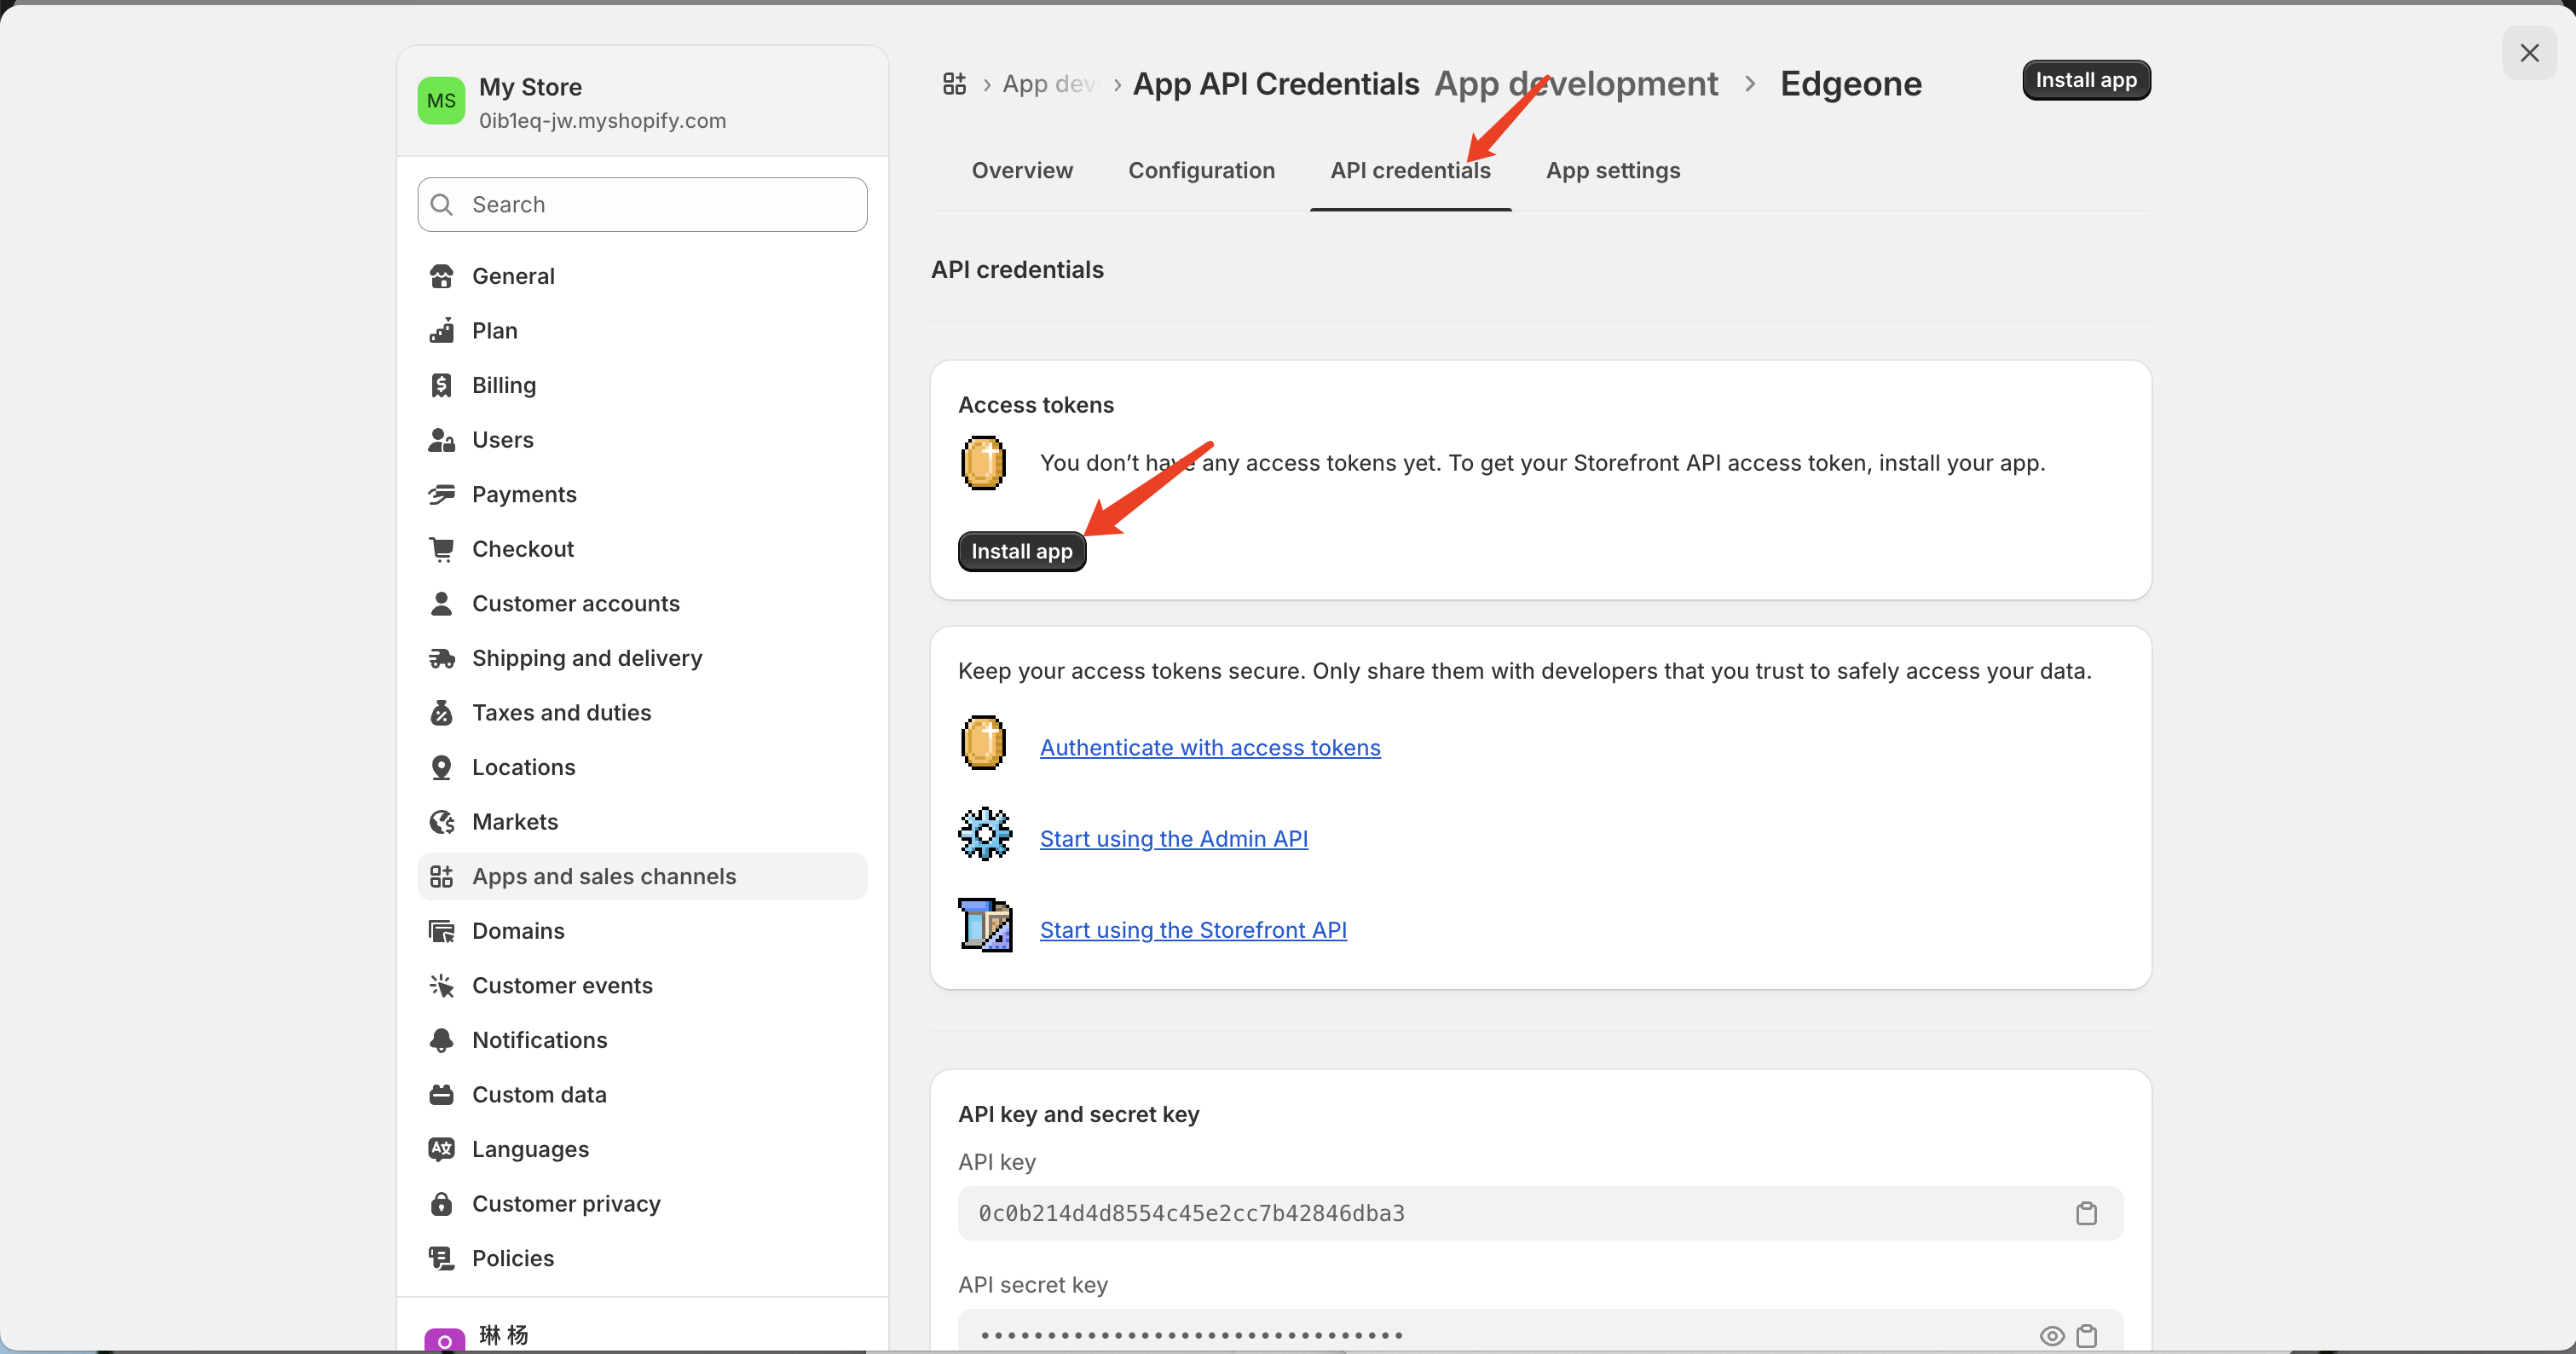

Simultaneously, your
store address can be obtained in the upper left corner of the settings interface.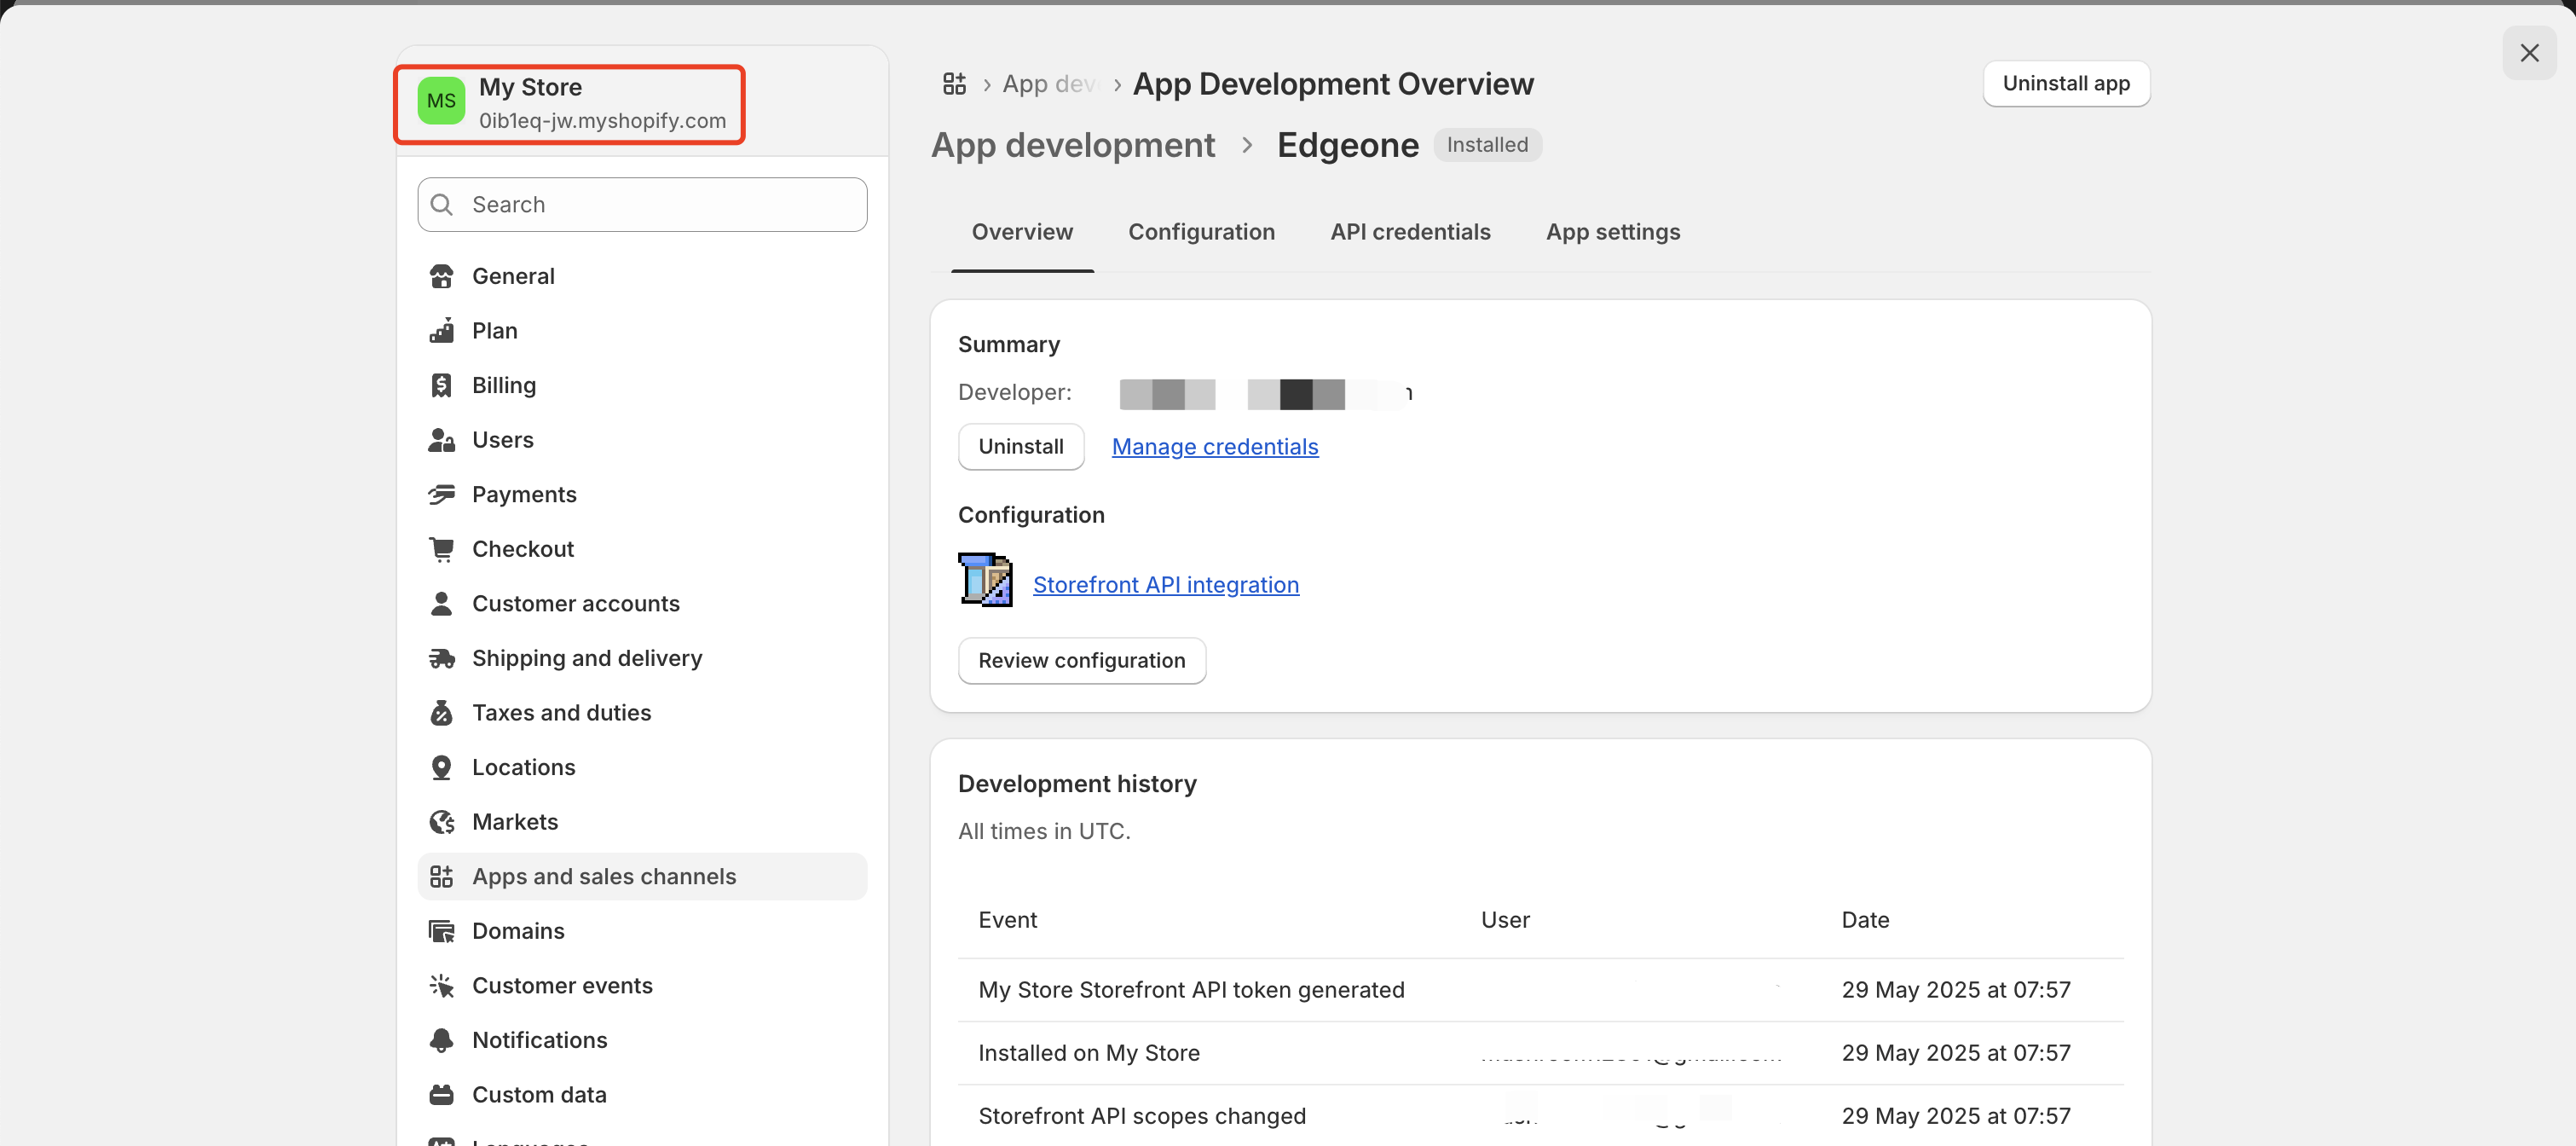
After getting the store address and
Storefront API Access Token, you can use API calls to access Shopify store APIs.Call Example
// Read environment variableconst storefrontAccessToken = env.SHOPIFY_STOREFRONT_ACCESS_TOKEN;const shopifyDomain = env.SHOPIFY_STORE_DOMAIN;const apiVersion = env.SHOPIFY_API_VERSION || '2024-04';// Build request addressconst graphqlEndpoint = `https://${shopifyDomain}/api/${apiVersion}/graphql.json`;// Build the required graphql according to the documentationconst mutation = `mutation customerAccessTokenCreate($input: CustomerAccessTokenCreateInput!) {customerAccessTokenCreate(input: $input) {customerAccessToken {accessTokenexpiresAt}customerUserErrors {codefieldmessage}}}`;// Pass parametersconst variables = {input: {email: '1@gmail.com',password: '111111',},};// Request dataconst response = await fetch(graphqlEndpoint, {method: "POST",headers: {"Content-Type": "application/json","X-Shopify-Storefront-Access-Token": storefrontAccessToken,},body: JSON.stringify({ query: mutation, variables }),});
Quick Start
Pull the template repository locally and install dependencies:
npm iCreate a
.env file and write environment variables:# Debug locallyNEXT_PUBLIC_DEV=trueFRONT_END_URL_DEV=http://localhost:3000NEXT_PUBLIC_API_URL_DEV=http://localhost:8088# Previously prepared shopify variableSHOPIFY_STORE_DOMAIN=yourshop.myshopify.comSHOPIFY_STOREFRONT_ACCESS_TOKEN=your-storefront-access-token# Hardcode it justSHOPIFY_API_VERSION=2025-04
Then run separately:
npm run dev Start frontend debugging.npm run edge:dev Start function debugging.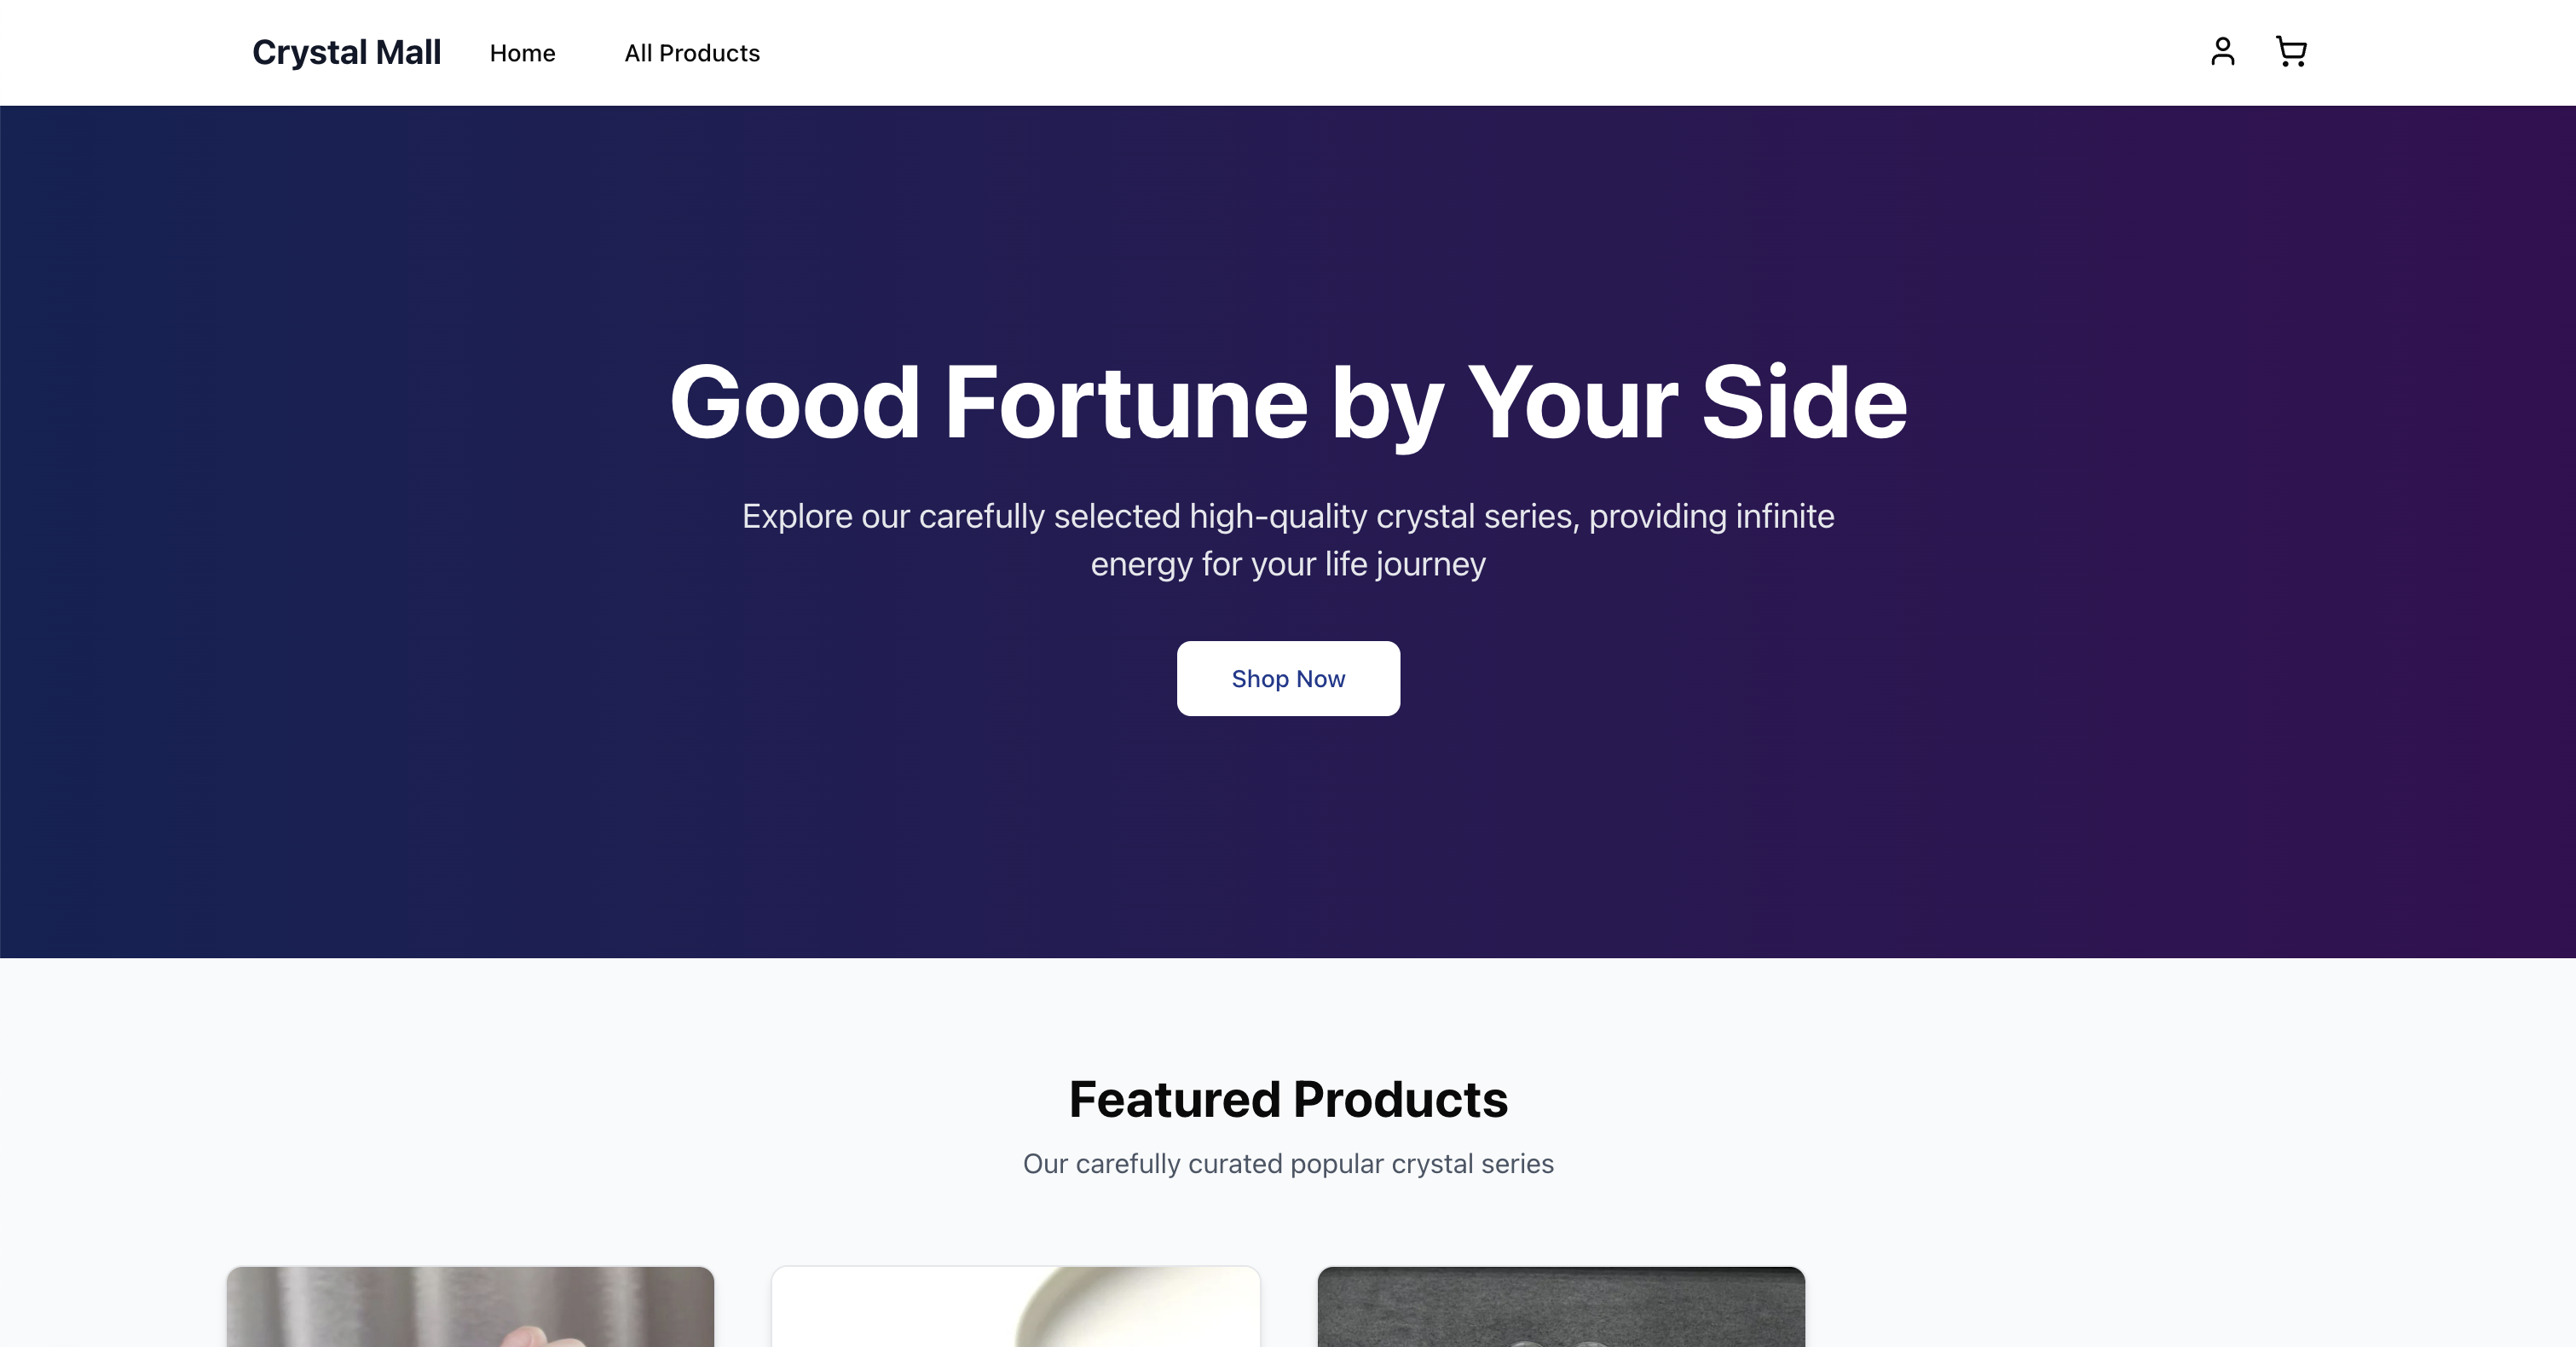
Deploying to EdgeOne Pages
Publishing Code to Git
Commit the code to the git repository to complete the deployment. Assuming you have created the
my-ecommere-website project and associated the current directory with it, use the following command to submit:git add .git commit -m "Initial commit"git push origin main
2. Importing a Project Into Pages
After submission, if you are already an EdgeOne Pages user and have associated your GitHub account, just access the console to deploy the corresponding project.
3. Adding an Environment Variable
Click Deploy on portfolio-with-sanity, then on the preparation deployment page, click "Environment Variables" and configure the following environment variables respectively:
SHOPIFY_STORE_DOMAIN: Enter your Shopify store addressSHOPIFY_STOREFRONT_ACCESS_TOKEN: Enter your Storefront API Access TokenSHOPIFY_API_VERSION: Enter 2025-04 if there are no special requirements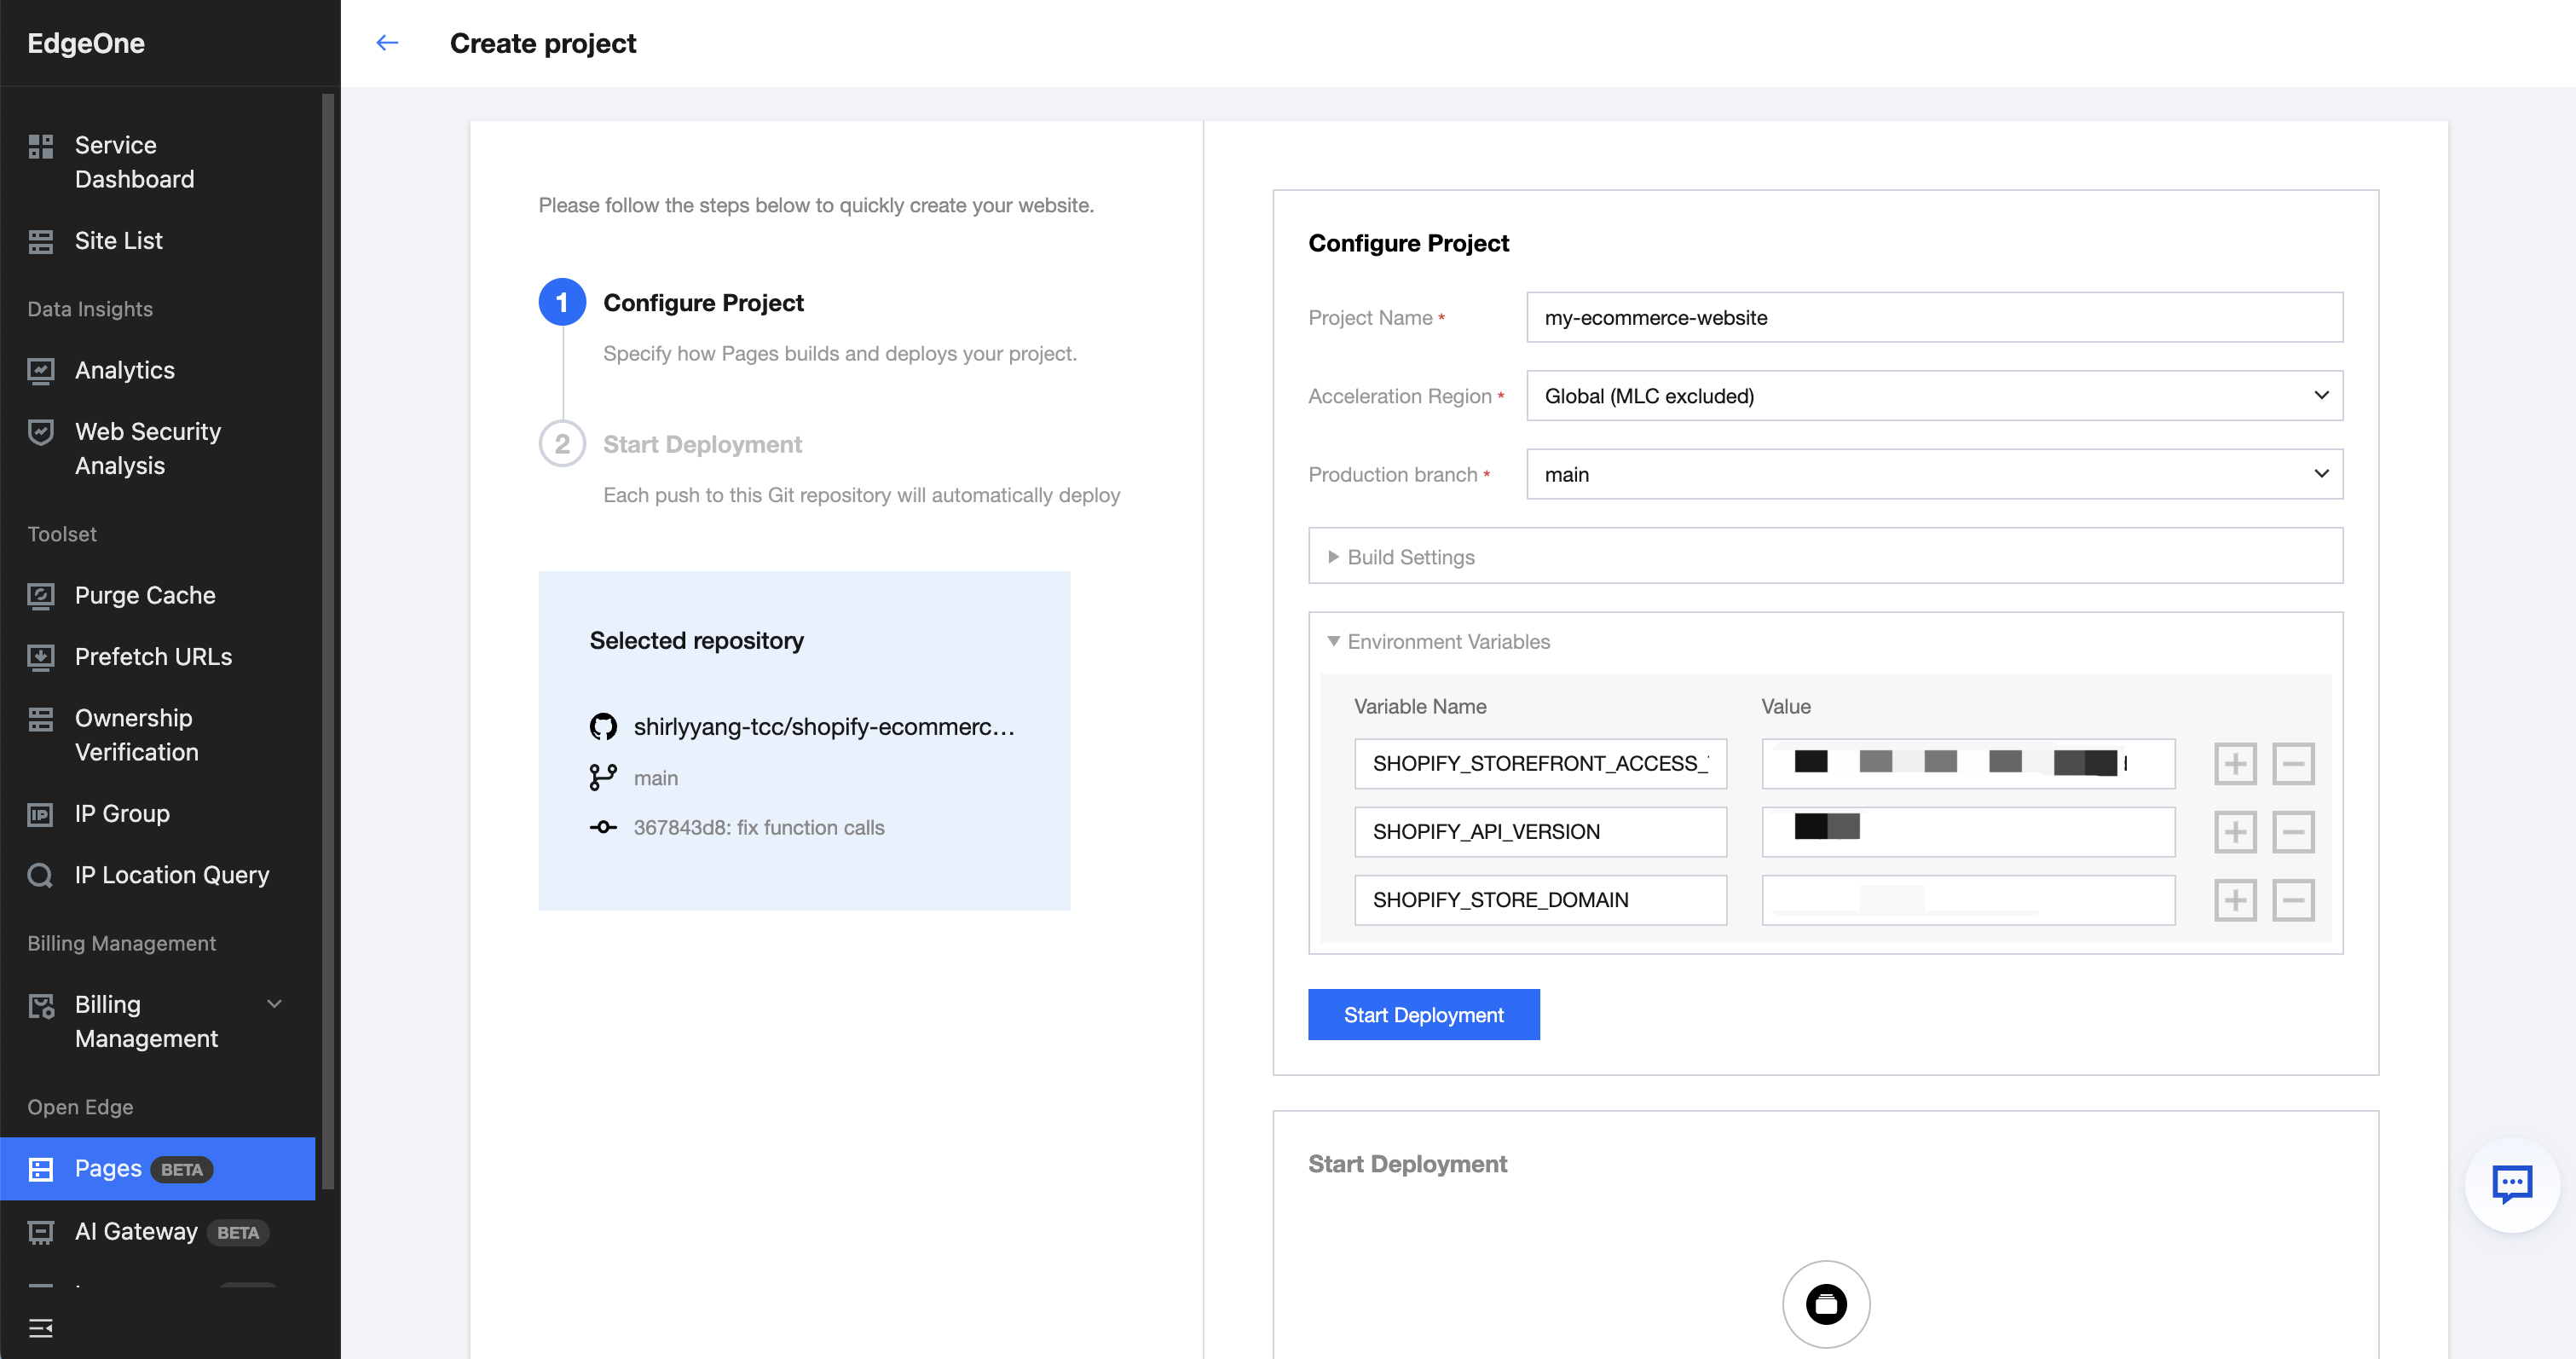
After the configuration is complete, click the "Start Deployment" button. Wait until the deployment is complete, and the deployment success interface will be displayed.
We have now completed the full deployment process of the entire solution. With this solution, you can:
Use Shopify's powerful e-commerce backend features
Customize your own e-commerce website page flexibly