

Clerk Integration
Clerk is a complete, embeddable UI, flexible API, and management dashboard for verifying and managing your users.
Overview
This guide provides developers with step-by-step instructions for quickly integrating Clerk and tutorials for deploying projects on EdgeOne Pages. The following context will introduce in detail how to integrate Clerk into a project and quickly complete the development of user management features in the project.
Getting Started
You can choose the Clerk integration template provided by Pages to quickly enter development and click the Clerk Authentication Starter template. This tutorial is roughly divided into three steps: Clerk configuration, local integration, and EdgeOne Pages deployment configuration. The following will introduce in detail the specific operations of each step.
Configuring Clerk
Go to clerk.com to register an account and create a project. Upon first login, you need
Create your project, then you will enter the Overview. On the Overview Page, find the corresponding development framework. This guide uses a Next.js project with a routing mode of Pages Router as an example.
If you haven't created a Next.js project yet, you can use the following command to create a Next.js project.
npx create-next-app@latest# oryarn create next-app
After creation, install the Clerk package for the Next.js project.
# npmnpm install @clerk/nextjs# yarnyarn add @clerk/nextjs# pnpmpnpm add @clerk/nextjs
Fill in API Keys Into a Local Project
After Clerk installation, create a
.env file in the project root directory and fill in the API keys. API keys can be found on the Clerk dashboard at Dashboard -> Configure -> Developers -> the first directory API keys.NEXT_PUBLIC_CLERK_PUBLISHABLE_KEY=pk_CLERK_SECRET_KEY=sk_
Alternative Solutions for Creating Middleware
Clerk provides multiple middleware options for seamless integration of identity authentication and user management features across different frameworks. The most commonly used middleware is the route protection middleware. Since currently deployed projects on Pages do not support middleware settings, it is advisable to use client-side verification methods in Pages.
// pages/dashboard.jsximport { useAuth } from "@clerk/nextjs";import { useRouter } from "next/router";import { useEffect } from "react";export default function Dashboard() {const { isLoaded, userId, isSignedIn } = useAuth();const router = useRouter();useEffect(() => {// Wait for Auth status to load completeif (isLoaded && !isSignedIn) {router.replace(/sign-in?redirect_url=${encodeURIComponent(router.asPath)});}}, [isLoaded, isSignedIn, router]);// Display loading status or unauthorized stateif (!isLoaded || !isSignedIn) {return <div>Loading...</div>;}// User verified, display contentreturn (<div></div>);}
Or create a uniform protected page wrapper for management.
Adding the Clerk Component to the Code
Add the
<ClerkProvider> component to your application. This component provides session and user context functionality. It is advisable to integrate it at the application entry.
In addition, you can also add the
<SignedIn> <SignedOut> <UserButton> <SignInButton> components to your application. These components enable:<SignedIn>: Only logged-in users can see the sub-items of this component.<SignedOut>: Only after exiting can you see the sub-items of this component.<UserButton>: Displays the user profile photo and includes a pull-down menu for user operations. <SignInButton>: A styleless component linking to the login page.// pages/_app.tsximport '@/styles/globals.css'import { ClerkProvider, SignInButton, SignedIn, SignedOut, UserButton } from '@clerk/nextjs'import type { AppProps } from 'next/app'function MyApp({ Component, pageProps }: AppProps) {return (<ClerkProvider {...pageProps}><SignedOut><SignInButton /></SignedOut><SignedIn><UserButton /></SignedIn><Component {...pageProps} /></ClerkProvider>)}export default MyApp
Deploying to EdgeOne Pages
This section will provide a detailed introduction on how to integrate Clerk during EdgeOne Pages deployment. Below are divided into directly selecting the Clerk template from
Pages template for deployment, and deploying custom projects to Pages. In this step, if there is no need to associate with an online Git, you will need to complete Git authorization (supporting Github/Gitee).
Deploying Pages Template Clerk Template Deployment
You can directly use the Clerk frontend template of EdgeOne Pages. Click
Create project -> Start from template, select Authentication -> Clerk -> Clerk Authentication Starter.
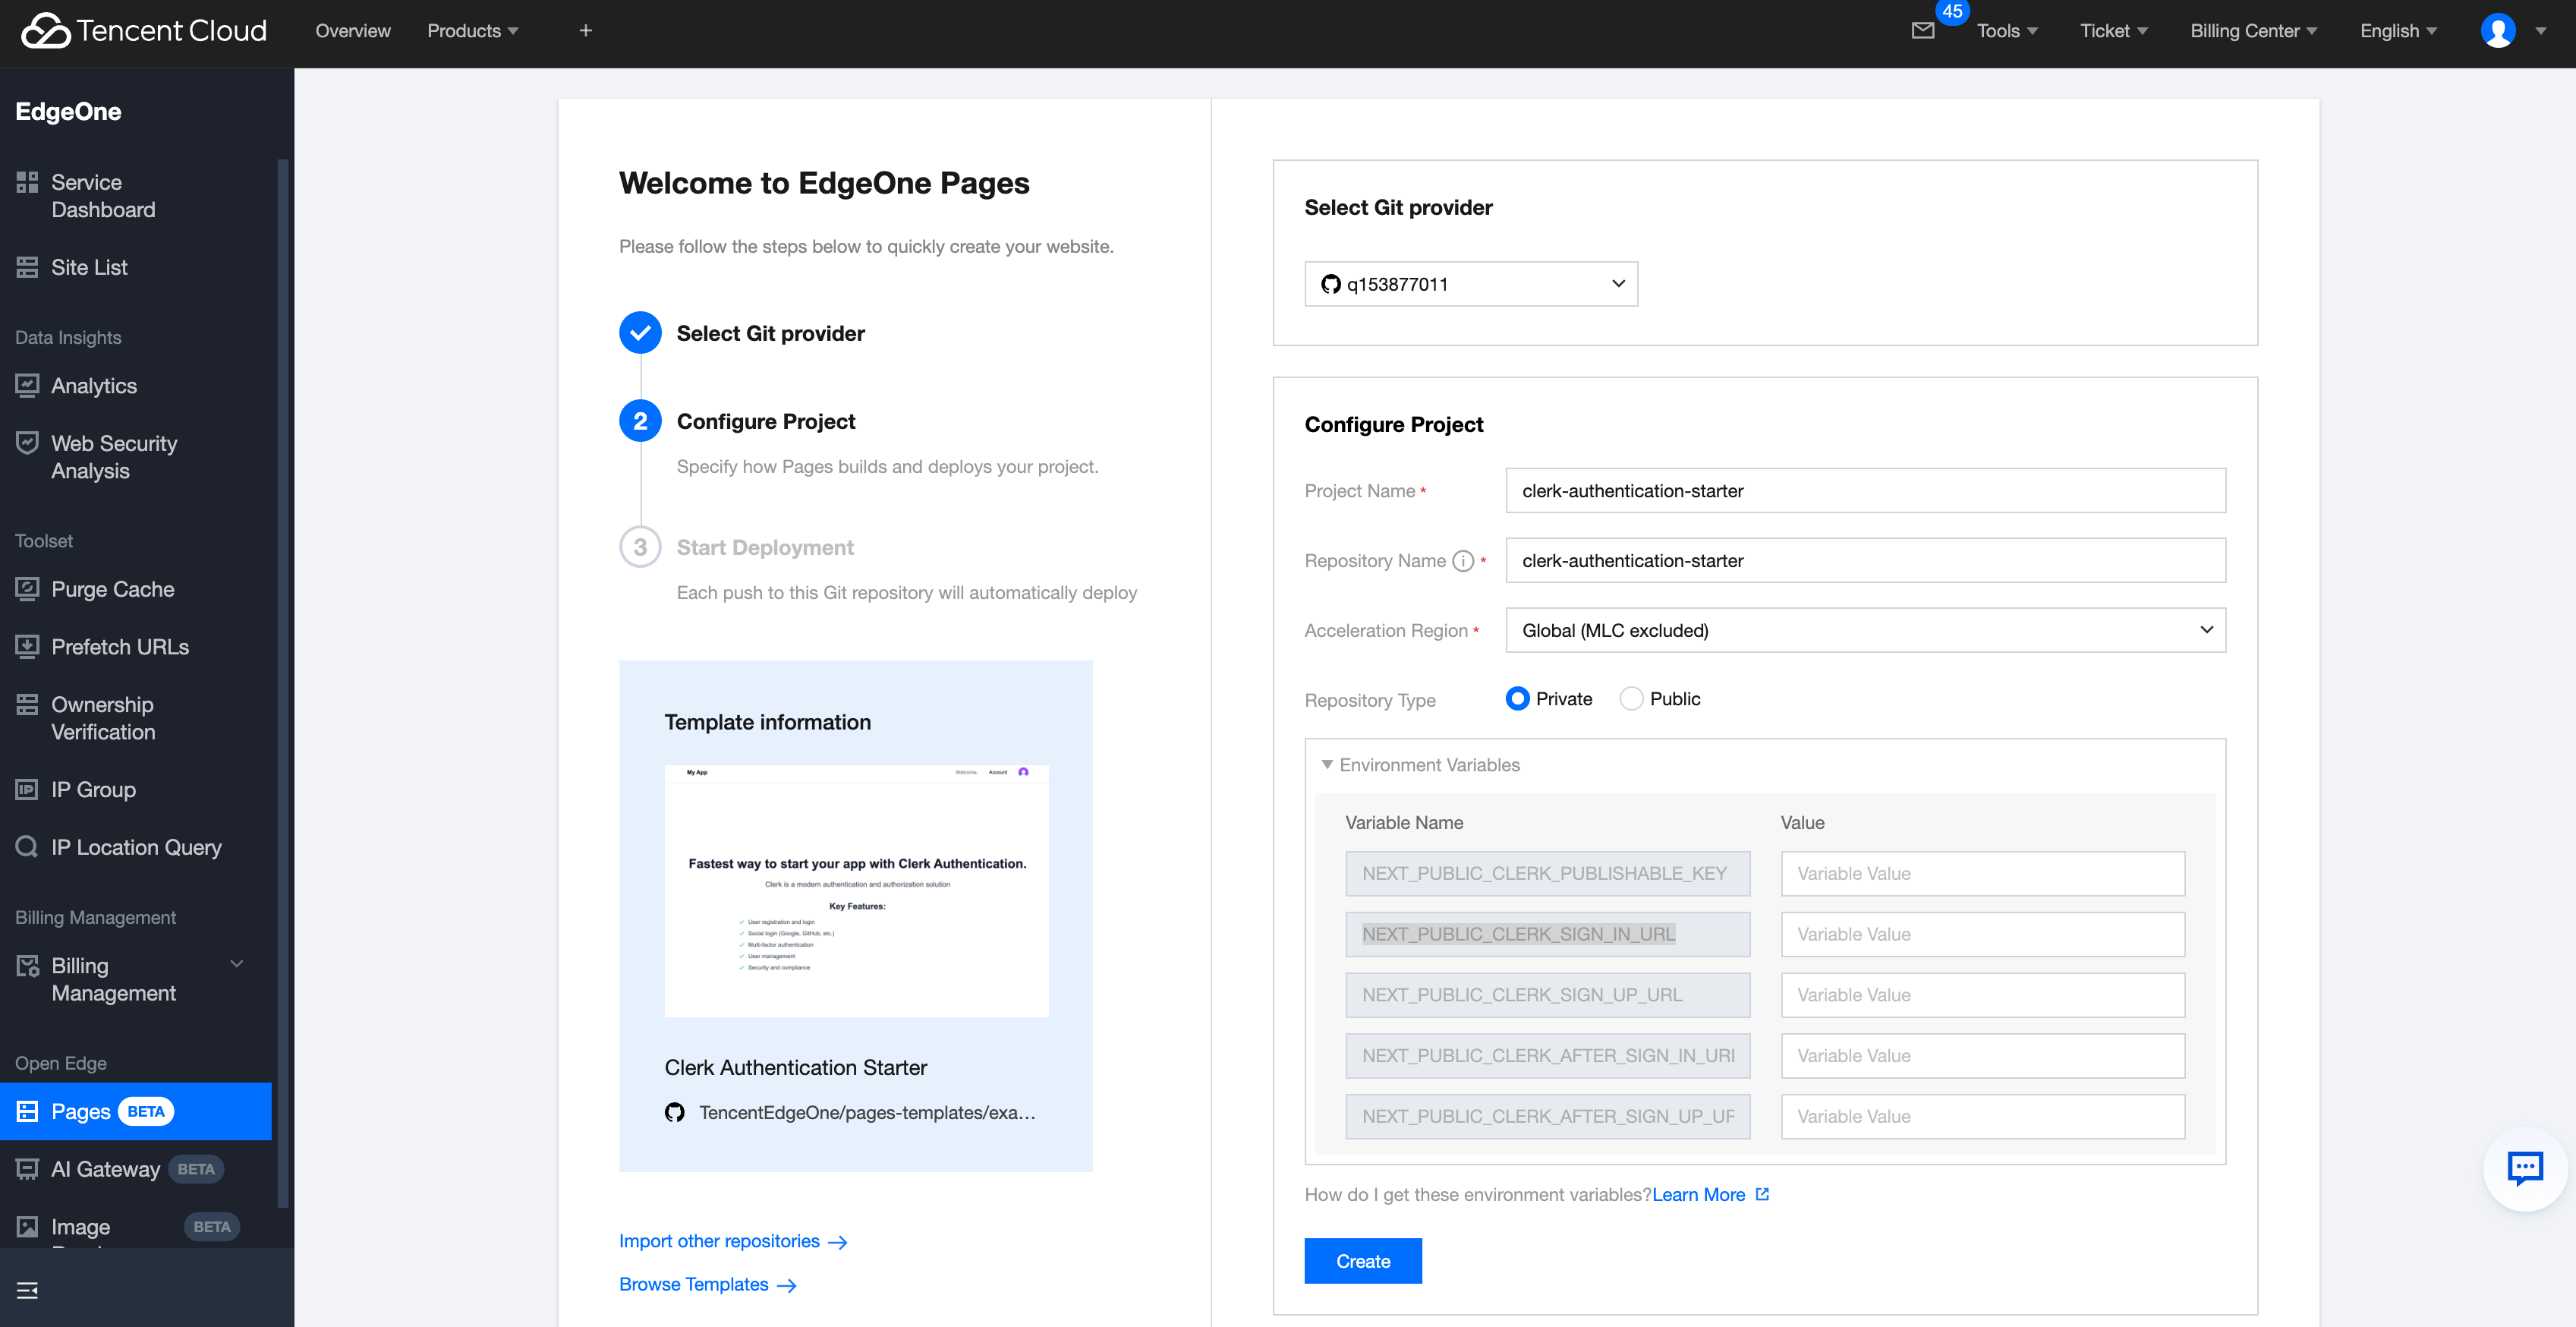
Then click
Deploy, fill in Environment Variables. The parameter description is as follows:NEXT_PUBLIC_CLERK_PUBLISHABLE_KEY: Clerk public key.NEXT_PUBLIC_CLERK_SIGN_IN_URL: Sign-in page address.NEXT_PUBLIC_CLERK_SIGN_UP_URL: Registration page address.NEXT_PUBLIC_CLERK_AFTER_SIGN_IN_URL: Redirect address after sign-in.NEXT_PUBLIC_CLERK_AFTER_SIGN_UP_URL: Redirection address after registration.
Click
Create to start deployment.
Deploying a Custom Project to Pages (Custom Deployment)
1. Create a new repository
Log in to your GitHub account and enter
Dashboard.Click the
New button in the upper right corner.Fill in the repository name, description, and other information.
Select repository visibility (Public or Private)
Click
Create repository to complete the creation
2. Upload a local project
Initialize Git in the local project directory (if uninitialized)
Submit and push the project files to the newly created remote repository
Then collocate the remote repository locally and upload the local code.
# Push your code to your git repository (e.g. GitHub, Gitee).git initgit add .git commit -m "First commit"git remote add origin "your Git address"git push -u origin master
Through these steps, your project code will be successfully hosted on GitHub, making necessary preparations for subsequent deployment.
Enter the EdgeOne Pages console, upload your own project to Github, click
Create project -> Import Git repository, and select your project.
On the deployment setting page, fill in
Environment Variables.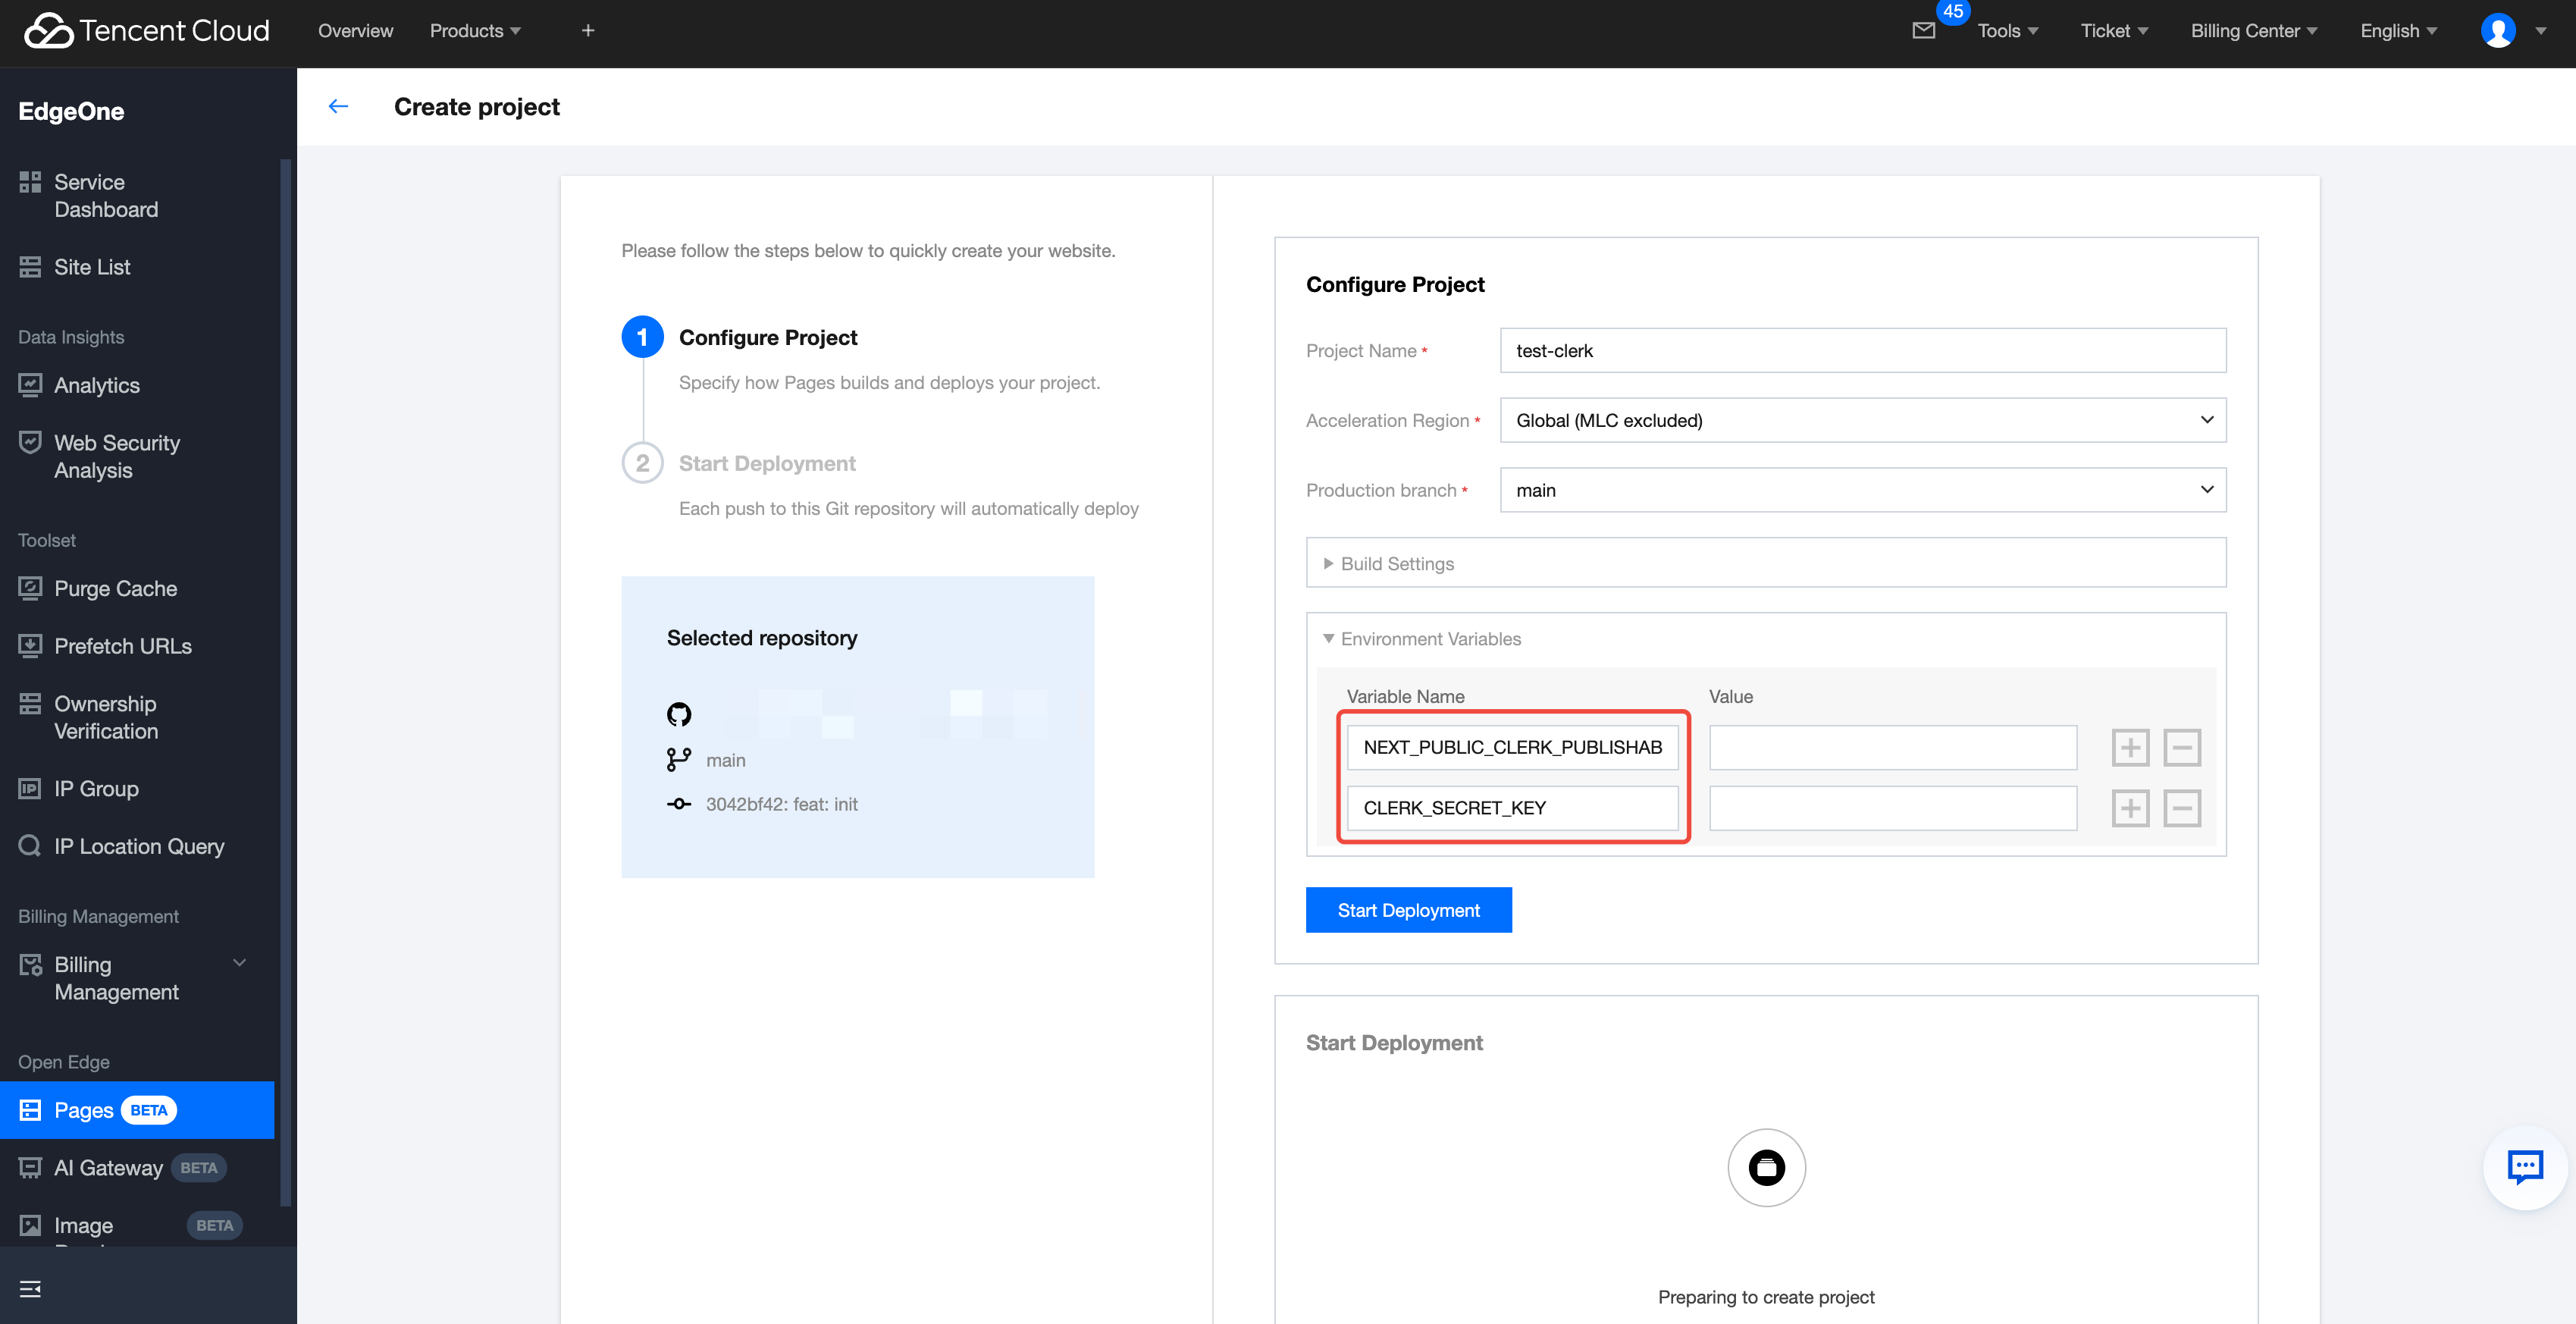
You can fill in only the basic connection parameters here. After deployment, you can modify them again in the project. In the left navigation bar, find
Project Setting, locate Environment Variables on the page, and redeploy after modifying or adding new ones.
When Congratulations appears, it indicates deployment success. The deployment will take approximately 1-3 minutes. If the project encounters a deployment failure, you can modify the project based on
Build Logs and Build Summary information, or contact staff to resolve the issue.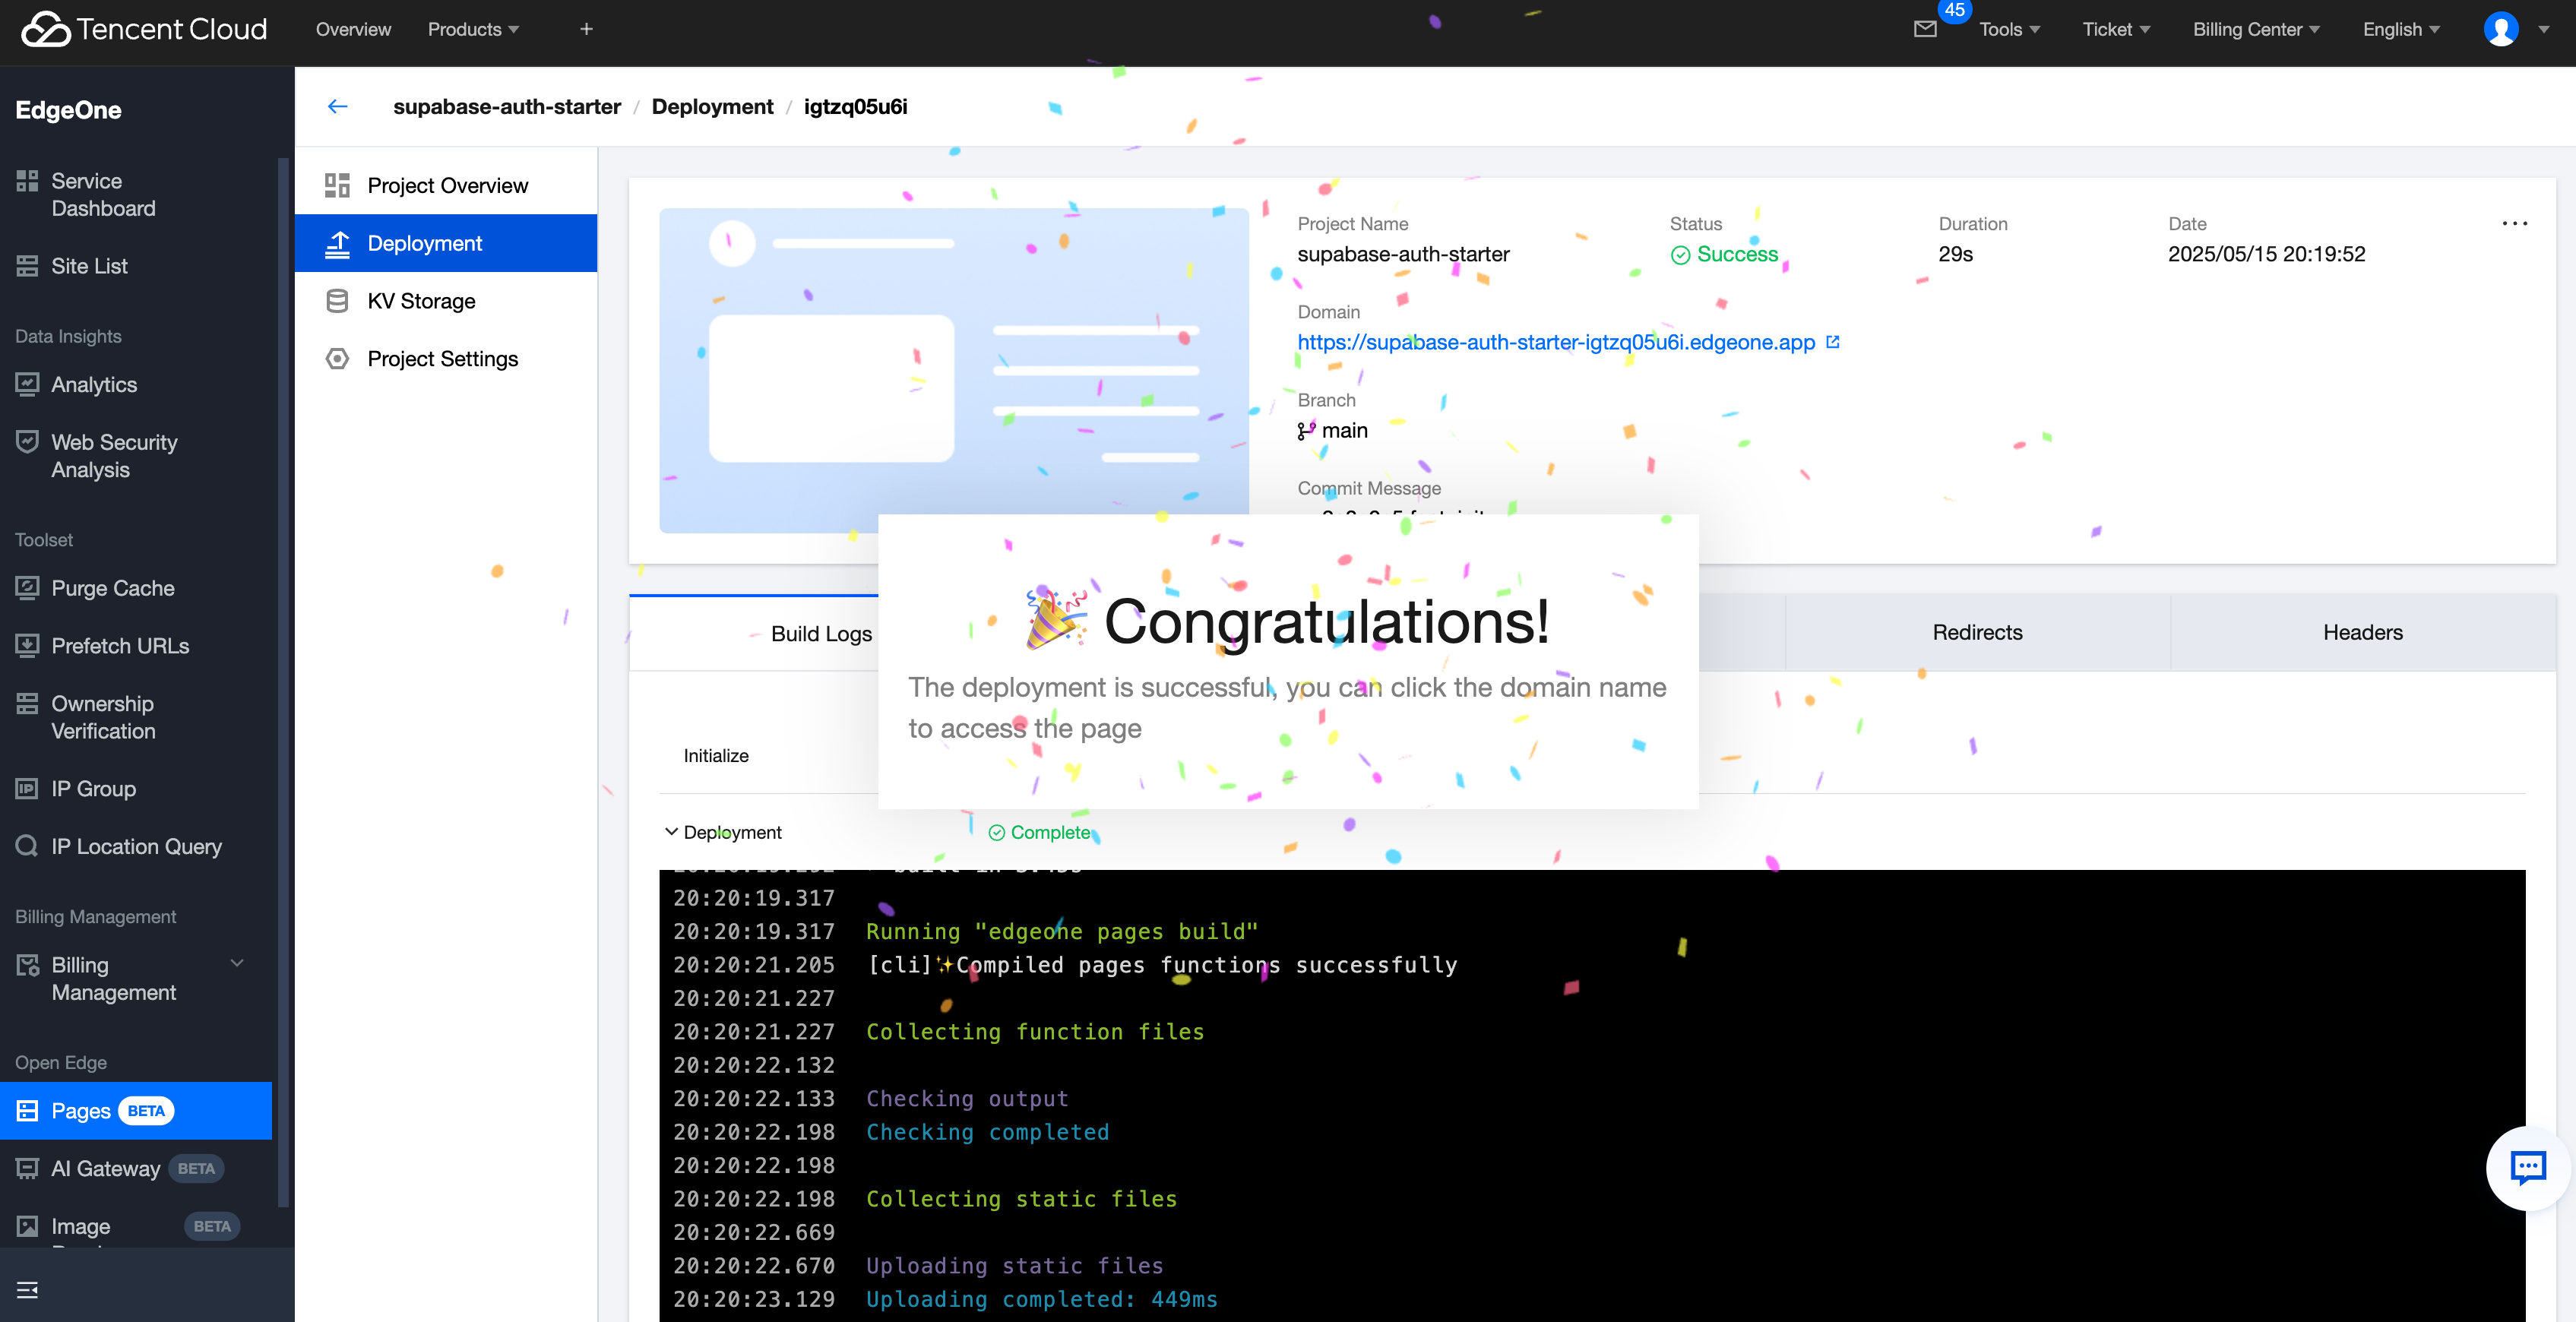
More Related Content
Learn more about Clerk operations: Clerk Operation Instructions
Copyright © 2013-2025 Tencent Cloud. All Rights Reserved.