

Supabase Integration
Supabase Authentication (commonly referred to as Supabase Auth) is a complete user authentication and management system provided by the Supabase platform. It allows developers to easily achieve user registration, login, identity authentication, and access control features without the need to build these complex security systems from scratch.
Overview
This guide provides developers with step-by-step instructions for quickly integrating Supabase Auth, as well as basic edge function feature development, and offers tutorials for deploying projects on EdgeOne Pages. The following context will introduce in detail the integration steps and quickly complete the development of user management features in the project.
Getting Started
You can choose the Supabase Auth integration template provided by Pages to quickly enter development and click the Supabase Auth Starter template. This tutorial is roughly divided into three steps: Supabase configuration, development debugging, and EdgeOne Pages deployment configuration. The following will introduce in detail the specific operations of each step.
Setting Up Supabase
1. Account Registration and Configurations
If you are first time exposed to Supabase, please see our Supabase Integration Guide to obtain the complete process of account registration and environment initialization.
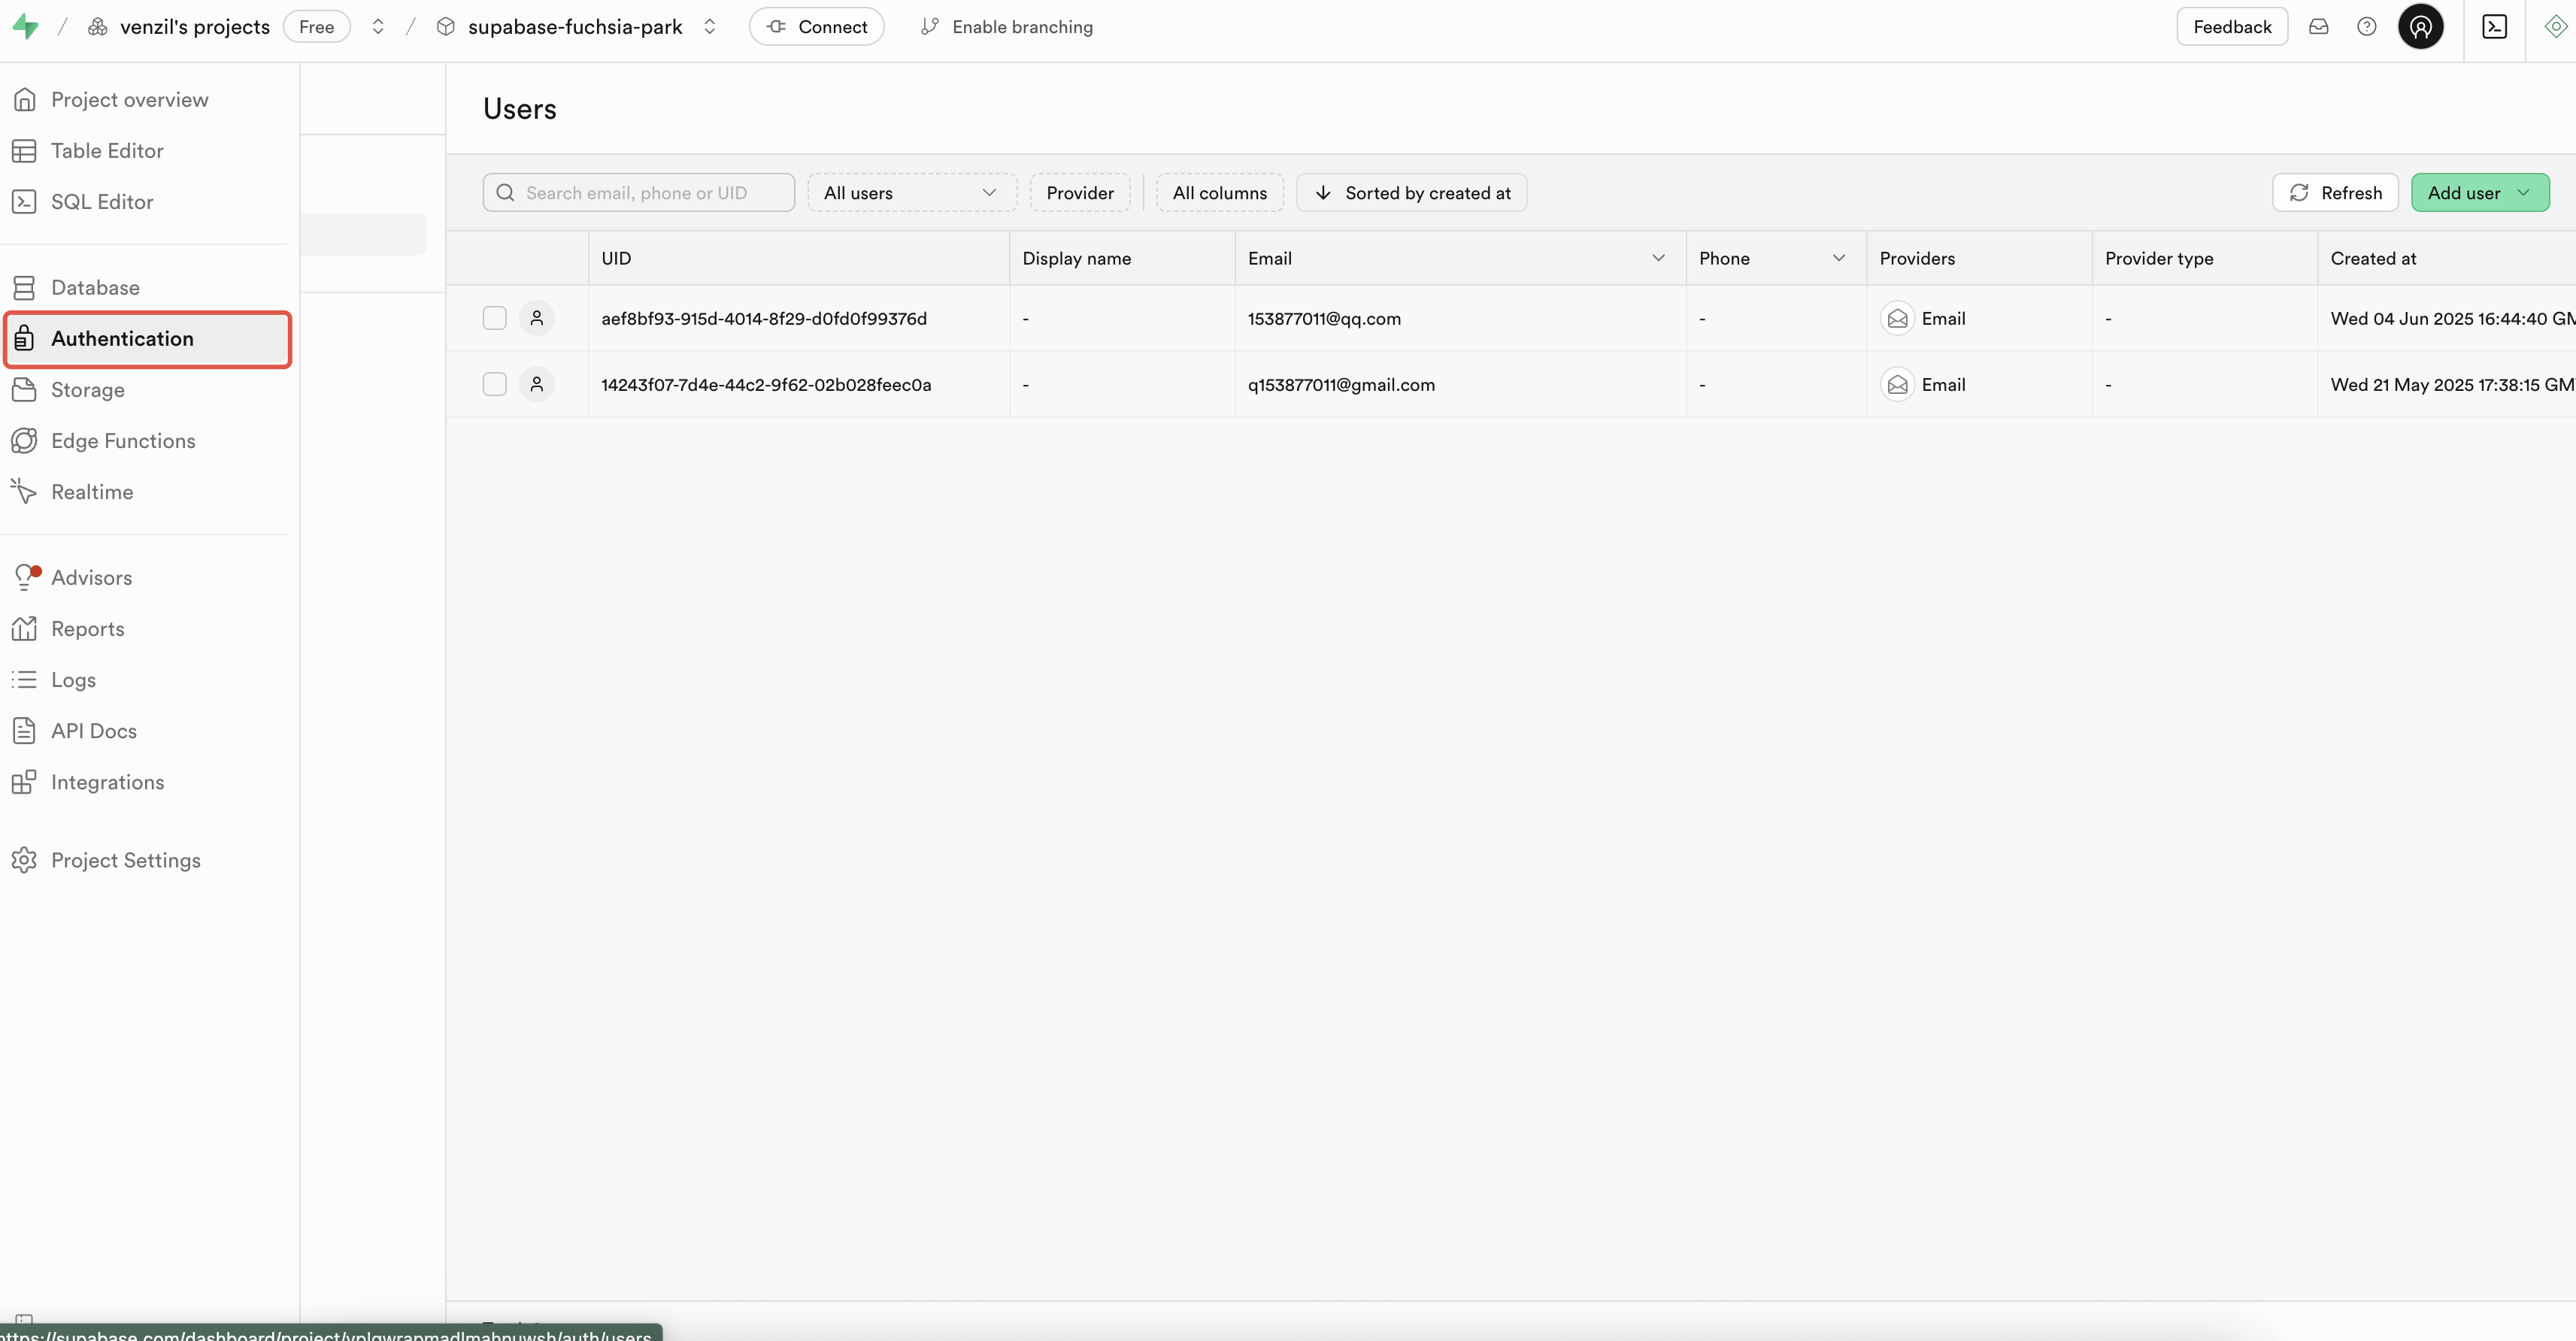
2. Authentication Introduction
The Authentication feature provided by the Supabase platform enables efficient user data management. By accessing the Authentication management interface through the left navigation pane, you will see a pre-configured user data table and related settings. This interface supports configuring core features such as the email validation process, access policies (Policies), and session (Session) parameters. For detailed information about specific features, please refer to the detailed description in the official documentation.
Developing Locally
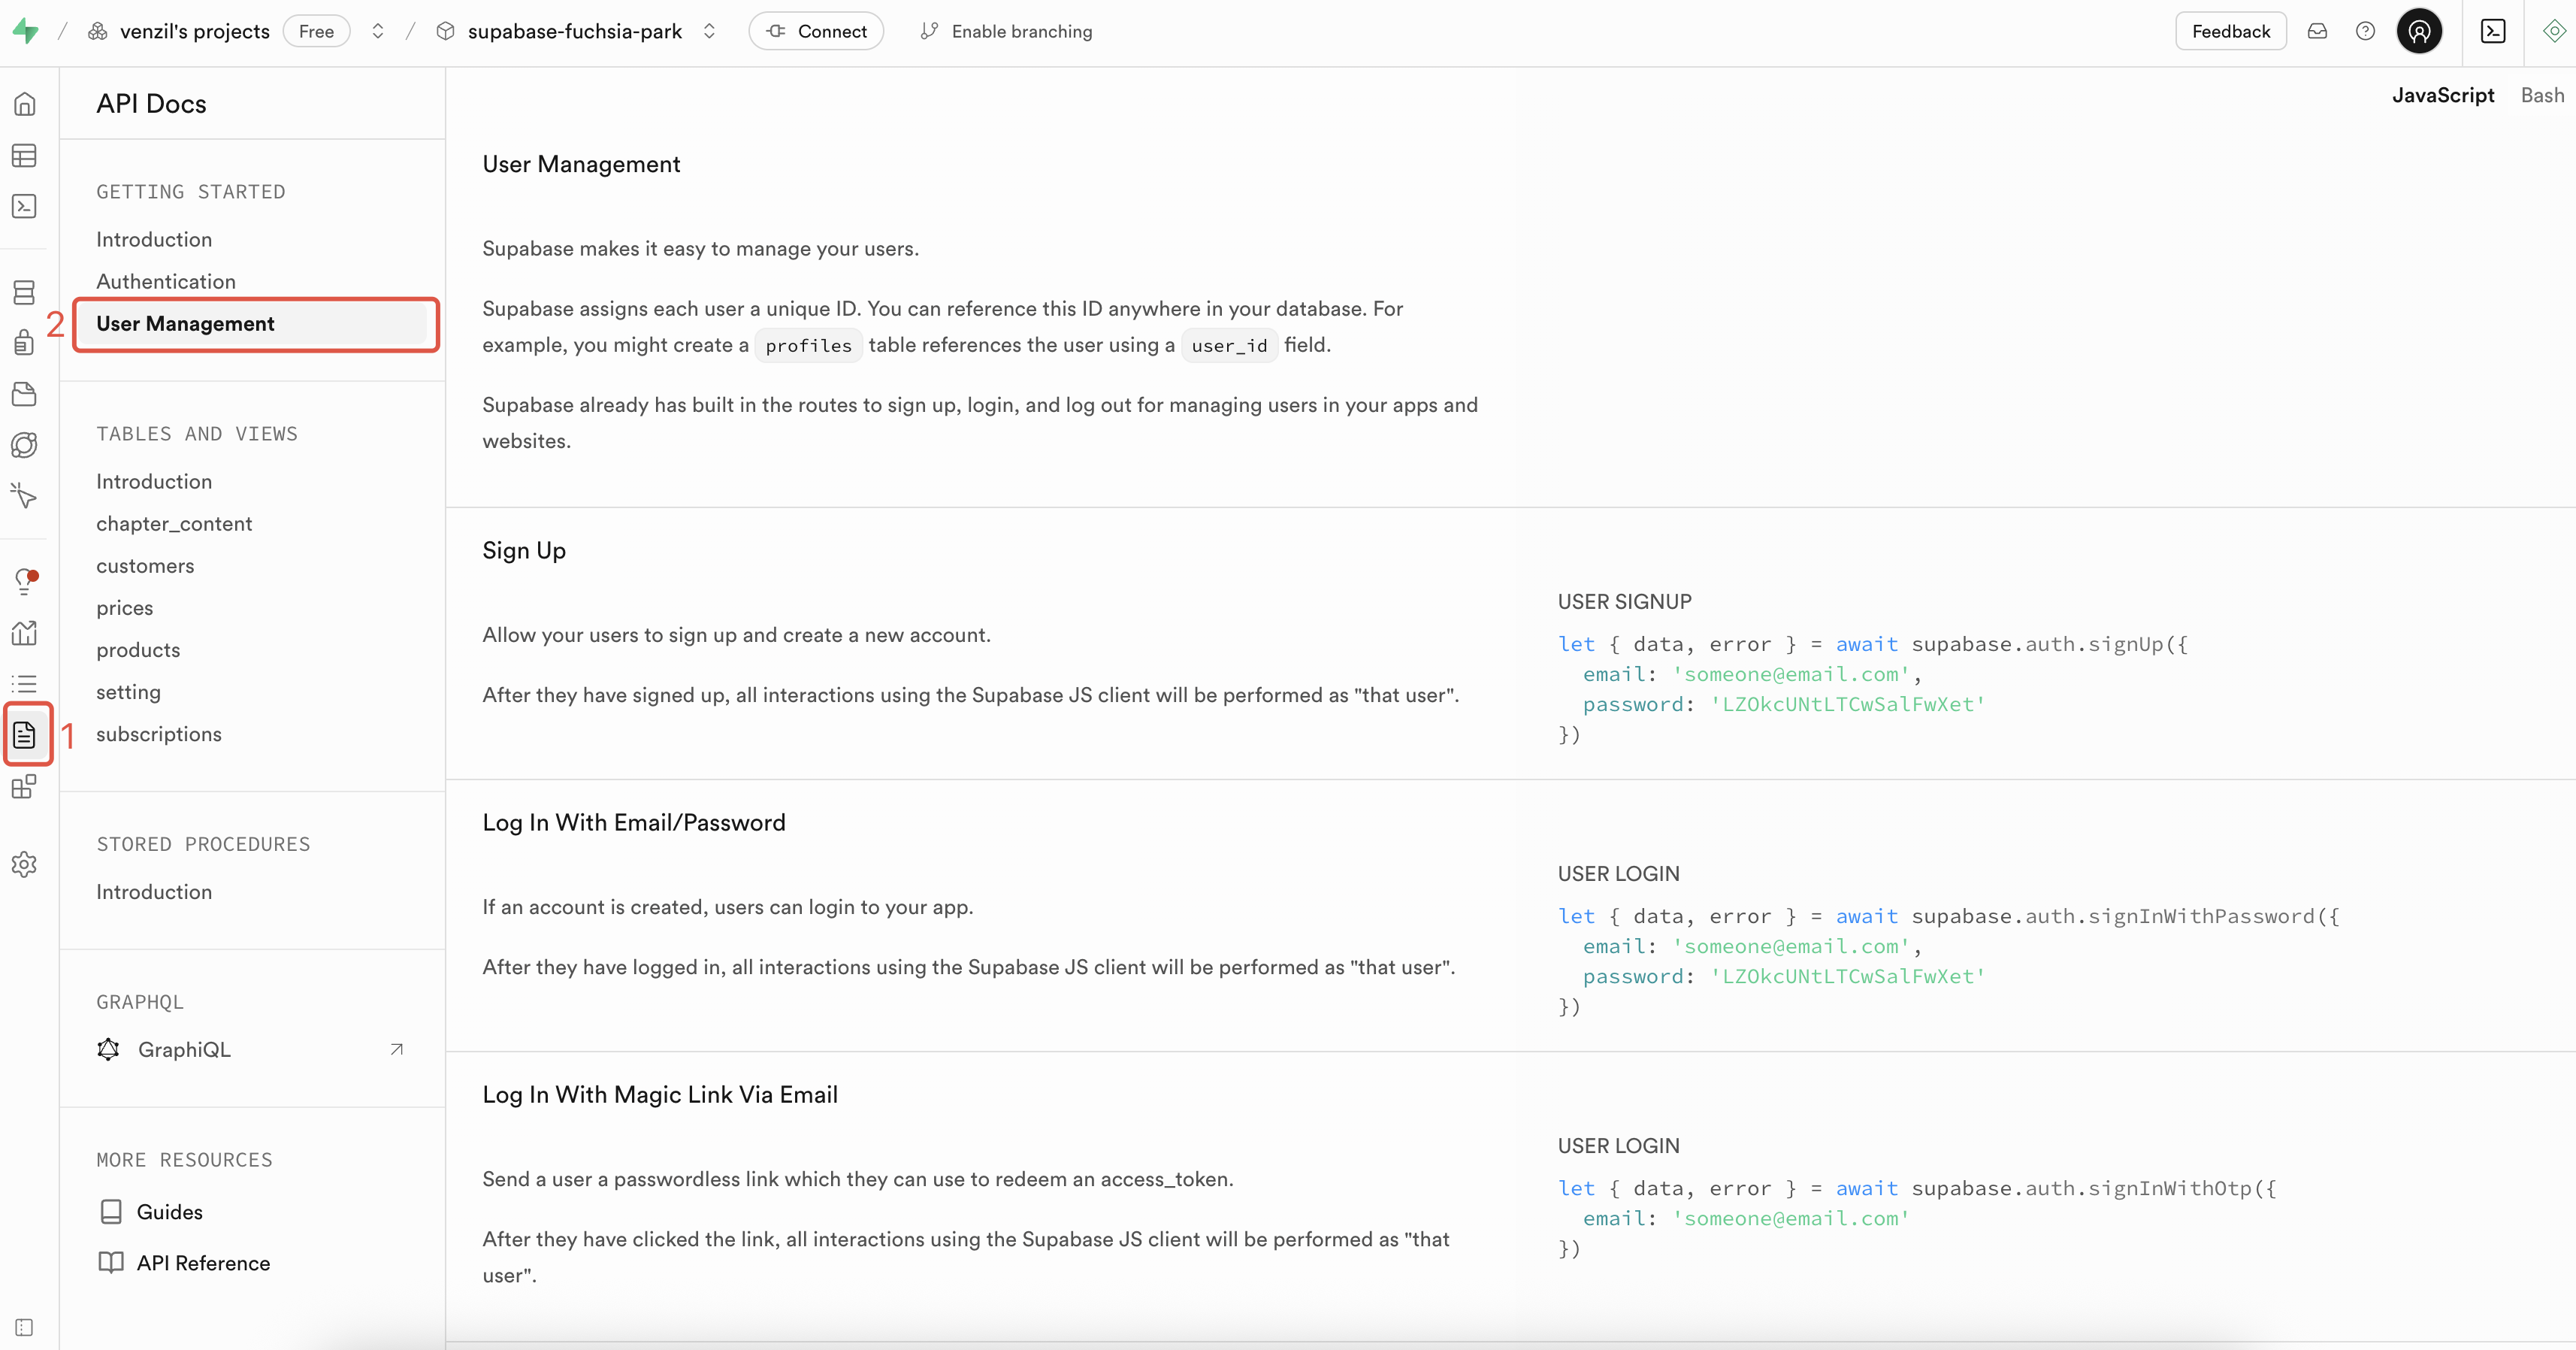
1. Supabase User Management Interface Description
The Supabase platform provides comprehensive preset API interfaces for user management. You can select the
User Management tab in the API Docs section of the left navigation pane to read these API documentation.
This comprehensive API system covers primary user management needs. In subsequent chapters, we will discuss how to call these Supabase APIs in an edge function environment to achieve a complete user management process in a Next.js application.
2. Calling Supabase User Management Interface Via Edge Function
Before starting practice, please first refer to the EdgeOne CLI documentation to understand the local development and debugging process of edge functions. This guide will develop code based on the Supabase Auth Starter template to demonstrate how to achieve core features of user identity management, including registration, login, account cancellation, and password management.
First, create a
.env file in the project root directory of your Next.js project and configure the following required environment variables:# supabase connection parametersSUPABASE_URL=https://xxxxx.supabase.coSUPABASE_ANON_KEY=xxxx# local dev vars# Frontend startup addressFRONT_END_URL_DEV=http://localhost:5173/# Backend edge function addressVITE_PUBLIC_API_URL_DEV=http://localhost:8088/DEV=true
Develop locally to start the project. You can execute
npm run dev in the command line to launch the frontend. After the frontend runs successfully, click New Terminal, and then execute edgeone pages dev --fePort=5173 in the new command line interface to start the edge function backend service.
Under the
functions folder, you need to create two sets of APIs: the auth authentication core feature API and the lib basic function.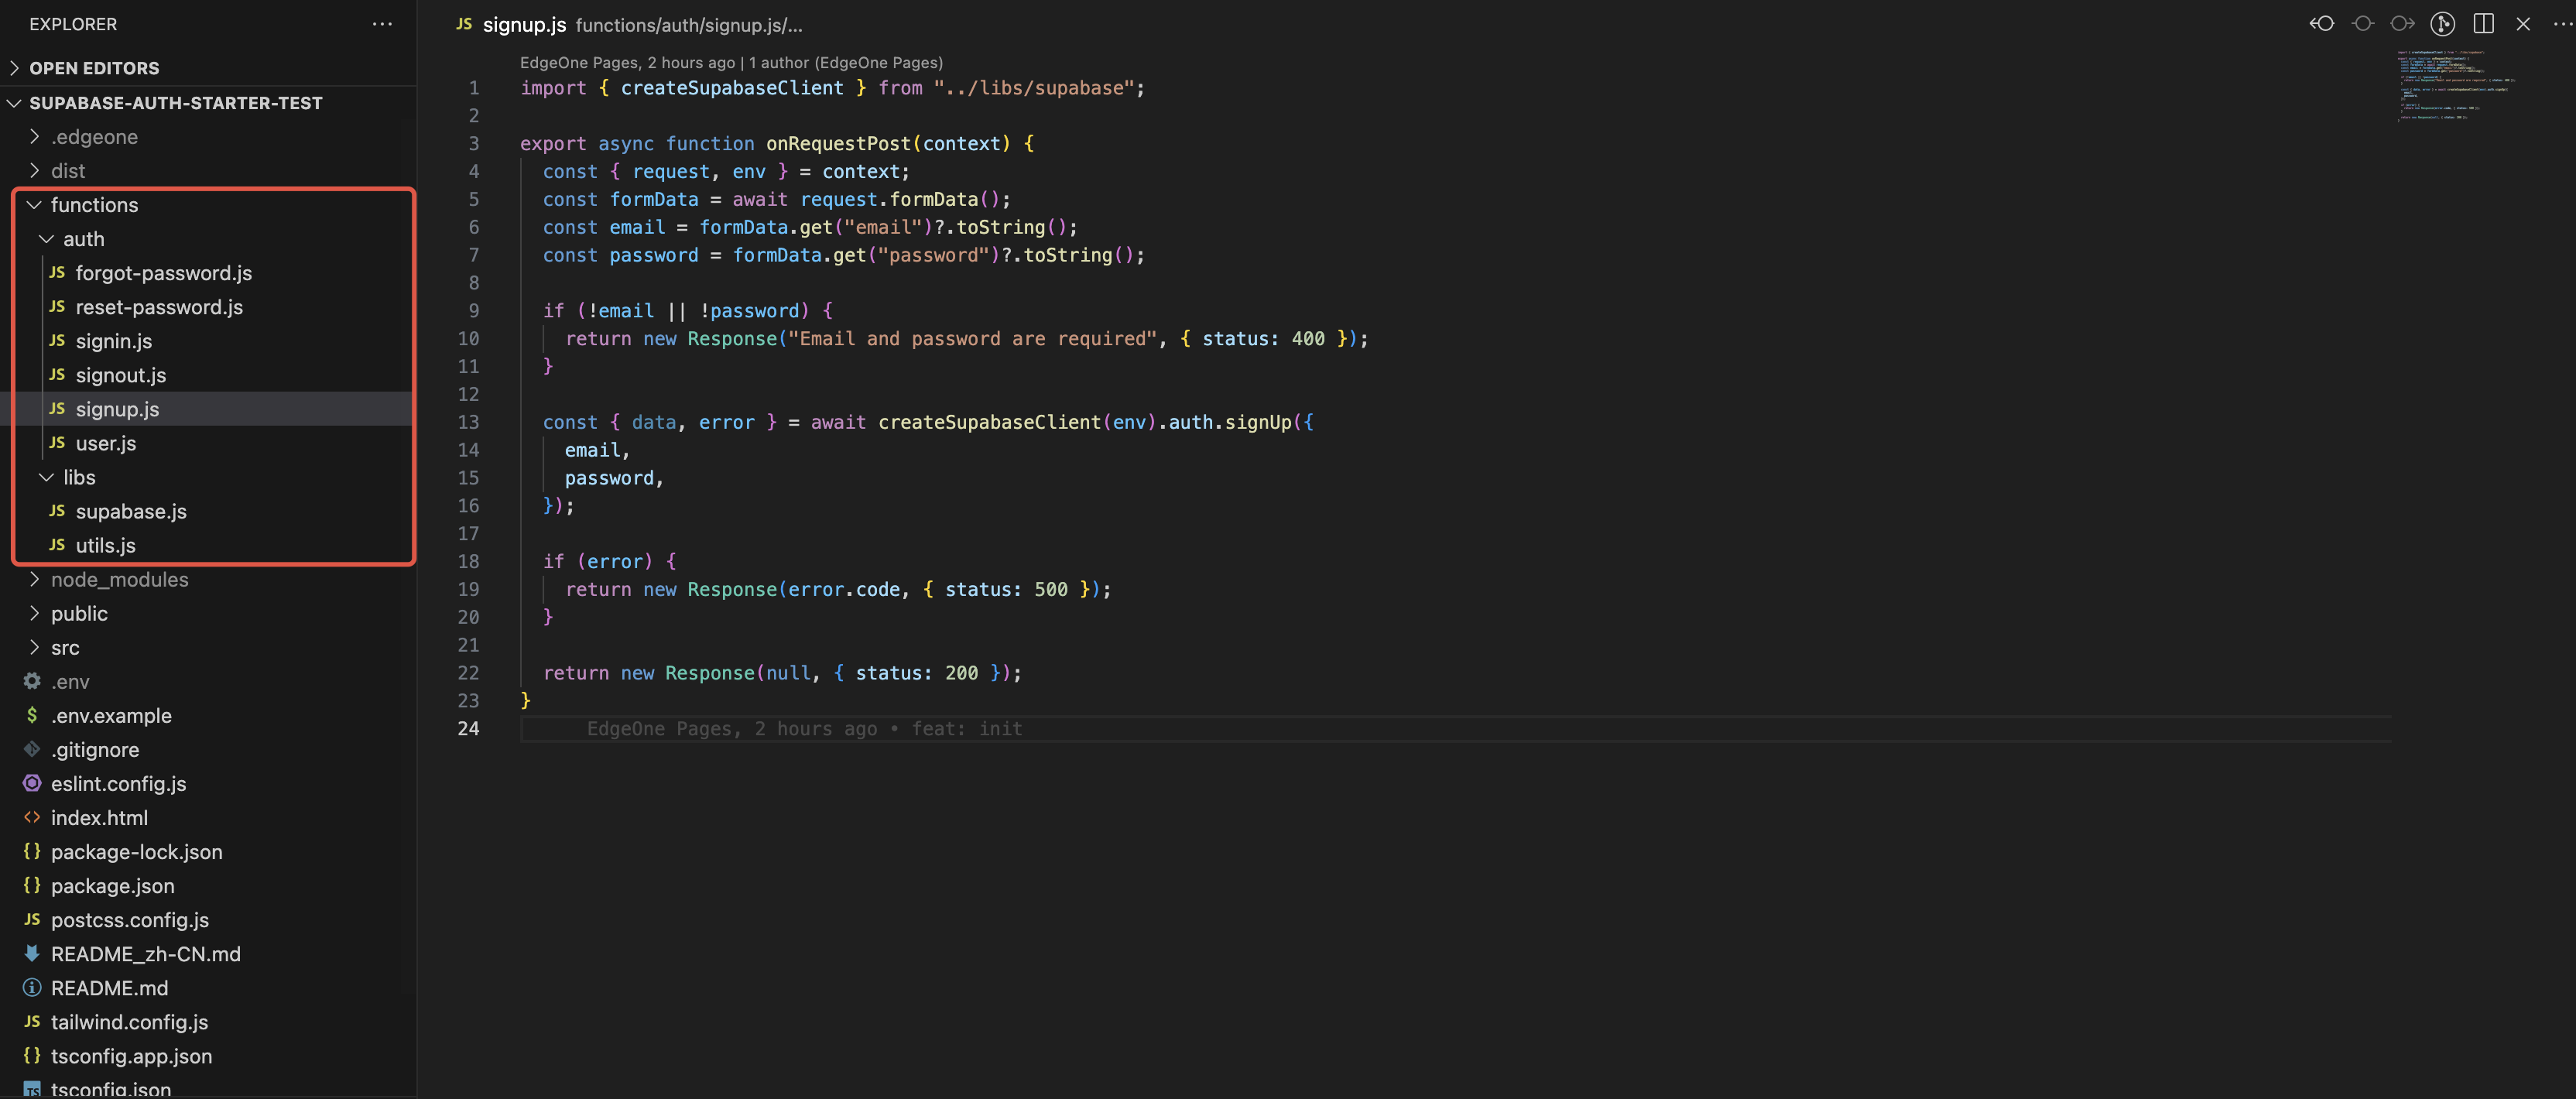
Create a Supabase client configuration in the
lib basic feature function.import { createClient } from "@supabase/supabase-js";export const createSupabaseClient = (env, access_token) => {return createClient(// connection parametersenv.SUPABASE_URL,env.SUPABASE_ANON_KEY,{// Authentication configurationauth: {autoRefreshToken: false,persistSession: false,detectSessionInUrl: false},// Global configurationglobal: {headers: access_token ? {Authorization:Bearer ${access_token}} : {}}});}
In
auth, taking the user registration feature as an example, we can implement customized data validation logic at the API layer. First, strictly validate the email format and password strength, then import the createSupabaseClient utility function and call the await createSupabaseClient(env).auth.xxx() method sequence to seamlessly connect to the services provided by Supabase.import { createSupabaseClient } from "../libs/supabase";export async function onRequestPost(context) {const { request, env } = context;const formData = await request.formData();const email = formData.get("email")?.toString();const password = formData.get("password")?.toString();if (!email || !password) {return new Response("Email and password are required", { status: 400 });}const { data, error } = await createSupabaseClient(env).auth.signUp({email,password,});if (error) {return new Response(error.code, { status: 500 });}return new Response(null, { status: 200 });}
Other authentication features such as login, account cancellation, and password management can adopt similar edge function implementation modes. It is advisable to refer to the provided template code to understand the implementation of these features.
Deploying to EdgeOne Pages
This section will provide a detailed introduction to deploying developed projects to EdgeOne Pages.
1. Upload the Project to Git (Ignore This Step If Creating a Project From a Template)
Create a new repository
Log in to your GitHub account and enter
Dashboard.Click the
New button in the upper right corner.Enter the repository name, description, and other information.
Select repository visibility (Public or Private)
Click
Create repository to complete the creation
Upload local project
Initialize Git in the local project directory (if uninitialized)
Submit and push the project files to the newly created remote repository
Then collocate the remote repository locally and upload the local code.
# Push your code to your git repository (e.g. GitHub, Gitee).git initgit add .git commit -m "First commit"git remote add origin "your Git address"git push -u origin master
Through these steps, your project code will be successfully hosted on GitHub, making necessary preparations for subsequent deployment.
Enter the EdgeOne Pages console, upload your own project to Github, click
Create project -> Import Git repository, and select your project.
2. Fill in Environment Variables
Fill in
Environment Variables on the deployment settings page. If it is a custom deployment, Variable name should be consistent with the .env in the local project.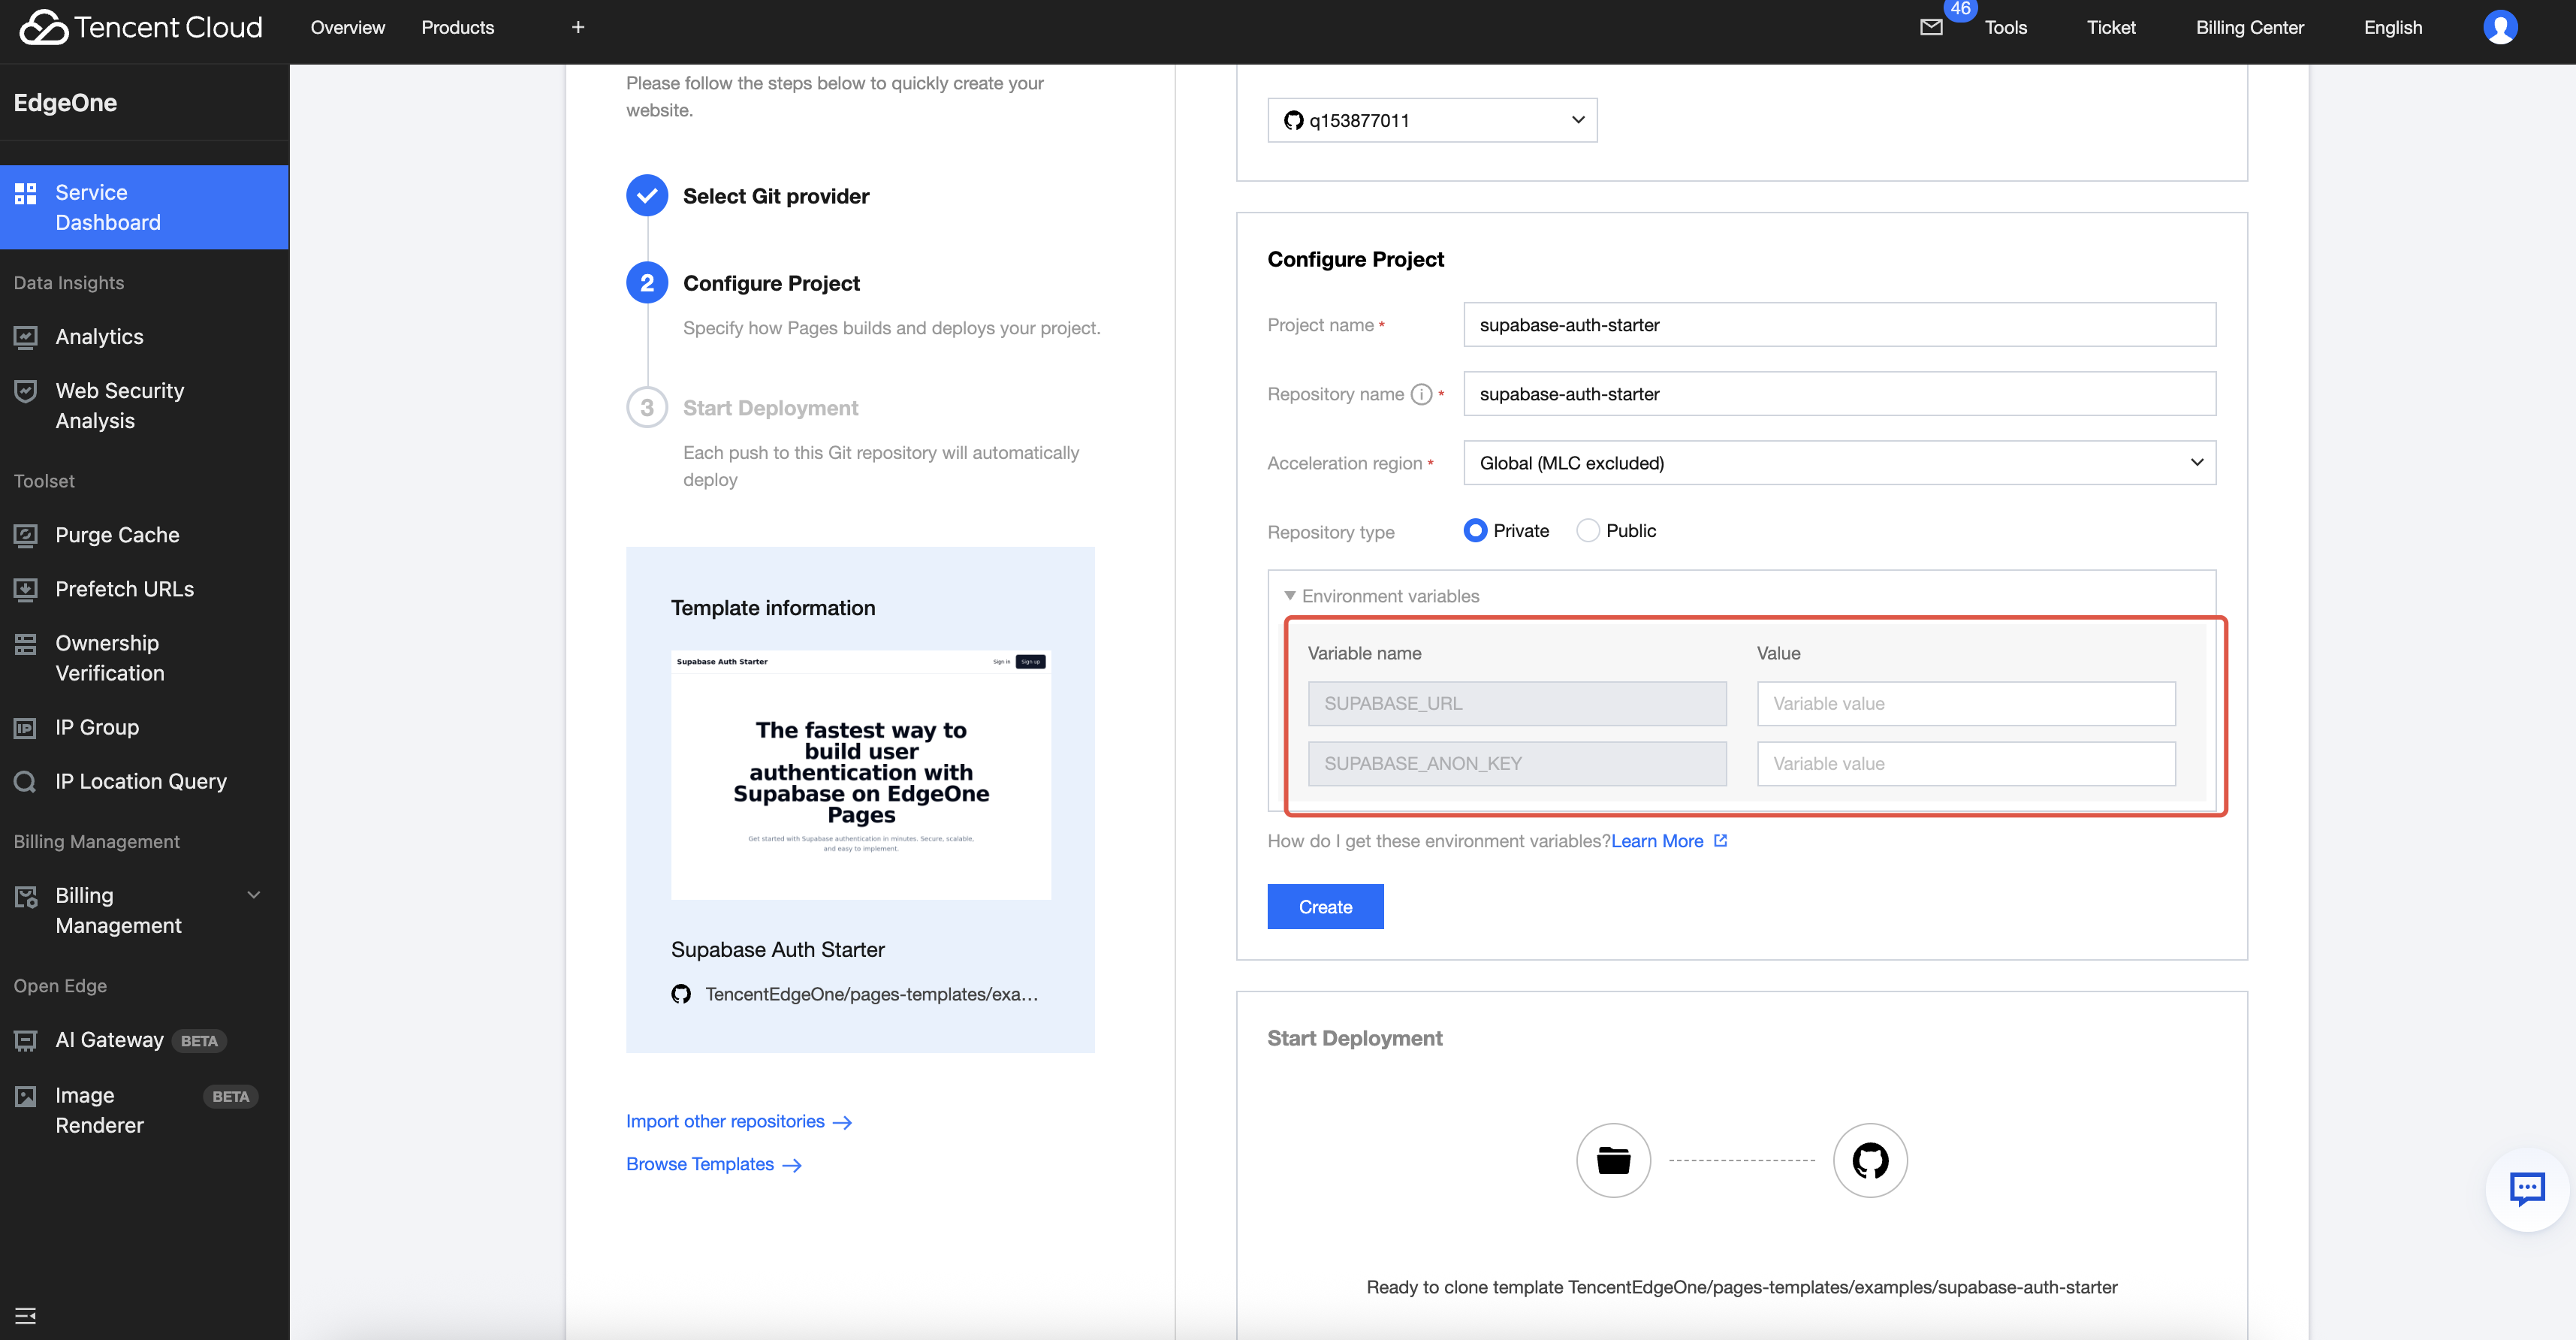
When "Congratulations!" appears, it indicates deployment success. The deployment will take approximately 1-3 minutes. If the project fails during deployment, you can modify the project based on
Build Logs and Build Summary, or contact staff to resolve the issue.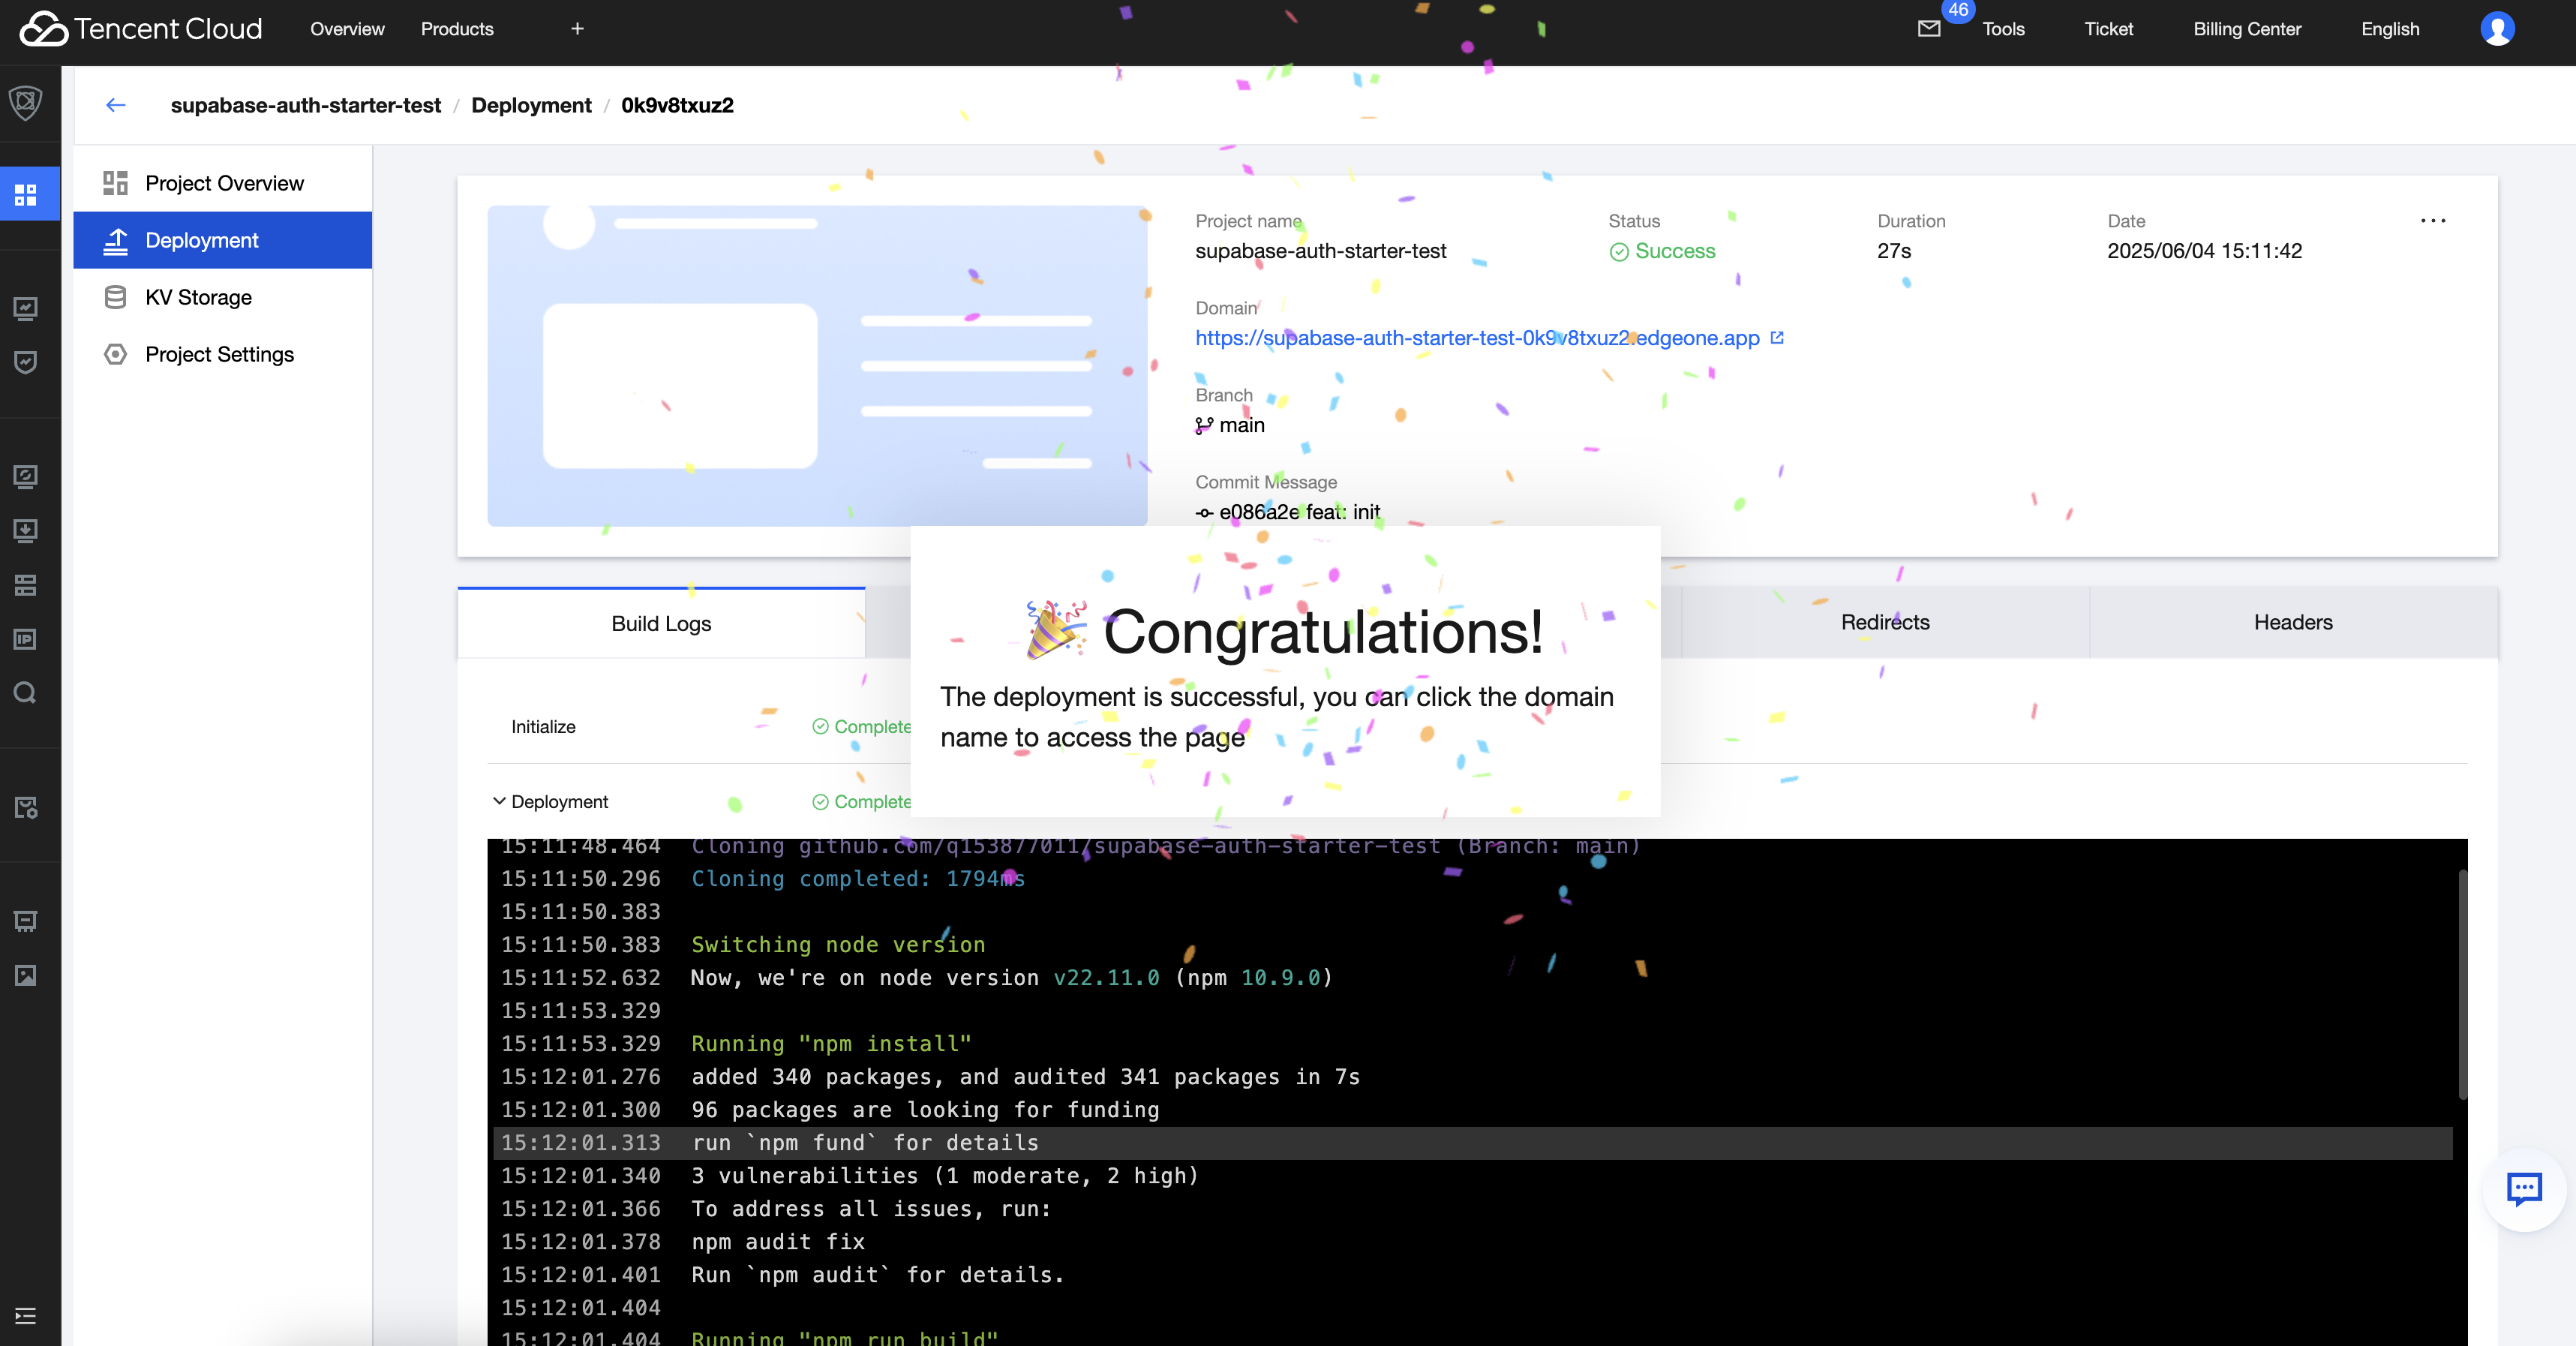
After successful deployment, go to the project homepage and copy
Domain.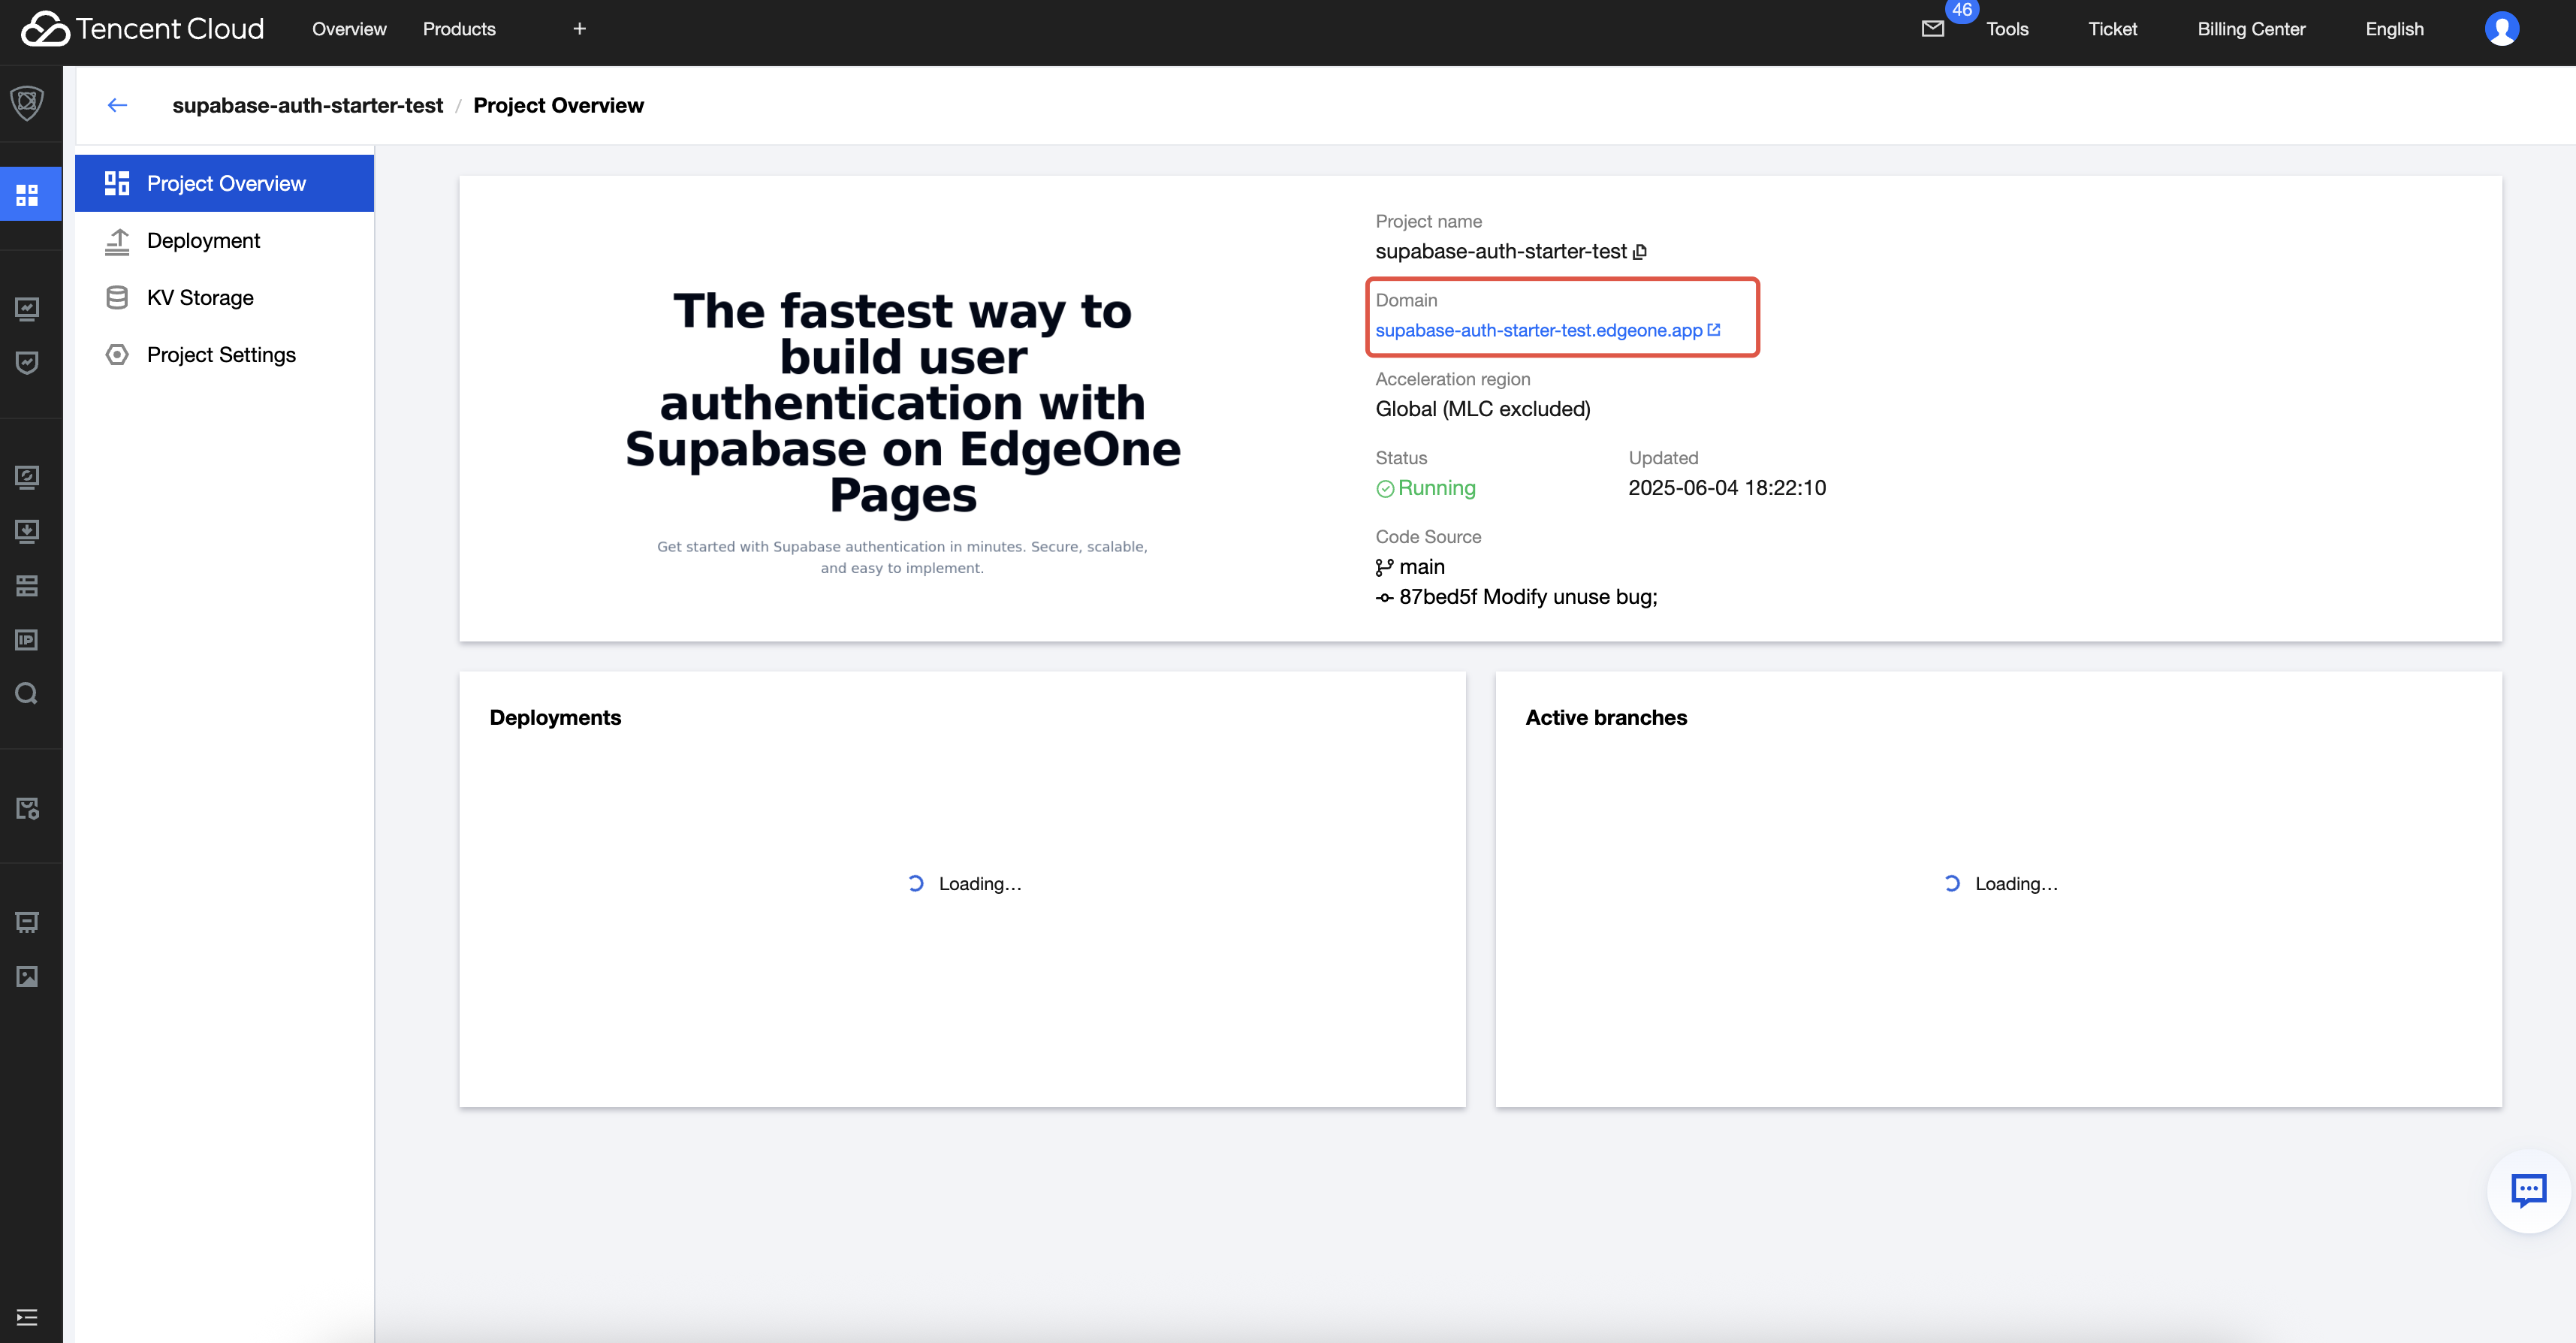
Next, access the Supabase Console and navigate to the URL configuration section. Copy your domain information into the
Site URL field so that users will be automatically redirected to your website homepage after completing the registration process.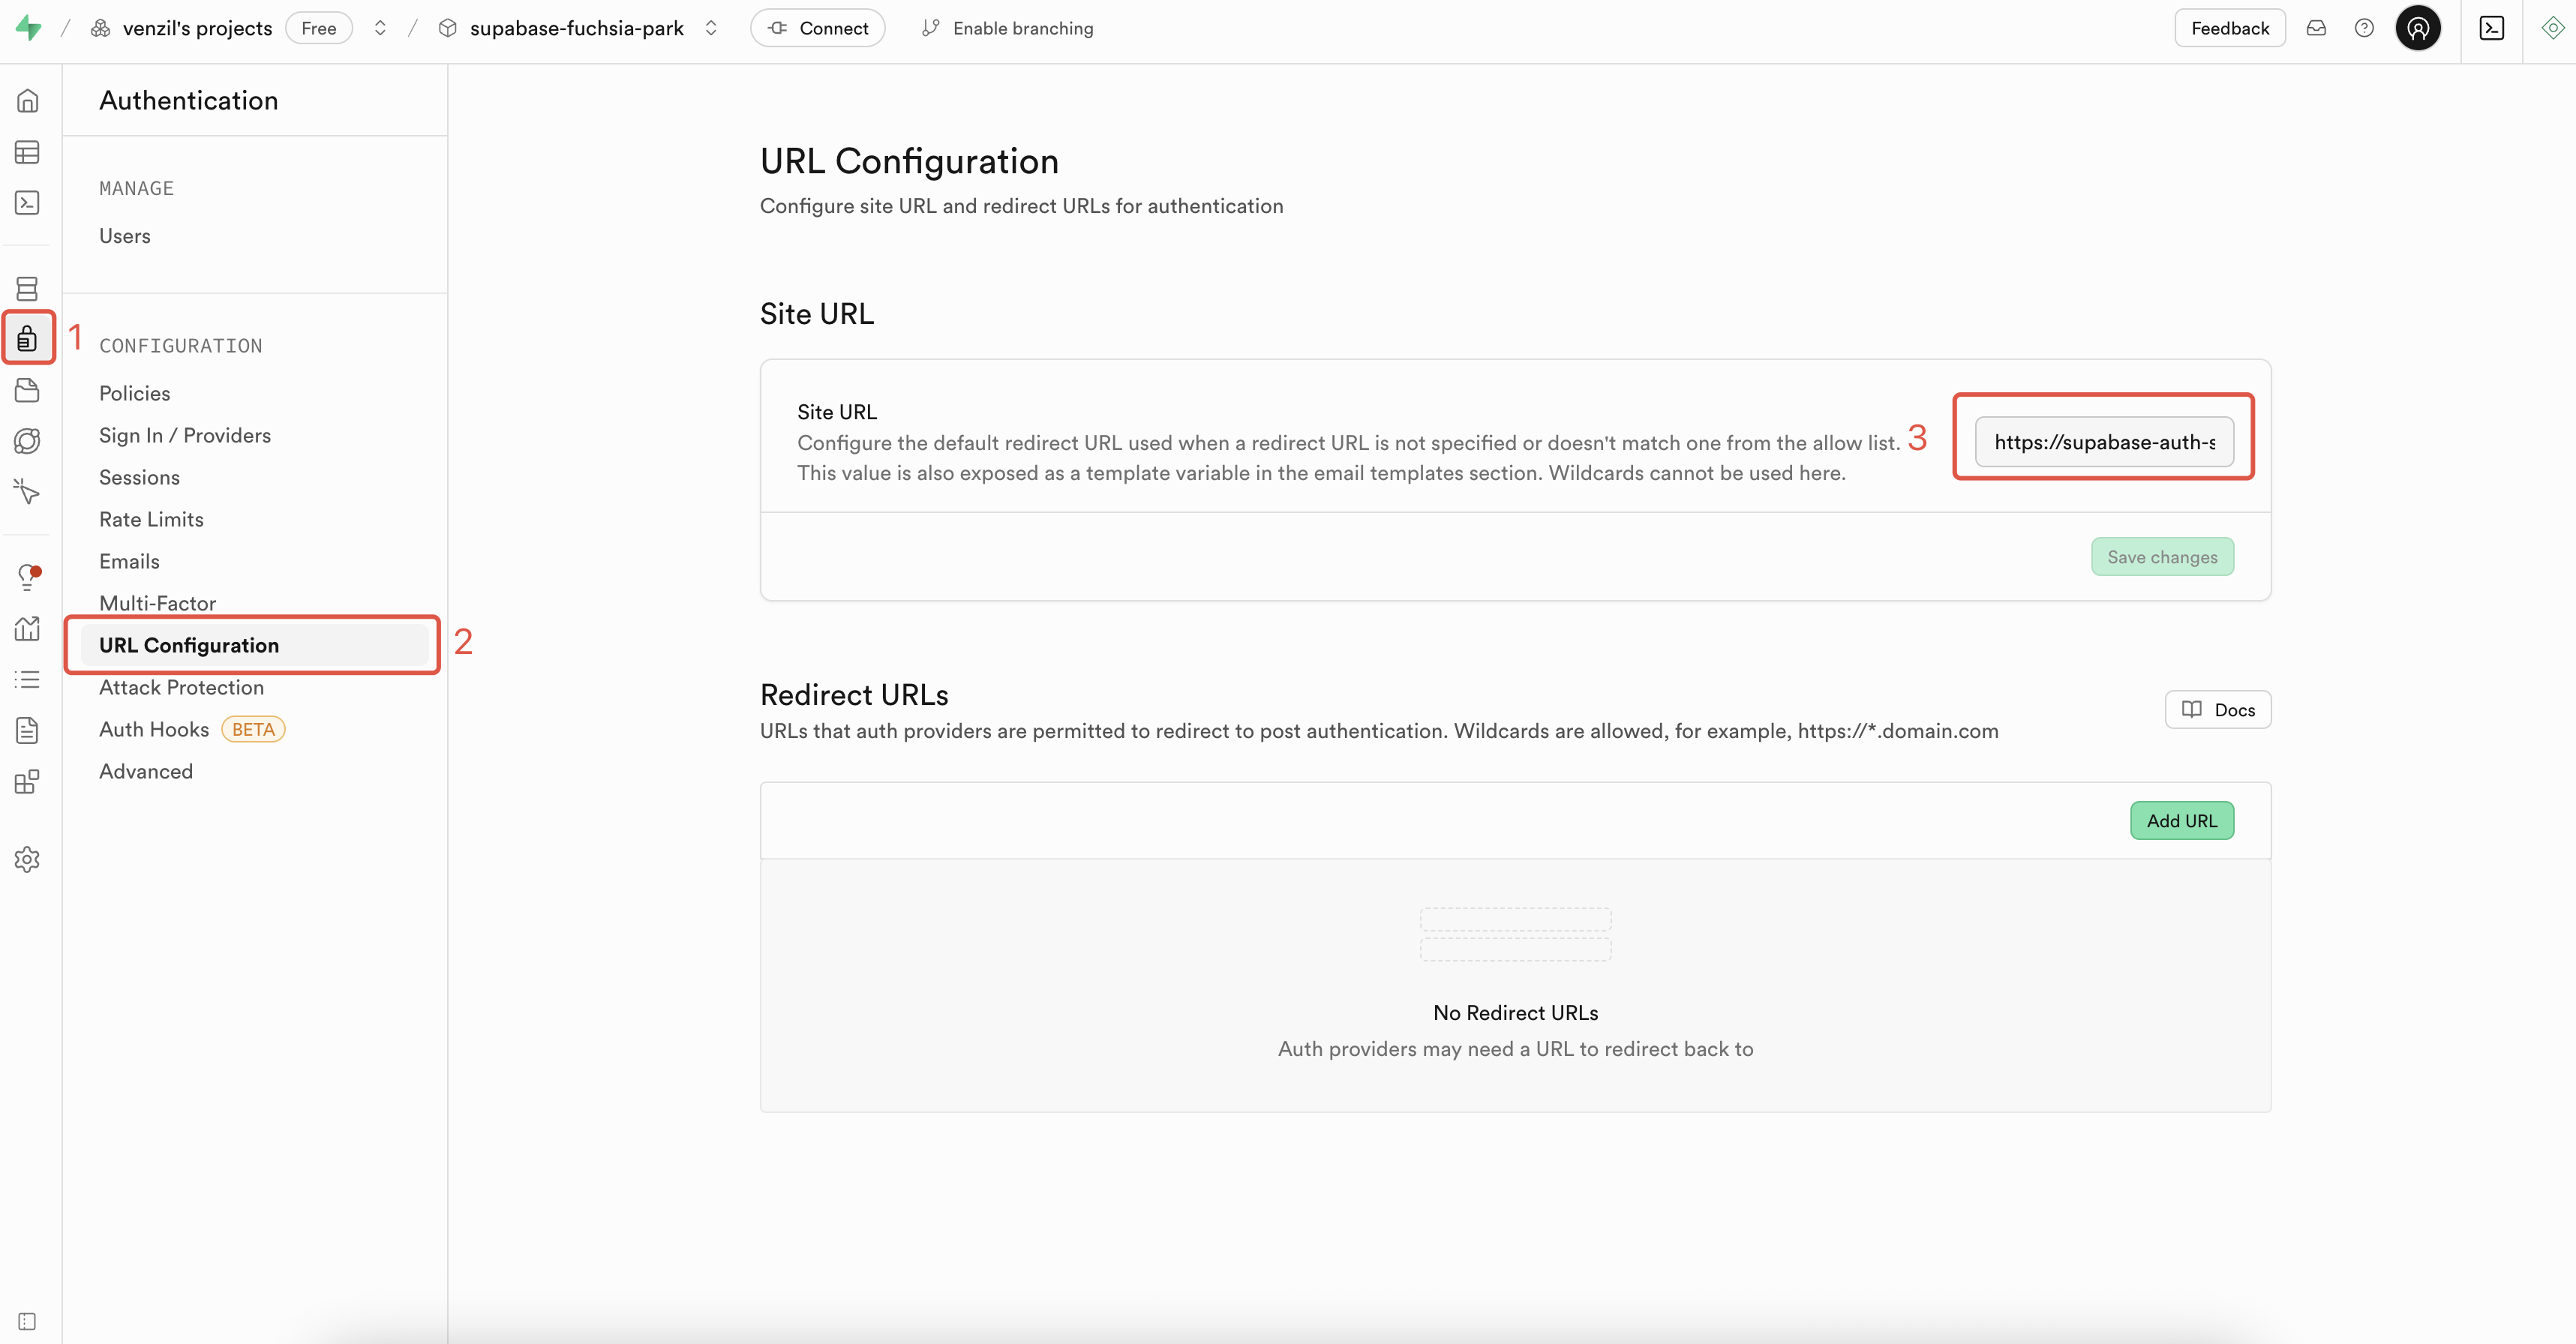
More Related Content
Detailed operations for Supabase integration: Supabase Integration Guide
More Supabase Auth features: Supabase auth documentation
Learn about EdgeOne CLI usage: EdgeOne CLI Instructions
Learn more about edge function usage: Edge Function Usage Documentation