Verify in the test environment and then release to the production environment
This article will introduce how to configure and verify in the test environment after creating a new version and then release it to the production environment.
Note:
This feature only supports sites linked to Standard and Enterprise Edition packages.
Overview
Assuming your current domain is www.example.com, the current effective version of the Layer 7 acceleration configuration group is Version 0. Now, you need to change it to Version 1. You should first verify the configuration in the test environment before releasing it to the production environment.
Note:
The information in the following text and images is sample data. Do not use it.
Prerequisites
1. Add the site example.com according to the Quick Start guide and purchase the EdgeOne Enterprise package.
2. Version management has been successfully enabled. For how to enable version management, see Enabling Version Management.
4. Version 1 has been created. For how to create a version, see Create A Version.
Directions
Step 1: Releasing Version 1 to the Testing Environment
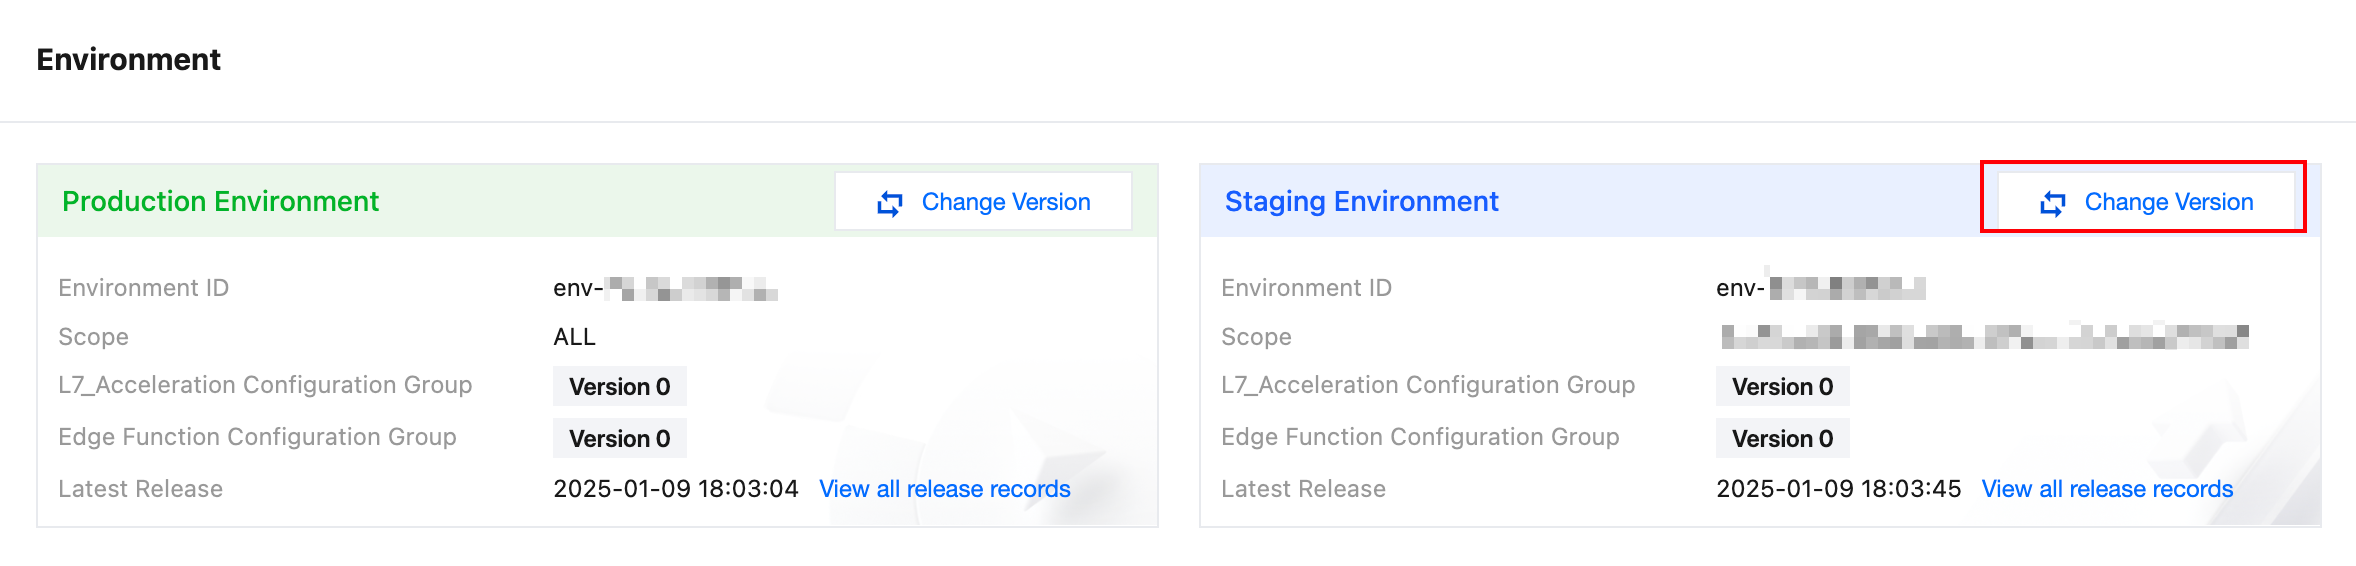
1. Log in to the Tencent Cloud EdgeOne console, enter Service Overview in the left menu bar, and click the site to be configured under Website Security Acceleration.
2. On the site details page, click Version Management in the left navigation.
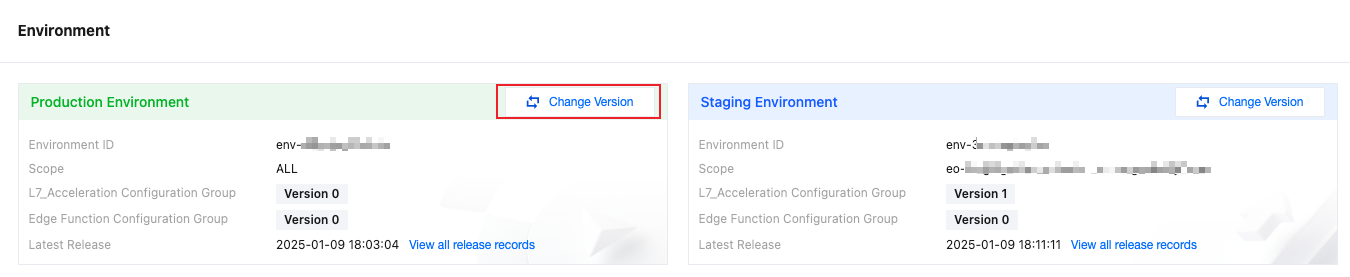
3. On the Testing Environment page, click Change Version.
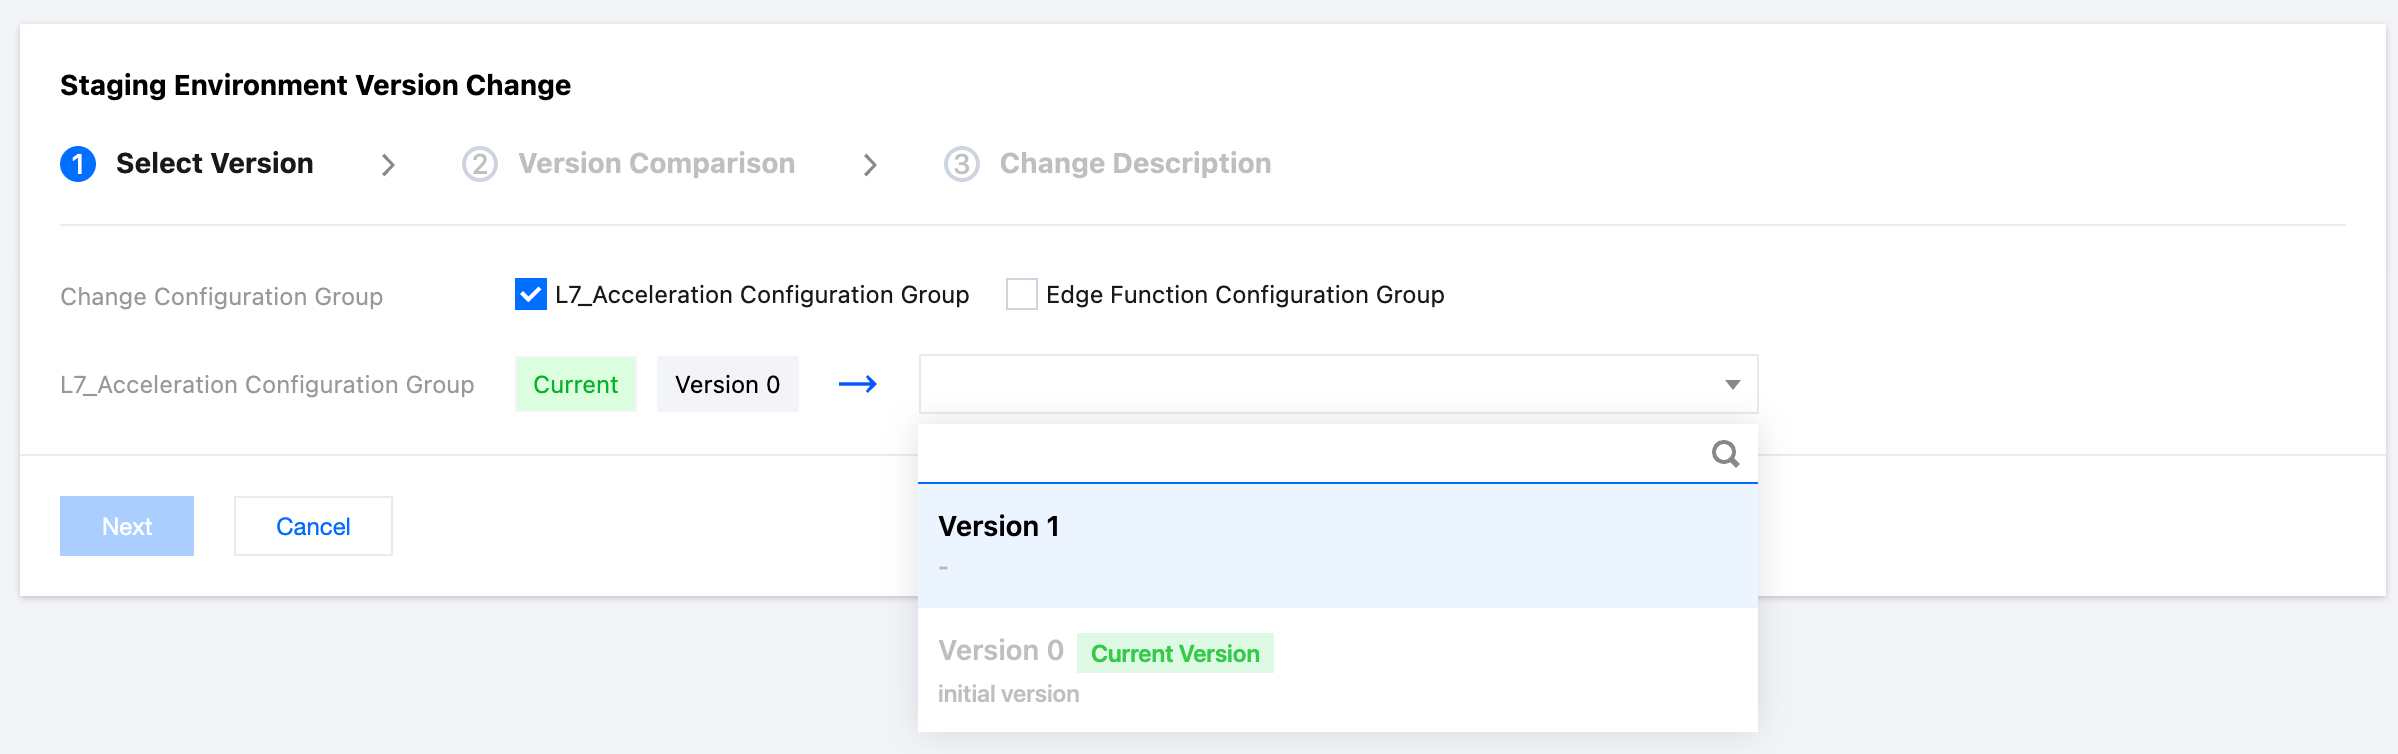
4. Please select the Version 1 you want to change, and click Next.
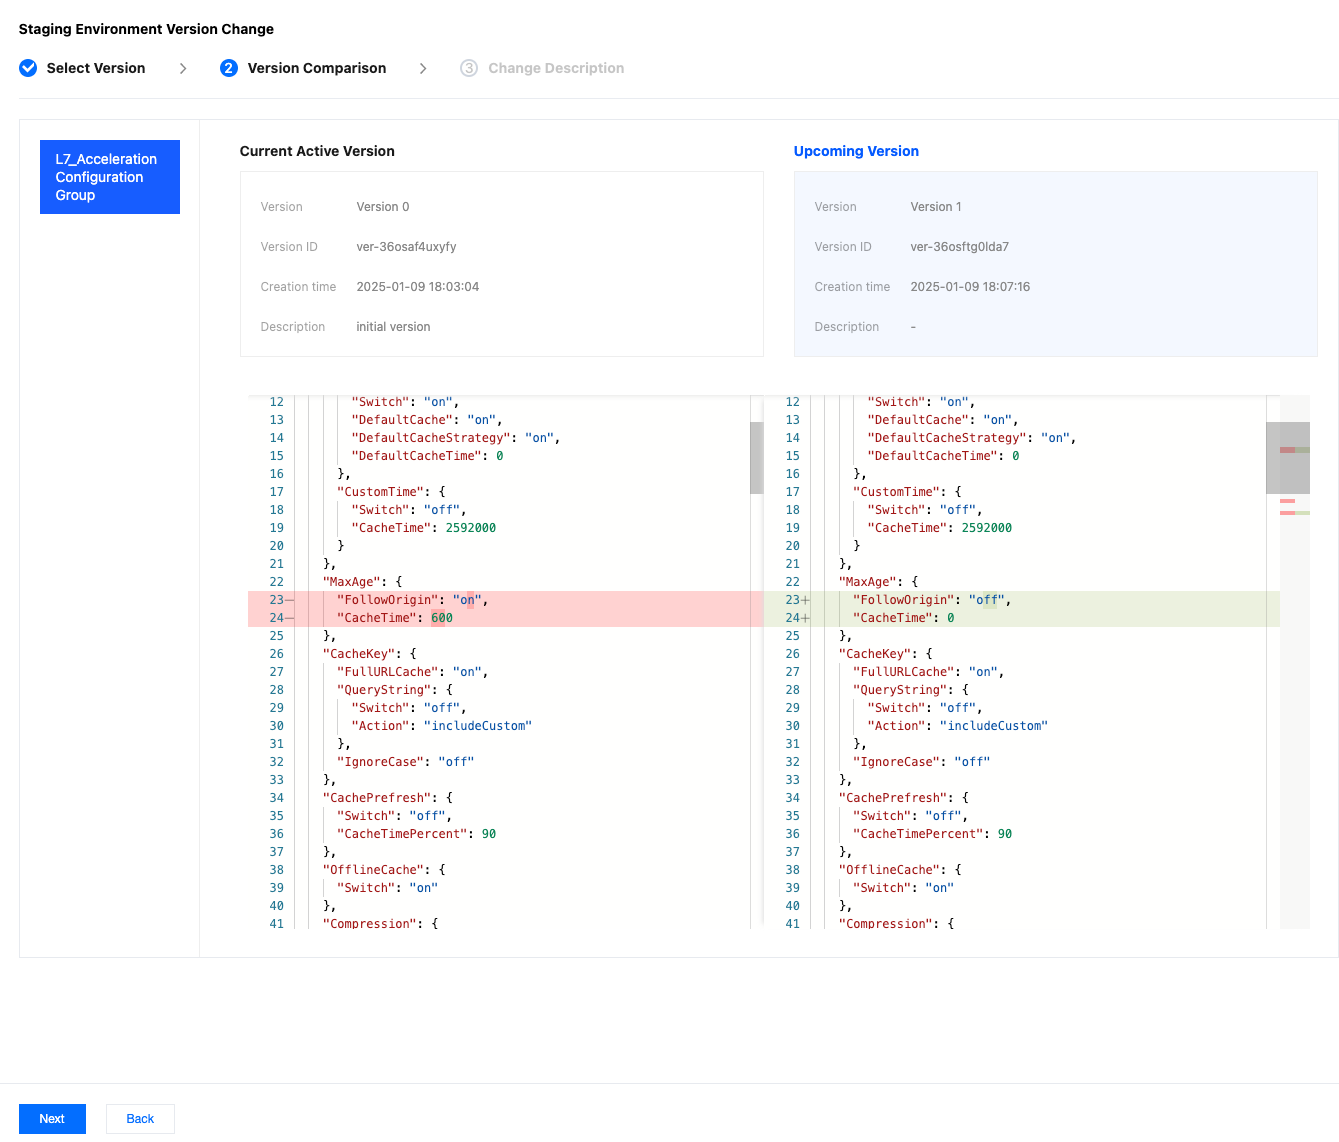
5. You can view the differences between the new version and the original version on the Comparison page to confirm whether the changes meet your expectations. If everything is correct, click Next.
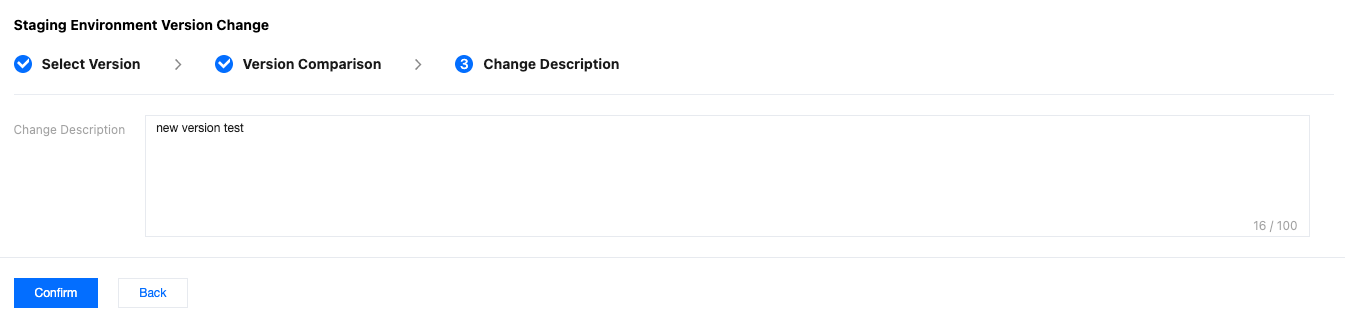
6. You need to fill in the change description, limited to 100 characters. After completing the entry, click Confirm Change.
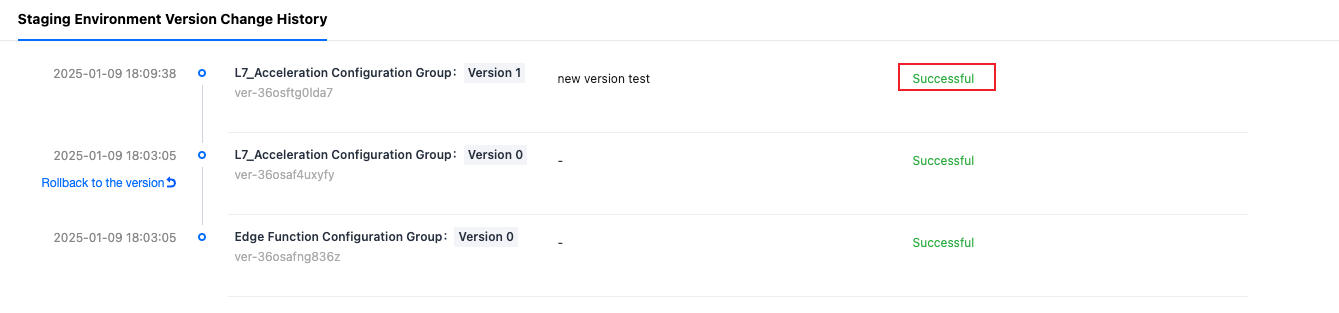
7. On the version change history page of the test environment, seeing a successful release indicates that the configuration of Version 1 has taken effect in the test environment.
Step 2: Conducting Simulated Access Testing
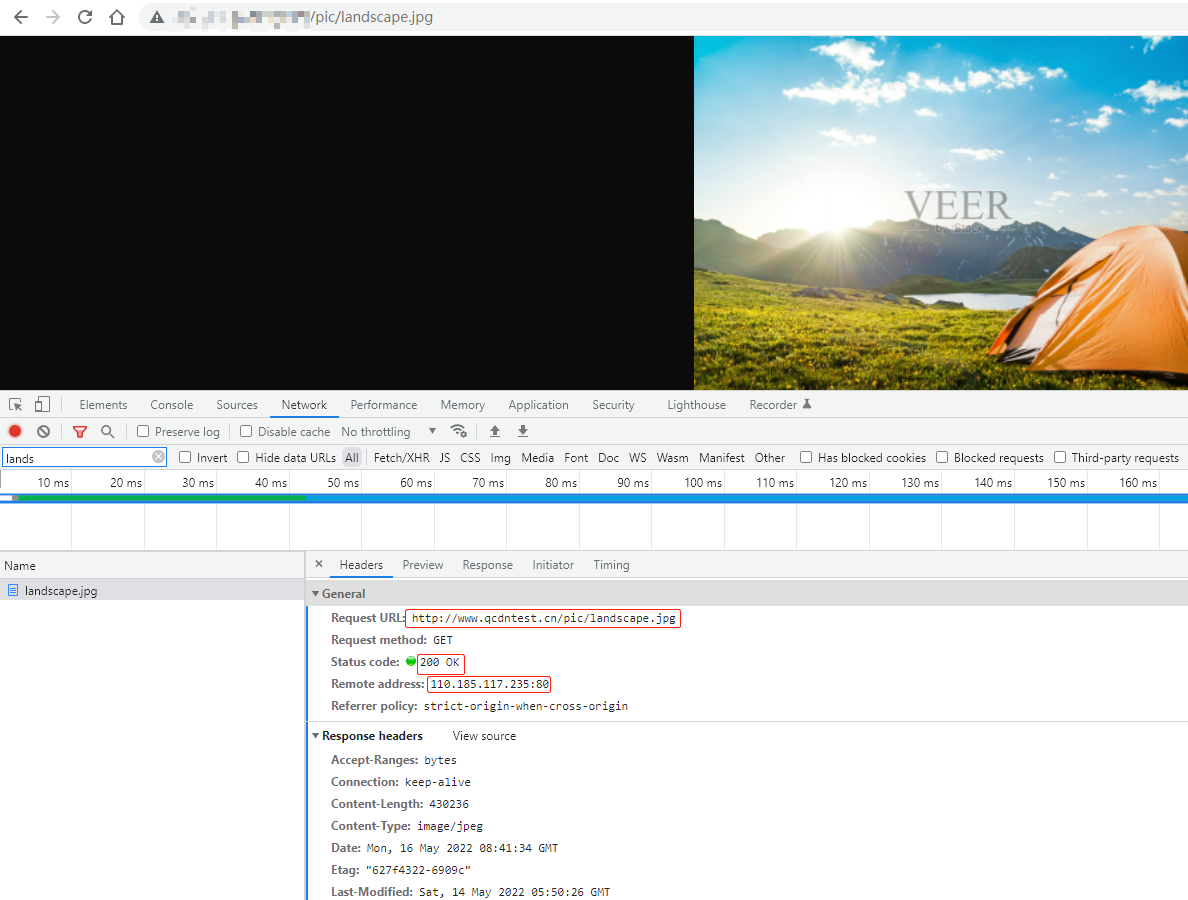
1. Click Version Management in the top navigation to return to the environment page. The CNAME address effective in the test environment will be displayed on the test environment page. You can obtain the access IP of the CNAME, modify the HOST file to bind the IP for simulated access testing.
2. According to the current assigned test environment CNAME address, you can refer to Verify Business Access, steps 4-5 in the document, to obtain and bind the test environment IP address to your local machine. When accessing the domain from your local machine, it will point to the test environment.
3. Conduct simulated access testing. If the response is normal and consistent with expectations, it indicates that the test environment is configured correctly.
Step 3: Releasing Version 1 to the Production Environment
1. After verifying the test is correct, release the version to the production environment. On the Production Environment page, click Change Version.
2. Refer to Step 1 items 4-7 to complete the version change in the production environment, and release version 1 to the production environment.