EdgeOne provides a client attestation SDK suitable for websites, which can be integrated into Web pages through frontend JavaScript to enable transparent verification for browser users.
Note:
To quickly integrate an imperceptible (invisible backend) attestation method into a simple Web service, you can focus on the SDK integration and attestation call part.
If the attestation method you use has user-visible interactive components, also focus on the interactive attestation adaptation part to provide a better interaction experience for the selected site.
If your site service uses both third-party domain name APIs, further focus on the CORS support: configure automatic attestation scope part to ensure the site can normally access third-party services.
Browser Compatibility
Client attestation SDK supports modern mainstream browser environments, including Mobile WebView. The earliest version recommended is as follows:
Chrome ≥ 90
Firefox ≥ 90
Safari ≥ 11
Edge ≥ 90
Mobile WebView (iOS ≥ 11, Android WebView ≥ 67)
Opera ≥ 76
Note:
Earlier browser versions (especially those that do not support Promise, Fetch, or Crypto API) may prevent the SDK from running normally.
Currently only support response integration SDK based on HTTPS protocol HTML page.
SDK Integration and Attestation Call
You can integrate the SDK into the webpage through any method. When the browser or WebView Component successfully loads the SDK, it will instantiate the EOClientSecurityKit global object in the window object. Developers can access the SDK API through this object to perform further configuration and control.
Inject JavaScript Via HTML Page (Recommended)
Manual Integration Adaptation
Injecting JavaScript via a way enables convenient integration with browsers and WebView, suitable for HTML pages provided by or proxied through the EdgeOne Platform, reducing manual intervention to the maximum extent.
Applicable Scenarios
WebView clients or browsers need to access HTML pages and API endpoints protected by EdgeOne. (HTML pages are distributed via EdgeOne proxy.)
Integration Method
No need to modify frontend code. Configure the injection rule in the EdgeOne console to enable JavaScript injection.
The client attestation SDK will be encapsulated in a JavaScript code snippet and automatically injected into the HTML content when responding to the specified HTML page. When the client continues accessing EdgeOne to load page content or initiate an AJAX request, the code snippet will run the corresponding attestation mechanism based on attestation rule requirements and automatically submit the attestation result. When used with seamless client attestation, the above attestation process requires no special adjustments or adaptations to page resources.
How SDK Works
After the SDK code is injected and loaded, it automatically intercepts XMLHttpRequest and fetch API calls in the page. The SDK transparently handles HTTP 428 challenges from the EdgeOne server and automatically adds the attestation token to subsequent request headers upon successful attestation, achieving automated client attestation.
Configure JavaScript Injection Range
You can use JavaScript injection rules to configure the injection range. By setting rule priority and match conditions, you can specify EdgeOne to inject JavaScript code fragments into specific resources or skip injection to satisfy both the best access performance and attestation effect at the same time.
Note:
Avoid enabling JavaScript injection in the following scenarios to prevent business exceptions:
Non-HTTPS page path
API path or path accessed by mobile terminal
WebSocket service path
Paths with edge function enabled
Paths with proactive feature recognition enabled
When configuring rules, you can specify conditions such as domain name (Host), URL path, and request method. For example, it can take effect only for a certain second-level domain or target a specific path (such as /checkout). In addition, you can match cookies or request headers as needed for high flexibility. Script injection is performed only when the request matches all conditions set.
Scenario Example: Automatic Deployment of JavaScript Injection for ALL HTML Pages on a Site, Attestation Browser Client
Attestation browsers and WebView clients by default when accessing ALL HTML pages on the e-commerce site www.buyexample.com, so that attestation policy can be deployed for API integration.
2. Before configuring in the production environment, use a test domain to deploy and test compatibility.
1. Log in to the EdgeOne console, enter Service Overview in the left menu bar, and click the configured site under Secure Content Delivery Network.
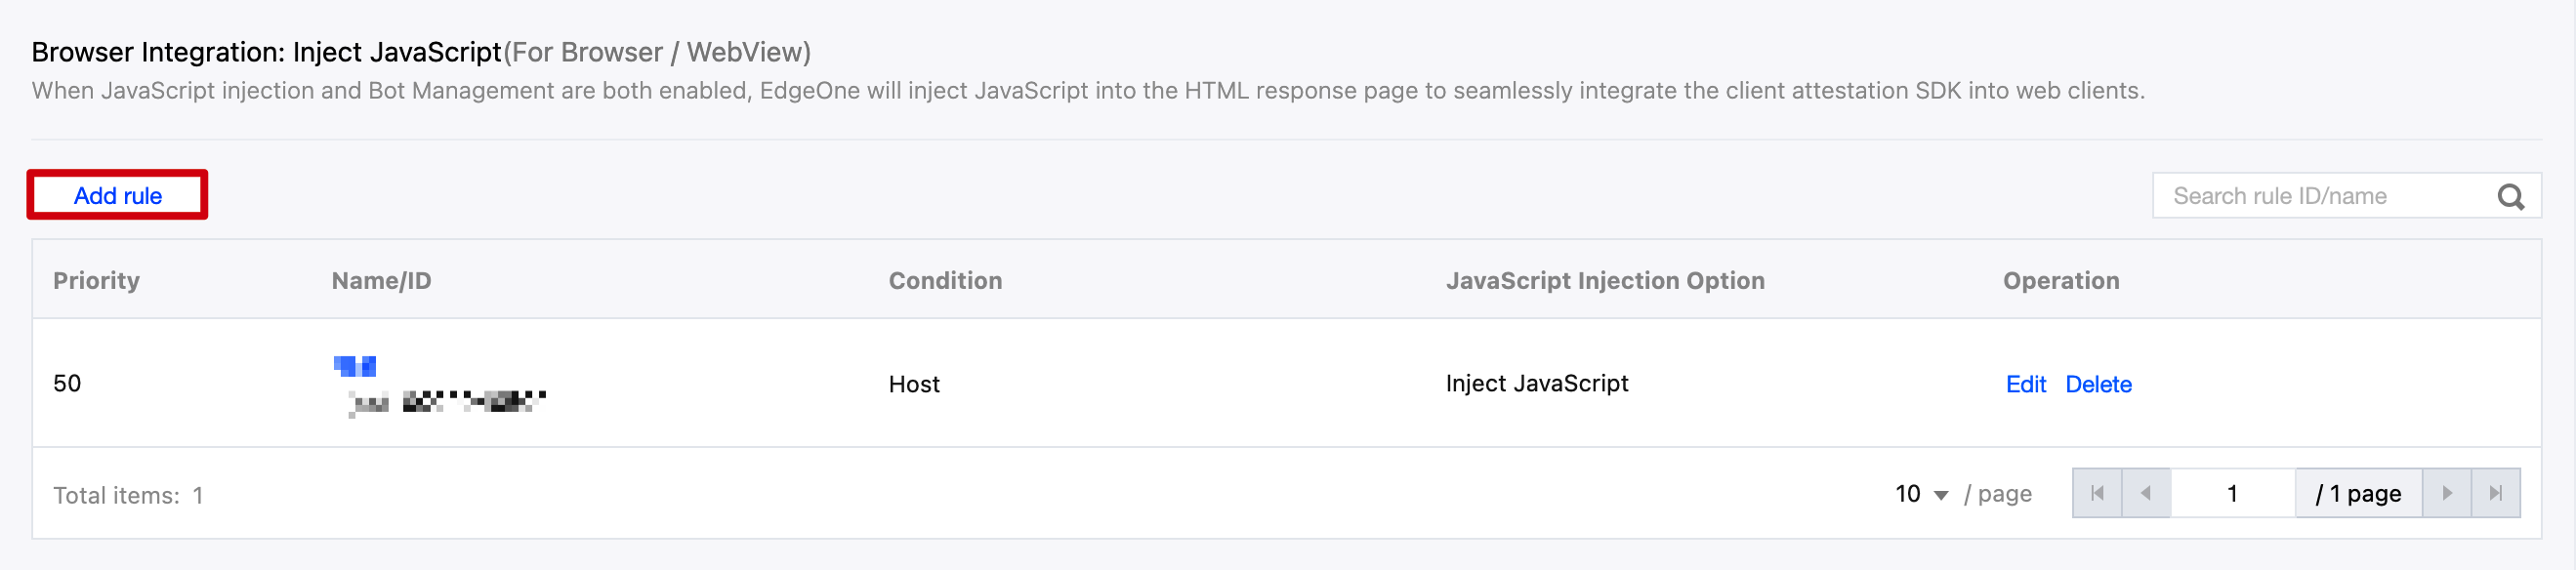
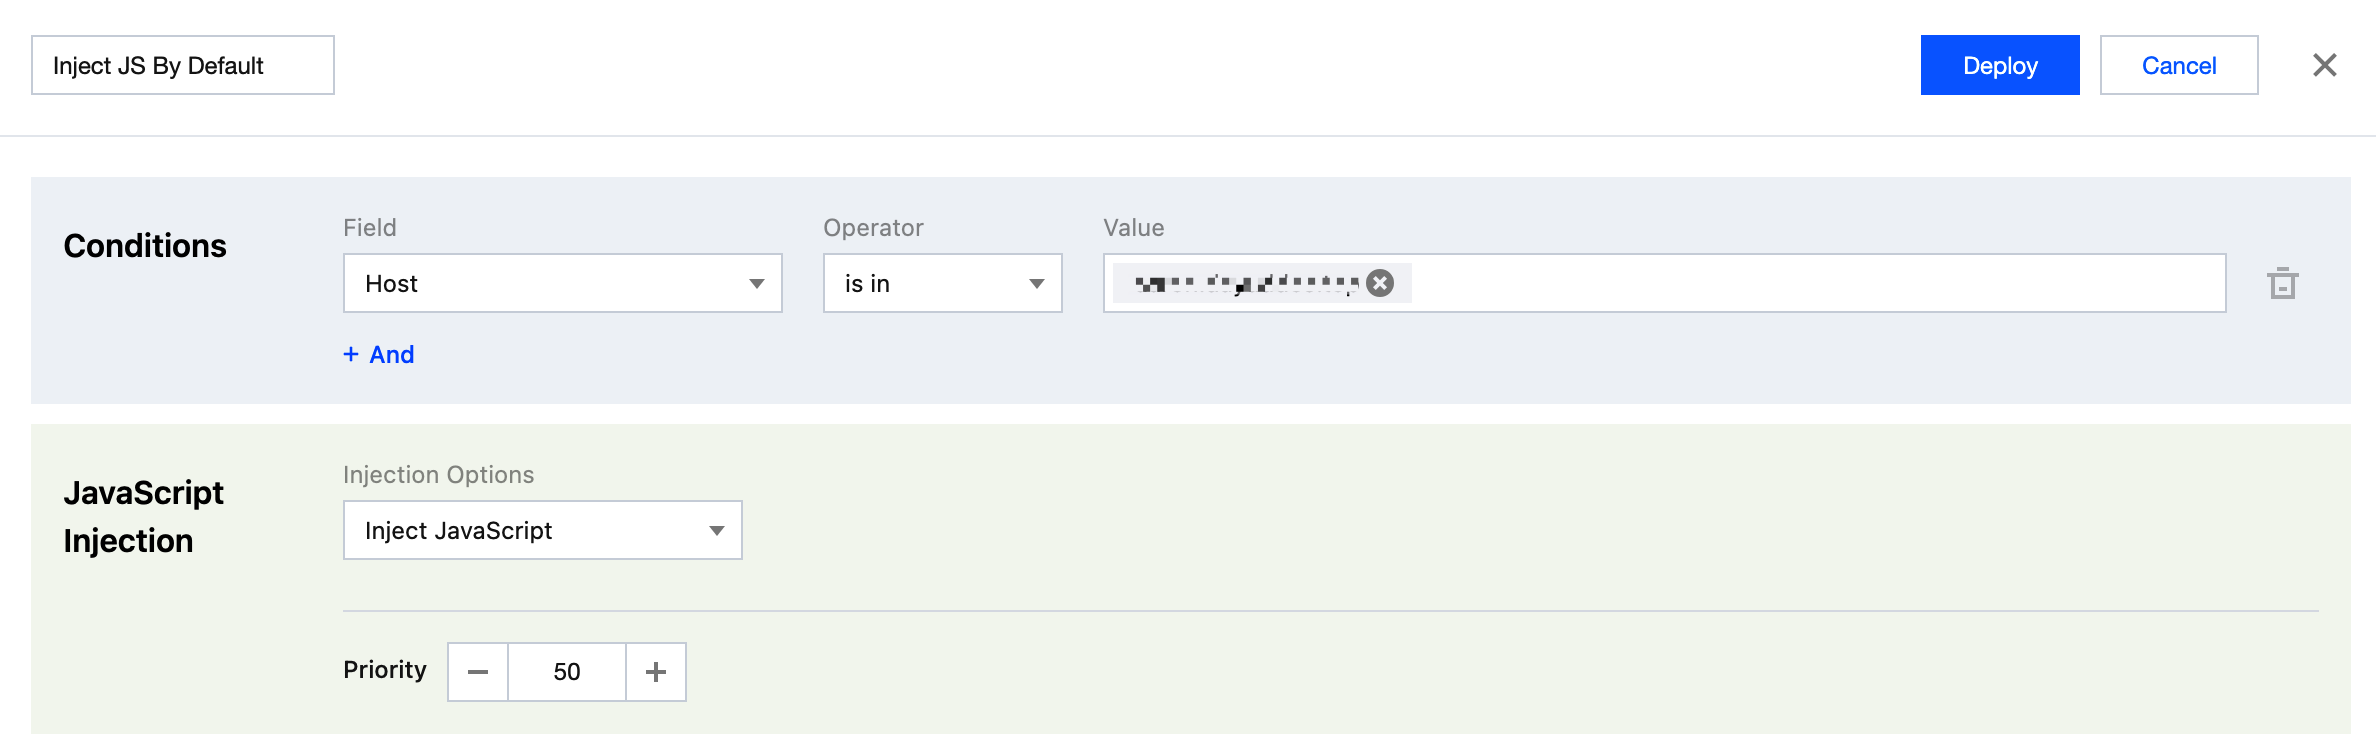
2. Click Security Protection > Client Attestation. Click the Attestation SDK Integration page, and select Browser Integration: Inject JavaScript under Add Rule to enter the rule configuration interface.
3. Fill in the rule name, configure the judgment condition and JavaScript injection options. For example, in the match condition options, select request domain matching; in the JavaScript injection options, select inject JavaScript. When a request matches multiple rules, the rule disposal method with higher priority (lower numeric value) takes precedence.
4. Click Save and Publish. The rules will deploy.
Suitable for specific scenarios where JavaScript injection cannot be performed on the EdgeOne Platform, such as local file loading or multi-CDN distribution.
Use Cases
Web pages load from local storage (file system, internal storage).
Static site files are distributed via multiple CDNs not controlled by EdgeOne.
Developers need finer control over SDK loading and initialization.
Implementation Approach
Ensure the client device can access the Internet. Insert the following <script> tag directly into the target HTML page <head> section (or before the <body> closing tag):
Note:
Please ensure the src attribute points to the correct SDK distribution address.
<script> After the tag loads and executes, eoclientsecuritykit.min.js will run and intercept requests sent via AJAX (XHR and Fetch API) on the page. The SDK will handle attestation challenges, obtain attestation tokens, and automatically attach them to subsequent requests, thereby protecting the API endpoint.
Adapting to Use Interactive Attestation (Optional)
In some client attestation scenarios, EdgeOne SDK requires specific runtime environment support, such as:
When the attestation process requires user interaction (such as verification code)
Perform compute-intensive tasks (such as Proof of Work)
In such scenarios, the SDK needs to load JavaScript in a runtime environment (WebView or browser). This section elaborates on how to adapt to these interactive attestation scenarios, including WebView usage methods and rendering options for attestation UI.
Running Interactive or JS-Based Attestation in WebView
When the authenticator needs to render an interactive CAPTCHA or run JavaScript-based encryption Proof-of-Work challenges, the SDK requires a WebView instance in the API parameters. This means developers must allocate a WebView instance in advance and pass it as an argument to the SDK when calling the attestation API.
Interactive Attestation Scenarios
Some authenticators (such as TC-CAPTCHA with embedded or pop-up interaction settings) require a WebView instance to render their interactive interface. The WebView instance will display the verification code webpage within the application, so it must be preset to ensure correct display.
Embedded Interactive Authentication
Popup Interactive Authentication
Display in fixed blocks on the device screen. To ensure the UI displays correctly without affecting user experience, the developer must preset the rendering window size, layering sequence, and alignment mode. Please note, the embedded attestation GUI does not scale with the screen view.
Description: For Tencent Cloud Captcha (TC-CAPTCHA) embedded mode, reserve at least 300x230 pixel space to get the best rendering effect and user interaction experience.
When attestation is invoked, it displays as a floating window on the device screen. Similar to embedded attestation, the rendering window size, layering sequence, and alignment mode must also be preset. The feature of popup attestation is that when the screen view is less than a specific threshold, the popup attestation GUI will automatically resize to adapt to different screen sizes.
Description: The initial rendering block size of Tencent Cloud Captcha (TC-CAPTCHA) popup mode is 360x360 pixels.
JavaScript-Based Attestation Scenario
Some authenticators (such as TC-CAPTCHA in seamless mode) require a WebView instance as a JavaScript runtime environment, primarily for executing encrypted Proof of Work (PoW) challenges. In this scenario, the WebView instance provides only a JavaScript execution sandbox, without the need to render any UI visibly. Therefore, the passed-in WebView instance does not need to be visible, and the SDK will not use it for UI rendering.
Rendering the Required UI for Attestation
For H5/web applications in a browser or WebView environment, when using interactive or visible attestation, the SDK requires an HTML element to render the attestation UI. The SDK supports various common container elements, such as <span>, <p>, <div>, and <section>. The SDK determines the rendering position of the attestation UI based on the following priority order:
Option One: Use Selector Callback to Specify Element
Option Two: Use Eo-Client-Attestation Element ID
Option Three: Default Dynamically Create Element
Developers can invoke the window.EOClientSecurityKit.setClientAttestationDOMSelectorProvider(elementSelectorFunc) API to allocate an element selector function. When the SDK needs to render the attestation UI, it will invoke this function. elementSelectorFunc can be defined in the following two ways:
Return CSS selector string: Return directly the CSS selector string, such as element ID (#valid-dom-id), class name (.valid-dom-class), or more complex descendant selector (#valid-dom-id .valid-dom-class). The SDK will use this selector to search for page elements and render UI.
Return async function callback: If you need to dynamically create or confirm the rendering element at runtime, return a Promise that eventually resolves to a CSS selector string. This provides flexibility for complex dynamic UI scenarios.
Example:
// Selector prototype for element rendering callback
type ClientAttestationDOMSelector=()=> string | Promise<string>
// Example 1: Use element ID to specify element (synchronously)
If a selector for the designated rendering element callback is defined inline (option one), this option will take precedence.
If setClientAttestationDOMSelectorProvider fails to allocate a callback function, the SDK will search for the first HTML element with ID eo-client-attestation on the page. Once found, this element will be used to render the attestation UI. This method provides a simple agreement, allowing developers to reserve the attestation UI display area.
Example:
<div id="eo-client-attestation"></div><!-- Element reserved for rendering area -->
Developers can place this div element in a suitable location on the HTML page, customize the style as needed, and ensure the attestation UI matches the overall design style of the page.
When the other two rendering options do not exist, EdgeOne SDK will adopt the default policy: dynamically create a new HTML element at the end of the <body> tag for rendering the attestation UI.
Note:
While this default rendering method ensures attestation UI display, it may not provide the best user experience. Since elements are dynamically created and positioned at the <body> end, their style and layout may not align with the page design, or even be obstructed by other elements. Therefore, strongly recommend developers proactively allocate and designate a specialized element for rendering the attestation UI (via option one or option two) to enable precise control over its display position, size, and style, delivering a higher-quality user experience.
CORS Support: Configuring Automatic Attestation Scope (Optional)
When integrating third-party services on a page, you may encounter cross-origin resource sharing (CORS) policy conflicts. EdgeOne SDK provides a flexible mechanism to limit the scope of application of its request blocking. By reasonably configuring the automatic attestation scope, developers can ensure effective management of the SDK's behavior in complex Web environments and prevent conflicts with third-party service CORS policies.
Set Custom Scope for SDK interception
By calling the window.EOClientSecurityKit.setCustomHostnameScope(customScope) API, you can precisely specify which domain requests require automatic attestation. This helps avoid SDK interception of irrelevant third-party requests, thereby effectively preventing potential CORS issues.
const hostnameScope =[
"*.example.com",// wildcards are supported for subdomain matching
Example: Set Custom Scope to Support Sending CORS Requests with SDK integration
When you are developing a Web application with the primary domain www.your-app.com, this application not only sends EdgeOne-protected api requests to api.your-app.com but also integrates a third-party statistics service that sends data reporting requests to analytics.third-party.com. The EdgeOne client attestation SDK has been integrated into your application page through automatic injection.
By default, EdgeOne SDK attempts to block all XMLHttpRequest and fetch API requests on the page and may automatically attach EO-Attest-Token in the request headers. When your application sends a report request to analytics.third-party.com, if the request also carries EO-Attest-Token but the server of analytics.third-party.com does not have a configuration that allows custom request headers such as EO-Attest-Token, the browser will block the request due to cross-origin security policy (CORS).
The specific manifestations are:
Preflight request (OPTIONS) failure: Before sending the actual cross-origin request, the browser first sends an OPTIONS preflight request, including the Access-Control-Request-Headers field, which lists the custom request headers (including EO-Attest-Token) to be carried in the actual request.
Server rejection: If the server of analytics.third-party.com does not explicitly allow EO-Attest-Token in its CORS configuration, it will reject the preflight request, causing the preflight to fail.
Actual request be blocked: After the preflight request fails, the browser will not send the actual data reporting request and will display a console error, indicating a CORS policy conflict.
This will cause the third-party statistics service to be unable to function normally, impacting data collection.
Solution
Configure automatic attestation scope for adaptation
To address the above issues, you need to use the window.EOClientSecurityKit.interceptor.setCustomHostnameScope() API to precisely limit the SDK's interception scope, making it only applicable to requests under your own domain name (api.your-app.com) and ignore requests for third-party domains.
"api.your-app.com",// Enable automatic attestation only for your API domain
"www.your-app.com"// If attestation is required for the main site, add it
]);
// At this point, the SDK will no longer add an EO-Attest-Token to requests for analytics.third-party.com
// Data report requests from third-party statistics services will be sent normally, no longer restricted by CORS.
With the above configuration, the SDK will only intercept and attach tokens to requests for api.your-app.com and www.your-app.com. When the app sends requests to analytics.third-party.com, the SDK will no longer add the EO-Attest-Token. Since the requests no longer contain custom request headers unrecognized by third-party servers, CORS preflight requests will pass successfully, and actual requests can be sent normally, thereby ensuring third-party services and EdgeOne SDK coexist harmoniously on the same page without interfering with each other.