

WordPress Integration
WordPress, the most popular content management system worldwide, offers powerful content management features and supports content management and display layer separation through REST API, enabling it to function as a Headless CMS. This architecture mode, in conjunction with a Static Site Generator, can provide better performance and more flexible display methods for websites.
Overview
This document describes how to use WordPress as a Headless CMS with a static site generator to build high-performance websites. In this architecture, WordPress is responsible for content creation and management, while the static site generator converts content into high-performance static pages. Currently, mainstream static site generators include Hexo and Gatsby, each with distinct features: Hexo is widely popular for its ease of use and extensive theme ecosystem, while Gatsby offers more powerful data access and build capacity. Considering the needs of most users, this document will use Hexo as an example to introduce in detail how to achieve seamless integration between WordPress and a static site generator, as well as how to deploy and speed up using EdgeOne Pages.
Getting Started
EdgeOne provides a ready-to-use WordPress + Hexo integration solution. You can directly access the template and deploy your website with one-click deployment. After deployment, simply modify the WordPress data source configuration to display the content you configured in WordPress on your site. If you want to preview and debug locally, you can also download the template from GitHub to your local system.
The WordPress integration mainly includes three steps: configuring WordPress as a data source, using Hexo to generate static pages, and deploying to EdgeOne Pages. The following section details each step.
Configuring WordPress
WordPress supports two deployment methods: WordPress.com managed and self-hosted. Both methods are consistent in architecture principle, differing only in deployment location. Following we use WordPress.com managed as an example to introduce the integration flow in detail.
1. Register a WordPress.Com Account
2. Select a Managed Solution
WordPress.com offers multiple managed solutions. The main difference lies in API access, plugin support, and storage space. Users can choose the appropriate solution according to their needs.
Personal: Basic API access, 6GB storage space.
Premium: Complete API access, 13GB storage space.
Business and above: Supports custom plugin, 200GB or higher storage space.
Since we only use WordPress as a data source and management tool, the integration methods for different solutions are basically the same. WordPress REST API v2 provides more complete endpoints, better performance optimization, richer feature support, and better backward compatibility, making it the most widely used version currently. Considering most WordPress users select the Business solution, which supports GraphQL data query mode, the following uses the Business solution as an example to explain how to integrate WordPress as a headless CMS with a front-end framework.
3. Configure Site Basic Information
Configure the website title, description and basic information in the WordPress backend.
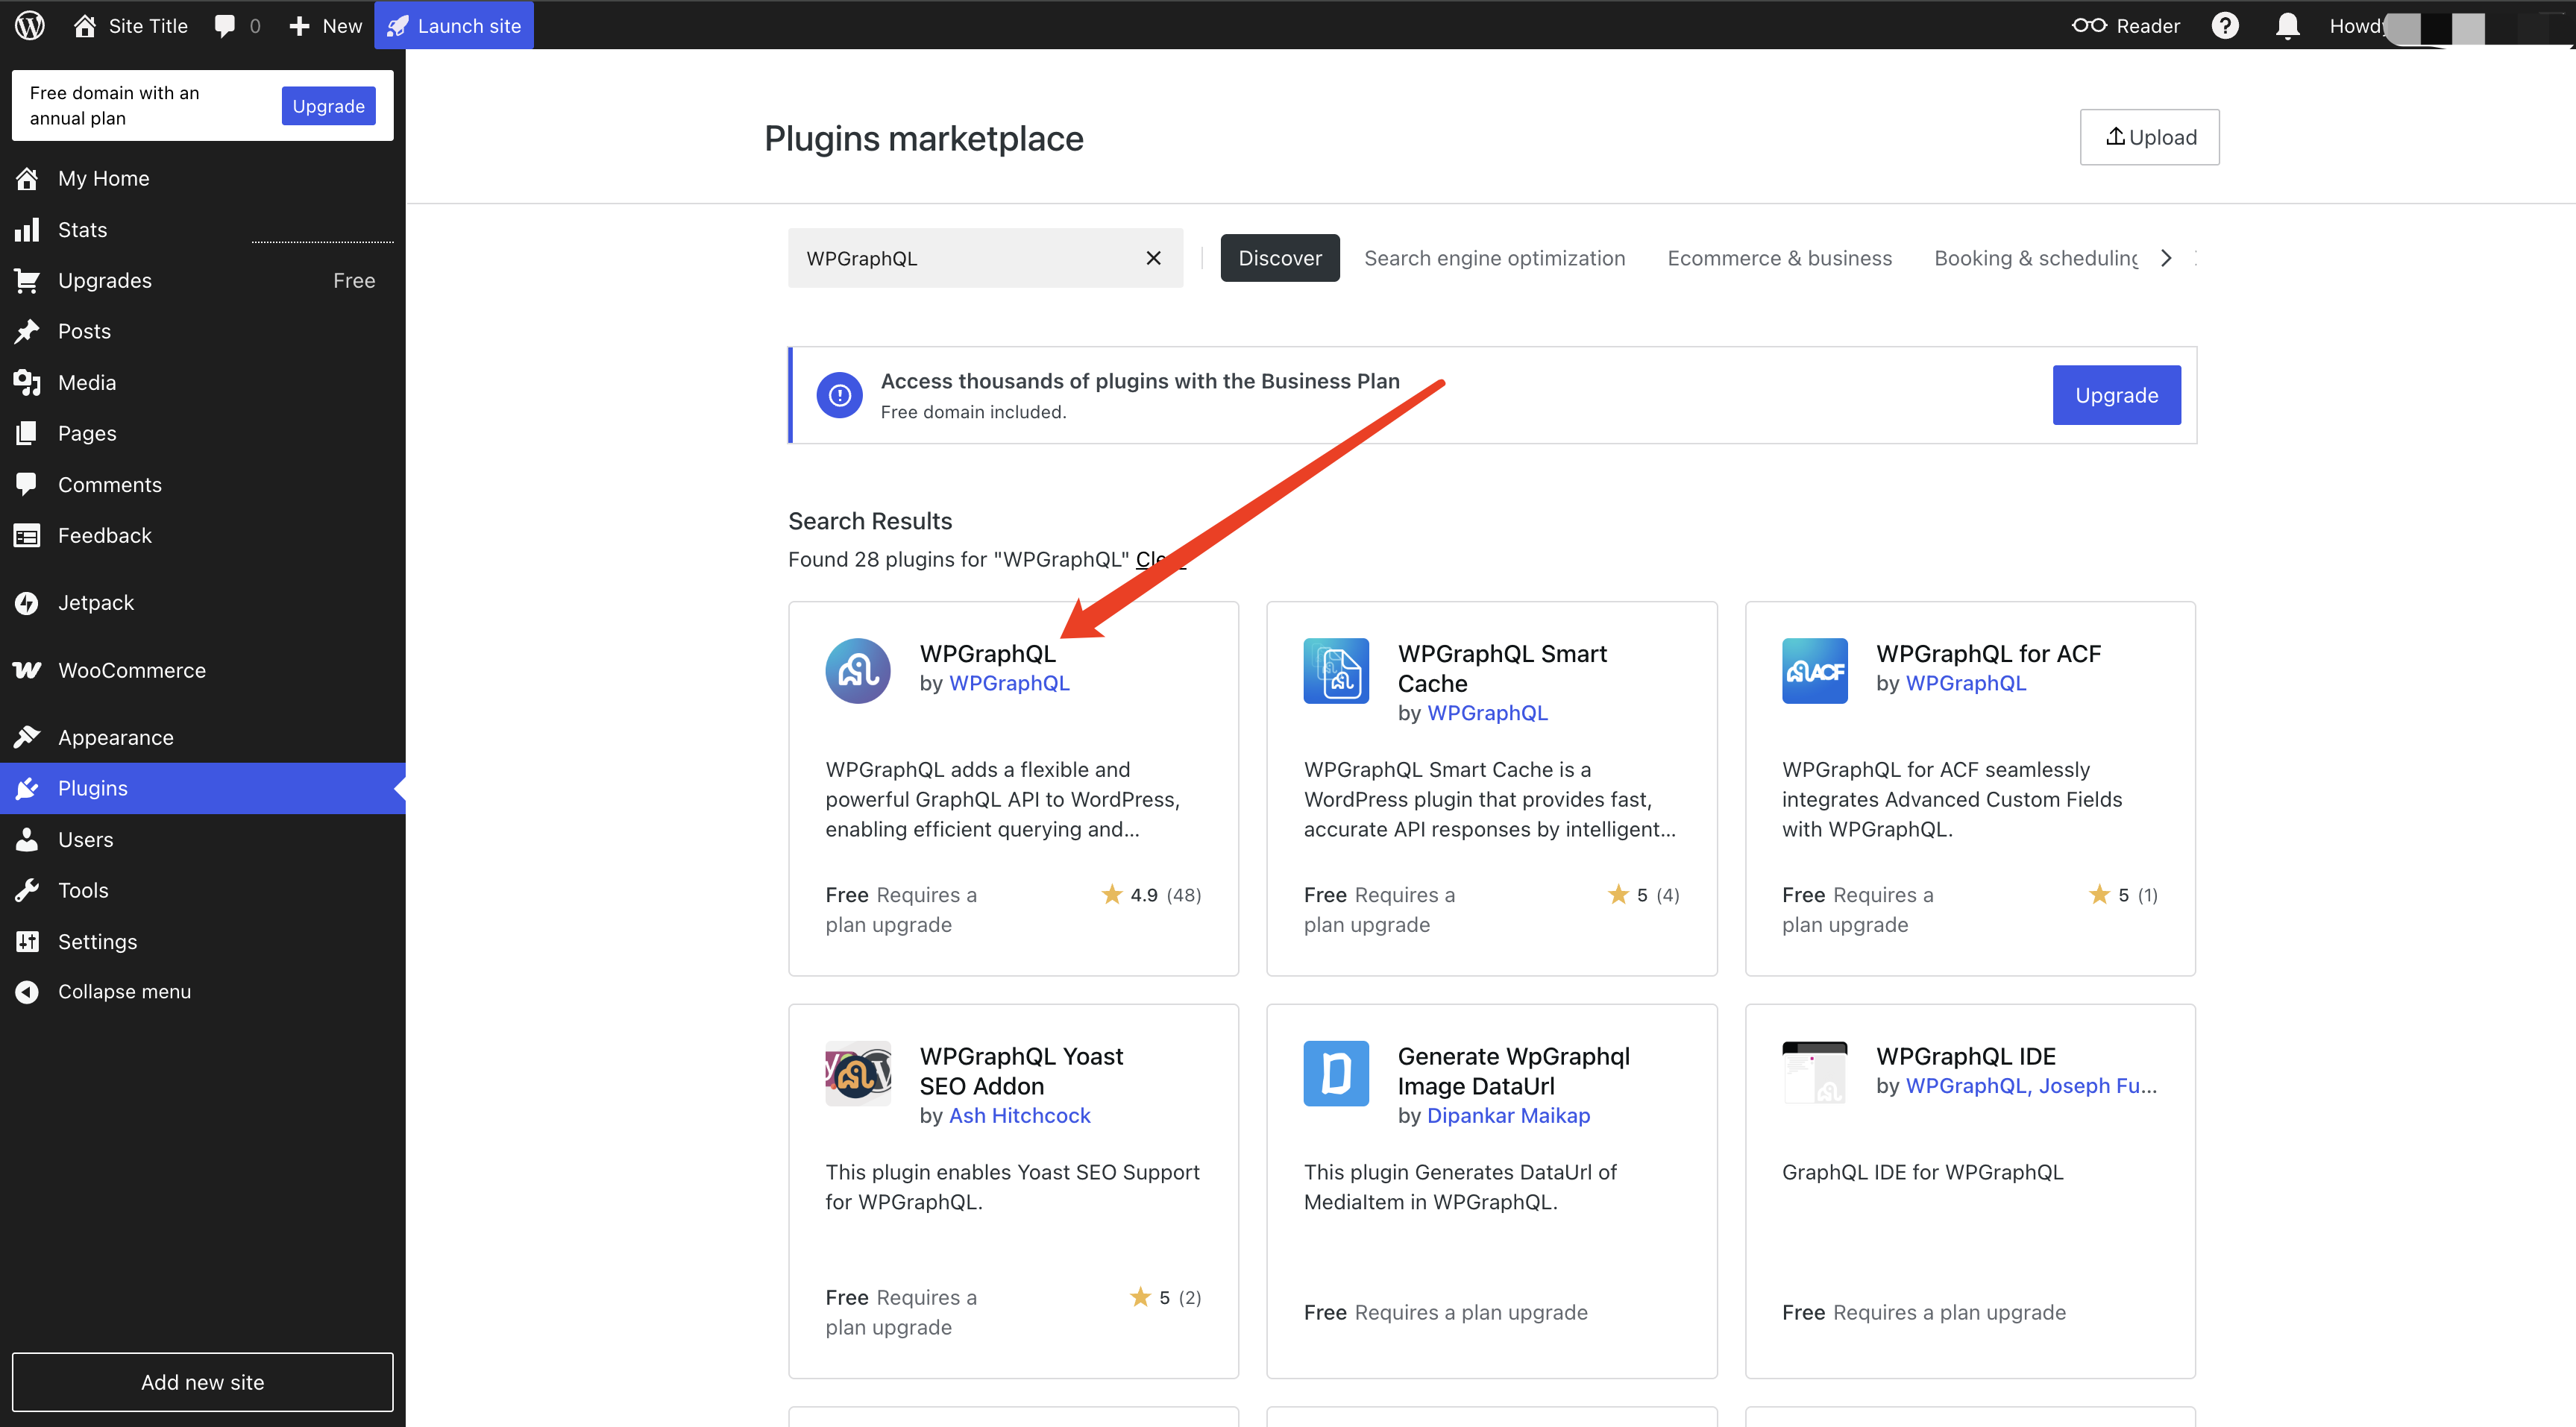
Install and configure the WPGraphQL plug-in to enable GraphQL queries via the API.
4. Preparing Data Content
To test the data retrieval feature, you need to create some basic content:
Create sample Posts
Set article Categories
Add article tags (Tags)
These contents will be used for follow-up test data sync and display functionality. It is recommended to create 3-5 Posts with different categories and tags so that thorough testing can be performed. The following diagram shows the interface for creating Posts and setting category tags:
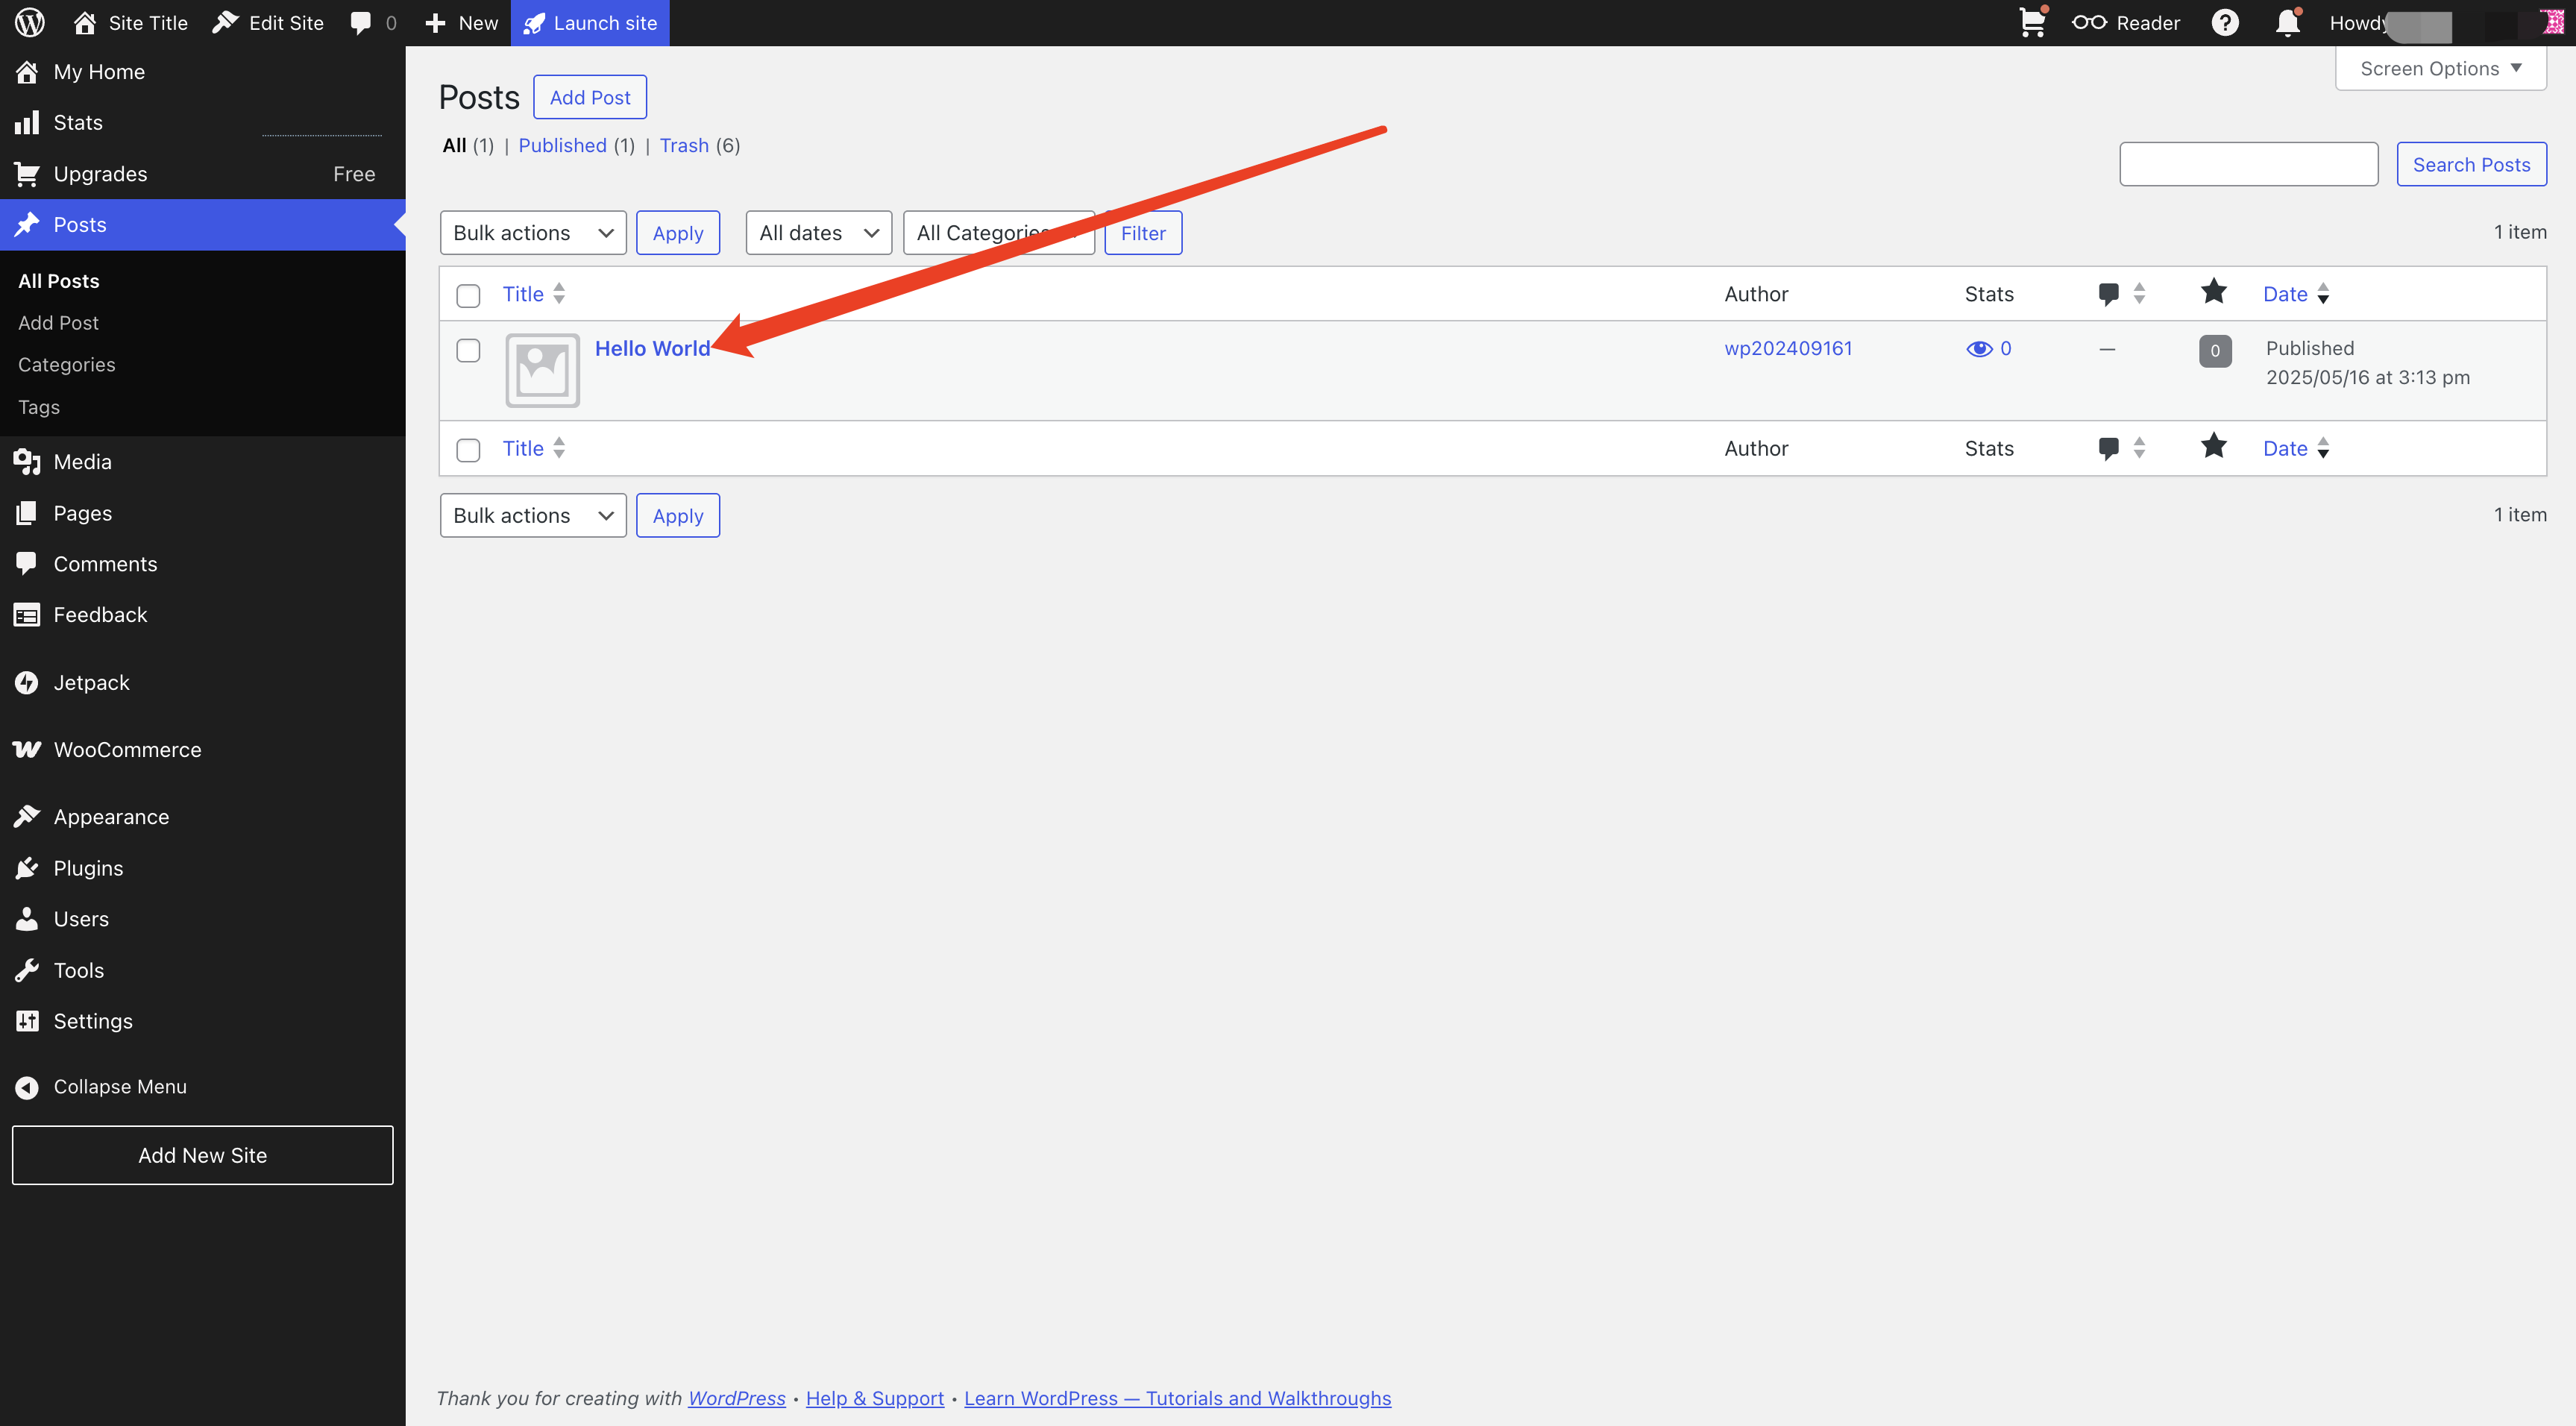
After completing the above configurations, WordPress will serve as our data source and provide REST API for the front-end framework to call.
5. Test Data Request
In the Business edition, we use WordPress REST API v2 to get data. You can access various types of data via the following host address:
Categories: https://your-site.com/wp-json/wp/v2/categories
To retrieve the article list, the returned data format for v2 is as follows:
[{"id": 1,"date": "2024-03-20T10:00:00","title": {"rendered": "Hello World"},"content": {"rendered": "This is my first post!","protected": false},"excerpt": {"rendered": "This is my first post!"},"featured_media": 0,"categories": [1],"tags": [1],"_links": {"self": [{"href": "https://your-site.com/wp-json/wp/v2/posts/1"}],"author": [{"href": "https://your-site.com/wp-json/wp/v2/users/1"}],"categories": [{"href": "https://your-site.com/wp-json/wp/v2/categories/1"}],"tags": [{"href": "https://your-site.com/wp-json/wp/v2/tags/1"}]}}]
Please visit the v2 posts API. If the returned data format matches the above example, it indicates the API validation is normal. Subsequently, we can maintain the site content by editing posts, categories, tags, and other data.
6. Configuring API Access
Configure REST API access permissions and CORS policy in the WordPress backend to ensure frontend applications can securely access data. For WordPress.com-managed sites, configure allowed domain names in the site settings. Specific steps are as follows:
Click "Settings" in the left menu
Select the "General" option
Ensure the correct domain is entered in "WordPress address" and "site address"
Click the "Save change" button
After completing the above configuration, the REST API will be automatically enabled. You can verify if the API is working properly by accessing
https://your-site.com/wp-json.Generating Static Files
Before starting generation of static pages, we need to understand Hexo's content rendering rules. If you are not familiar with Hexo's management regulations, refer to Hexo official documentation to learn more details.
Our template (wordpress-hexo-template) has implemented WordPress REST API data receipt and conversion, enabling automatic transformation of WordPress content into Hexo-compatible format. First, we need to download the template file to your local system.
1. Get a Template
# Create directory and initialize git repositorymkdir wordpress-hexo-template && cd wordpress-hexo-templategit init# Add remote repositorygit remote add origin https://github.com/TencentEdgeOne/pages-templates.git# Enable sparse-checkout and set to only get Hexo Templategit sparse-checkout set examples/wordpress-hexo-template# Pull contentgit pull origin main# Move files to the current directorymv examples/wordpress-hexo-template/* .rm -rf examples
2. Environment Preparation
This template is developed based on the Hexo framework. Ensure the following environment:
Node.js 14.0 or higher
npm 6.0 or higher
Confirm the environment meets requirements, start by installing project dependency:
# Install dependency.npm install
After installation, you can start sync WordPress content and start up the development server:
# Configure WordPress data source and start up the development server# Replace https://your.site.url with your WordPress site address# For example: https://myblog.wordpress.com# Note: No need to add /wp-json/wp/v2, the script will auto-complete the API pathWP_URL=https://your.site.url node scripts/wp-sync.js
This command will:
Retrieve article content from WordPress
Convert content to Hexo-compatible format
Start the local development service to preview the effect
After executing the synchronization command, please check the
source/_posts directory to see if the corresponding Markdown file list has been generated. If you can see that the articles from WordPress have been converted to Markdown files, it indicates that the data sync was successful.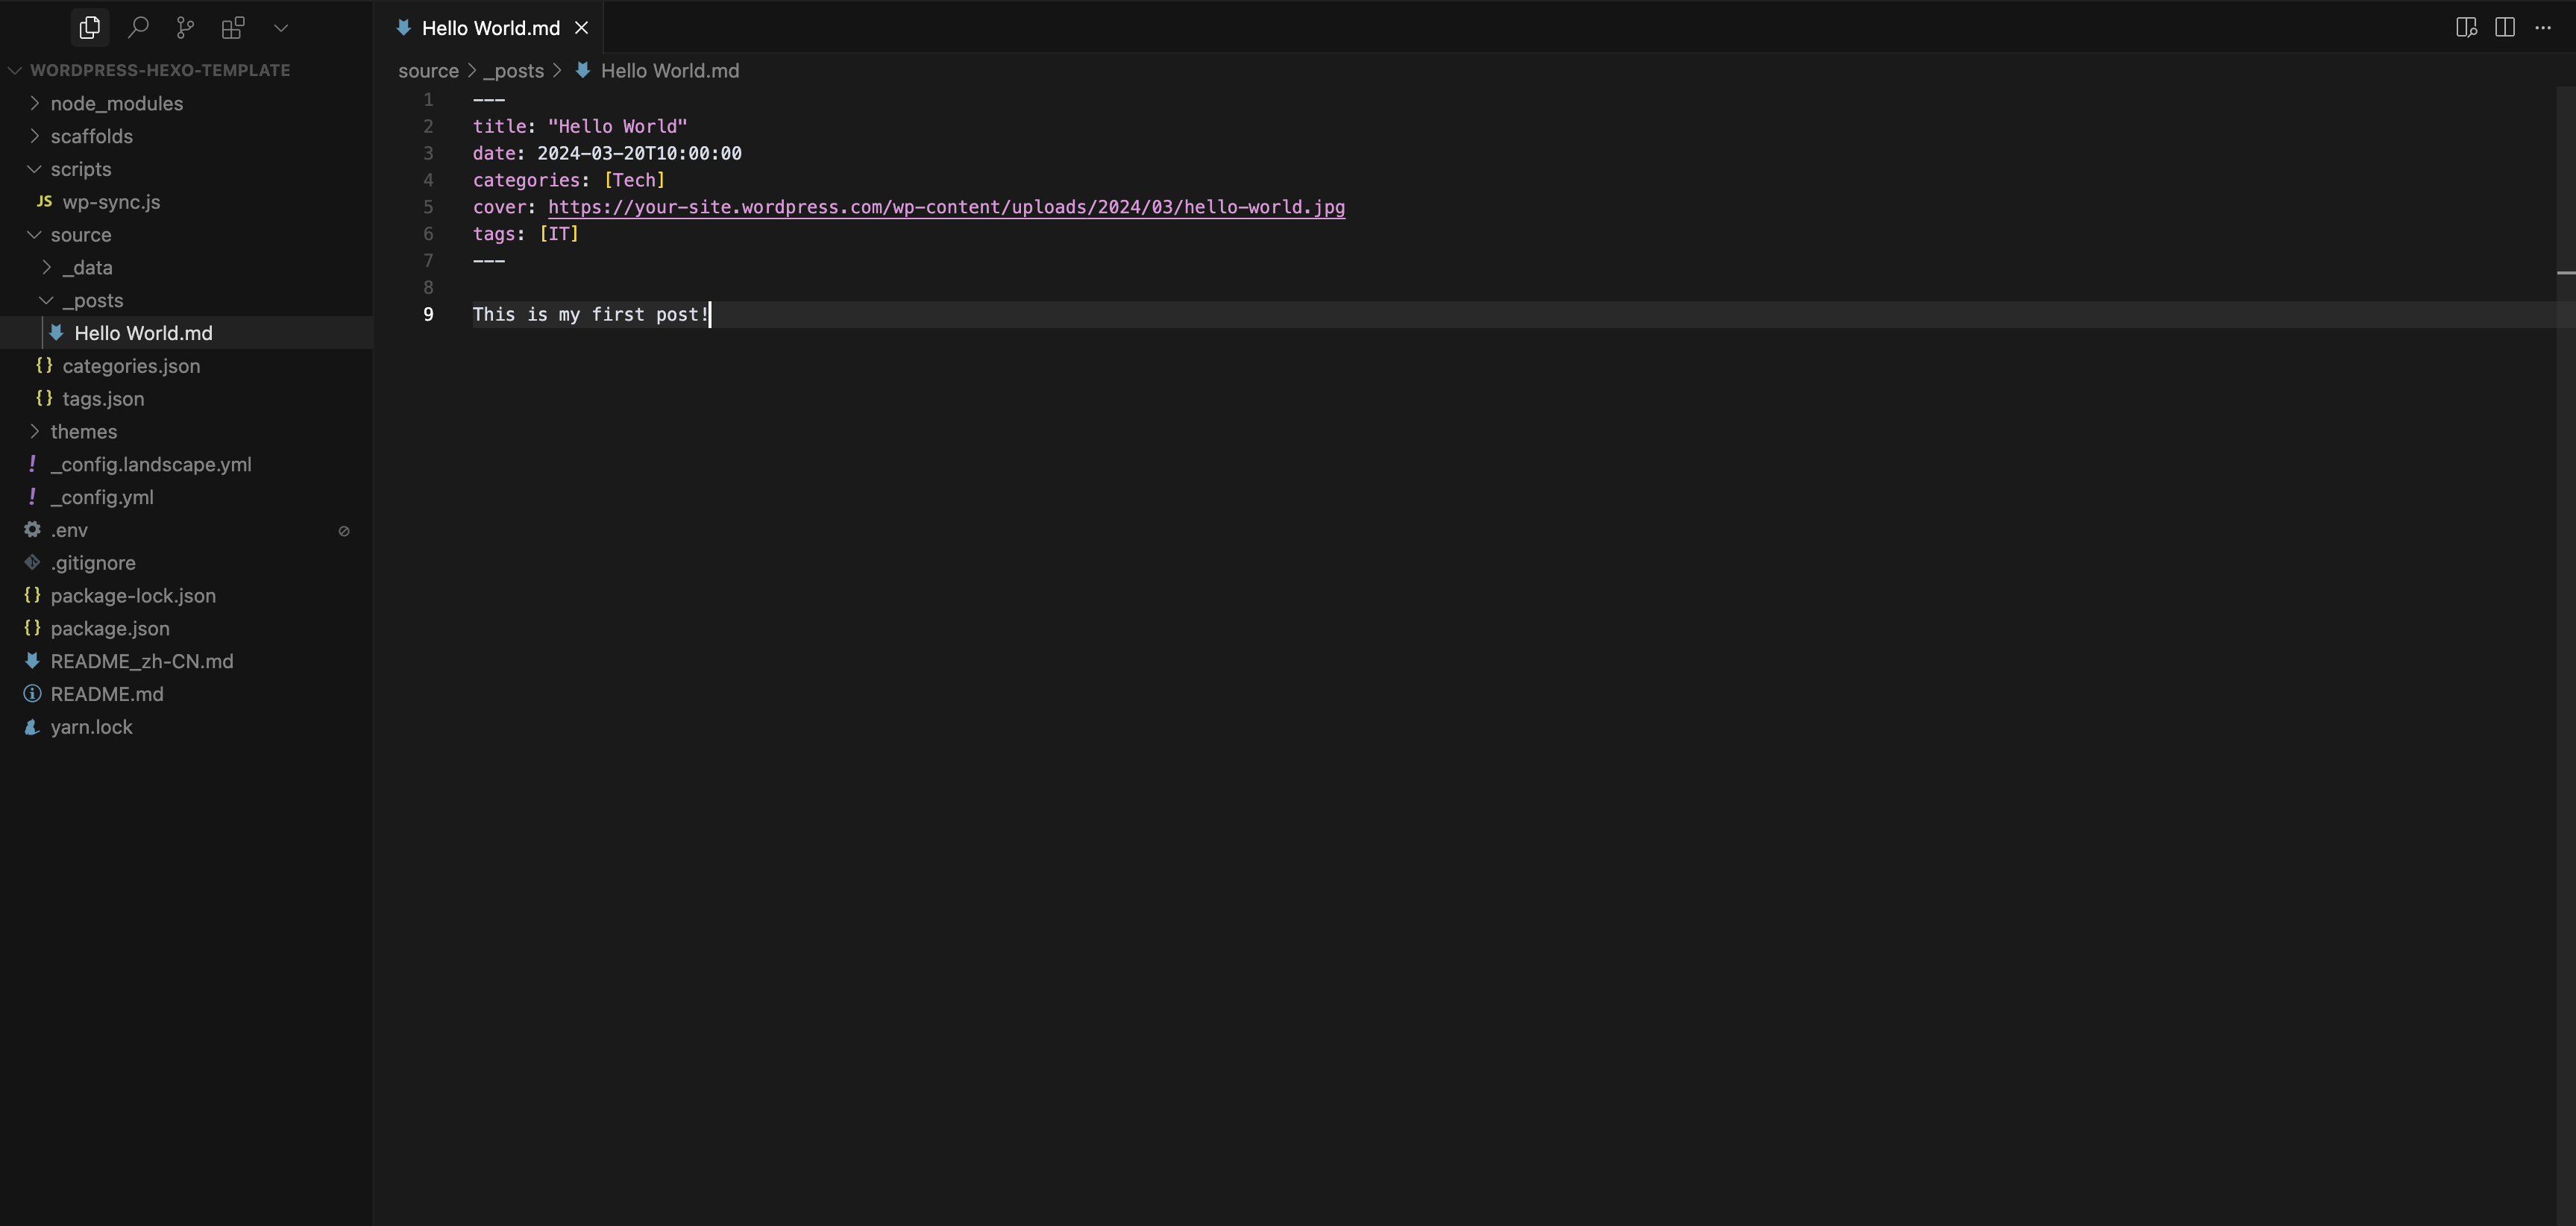
Next, please check whether the following files have been generated correctly.
source/categories.json: Confirm whether the WordPress classification data has been synced.source/tags.json: Confirm whether the WordPress tag data has been synced.If all the above files are generated correctly, the environment preparation is completed. You can proceed to the next step.
3. Packaging Static Files
Start by launching the local preview service to view the effect:
hexo server
After executing, visit
http://localhost:4000 in the browser. You will see a preview effect similar to the figure below: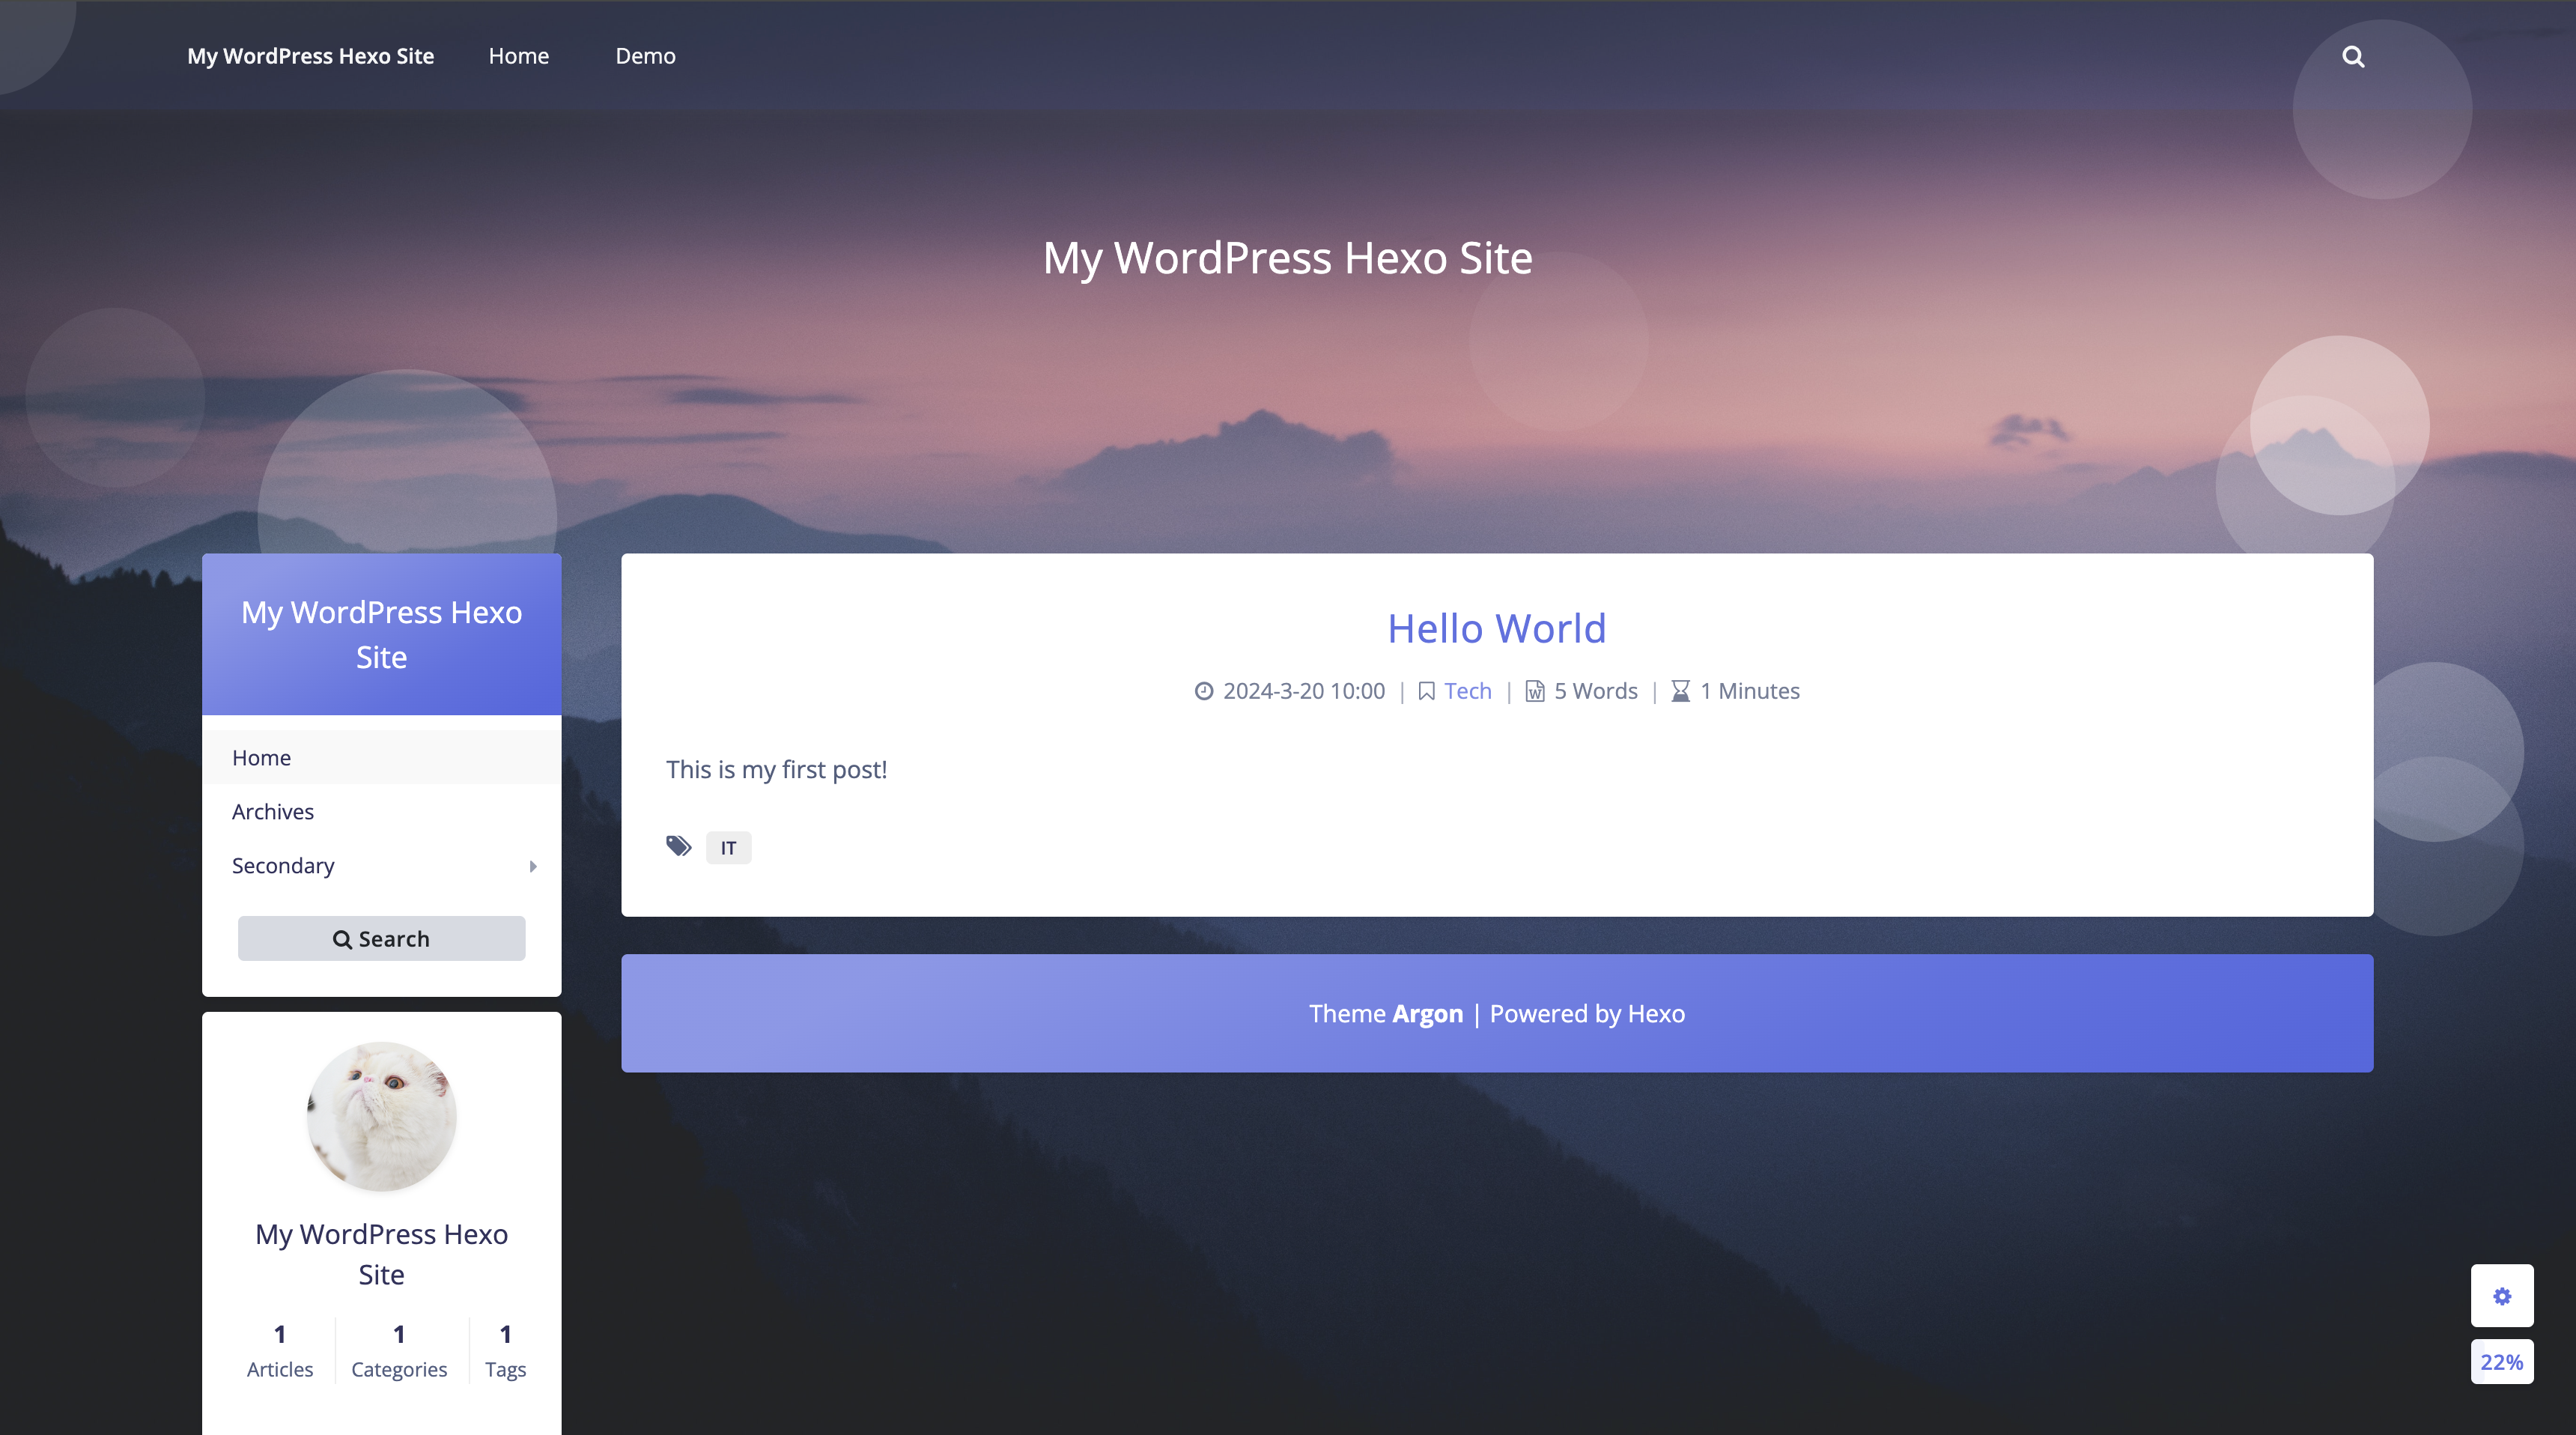
After confirming the preview effect is correct, you can generate static files:
hexo generate
After execution, a
public folder will be generated in the project root directory, including ALL static files.Deploying to EdgeOne Pages
1. Publishing Code to Git
Commit the code to the git repository to complete the deployment. Suppose you have created the
wordpress-hexo-template project and associated the current directory with it, run the following command to commit:git add .git commit -m "Initial commit"git push origin main
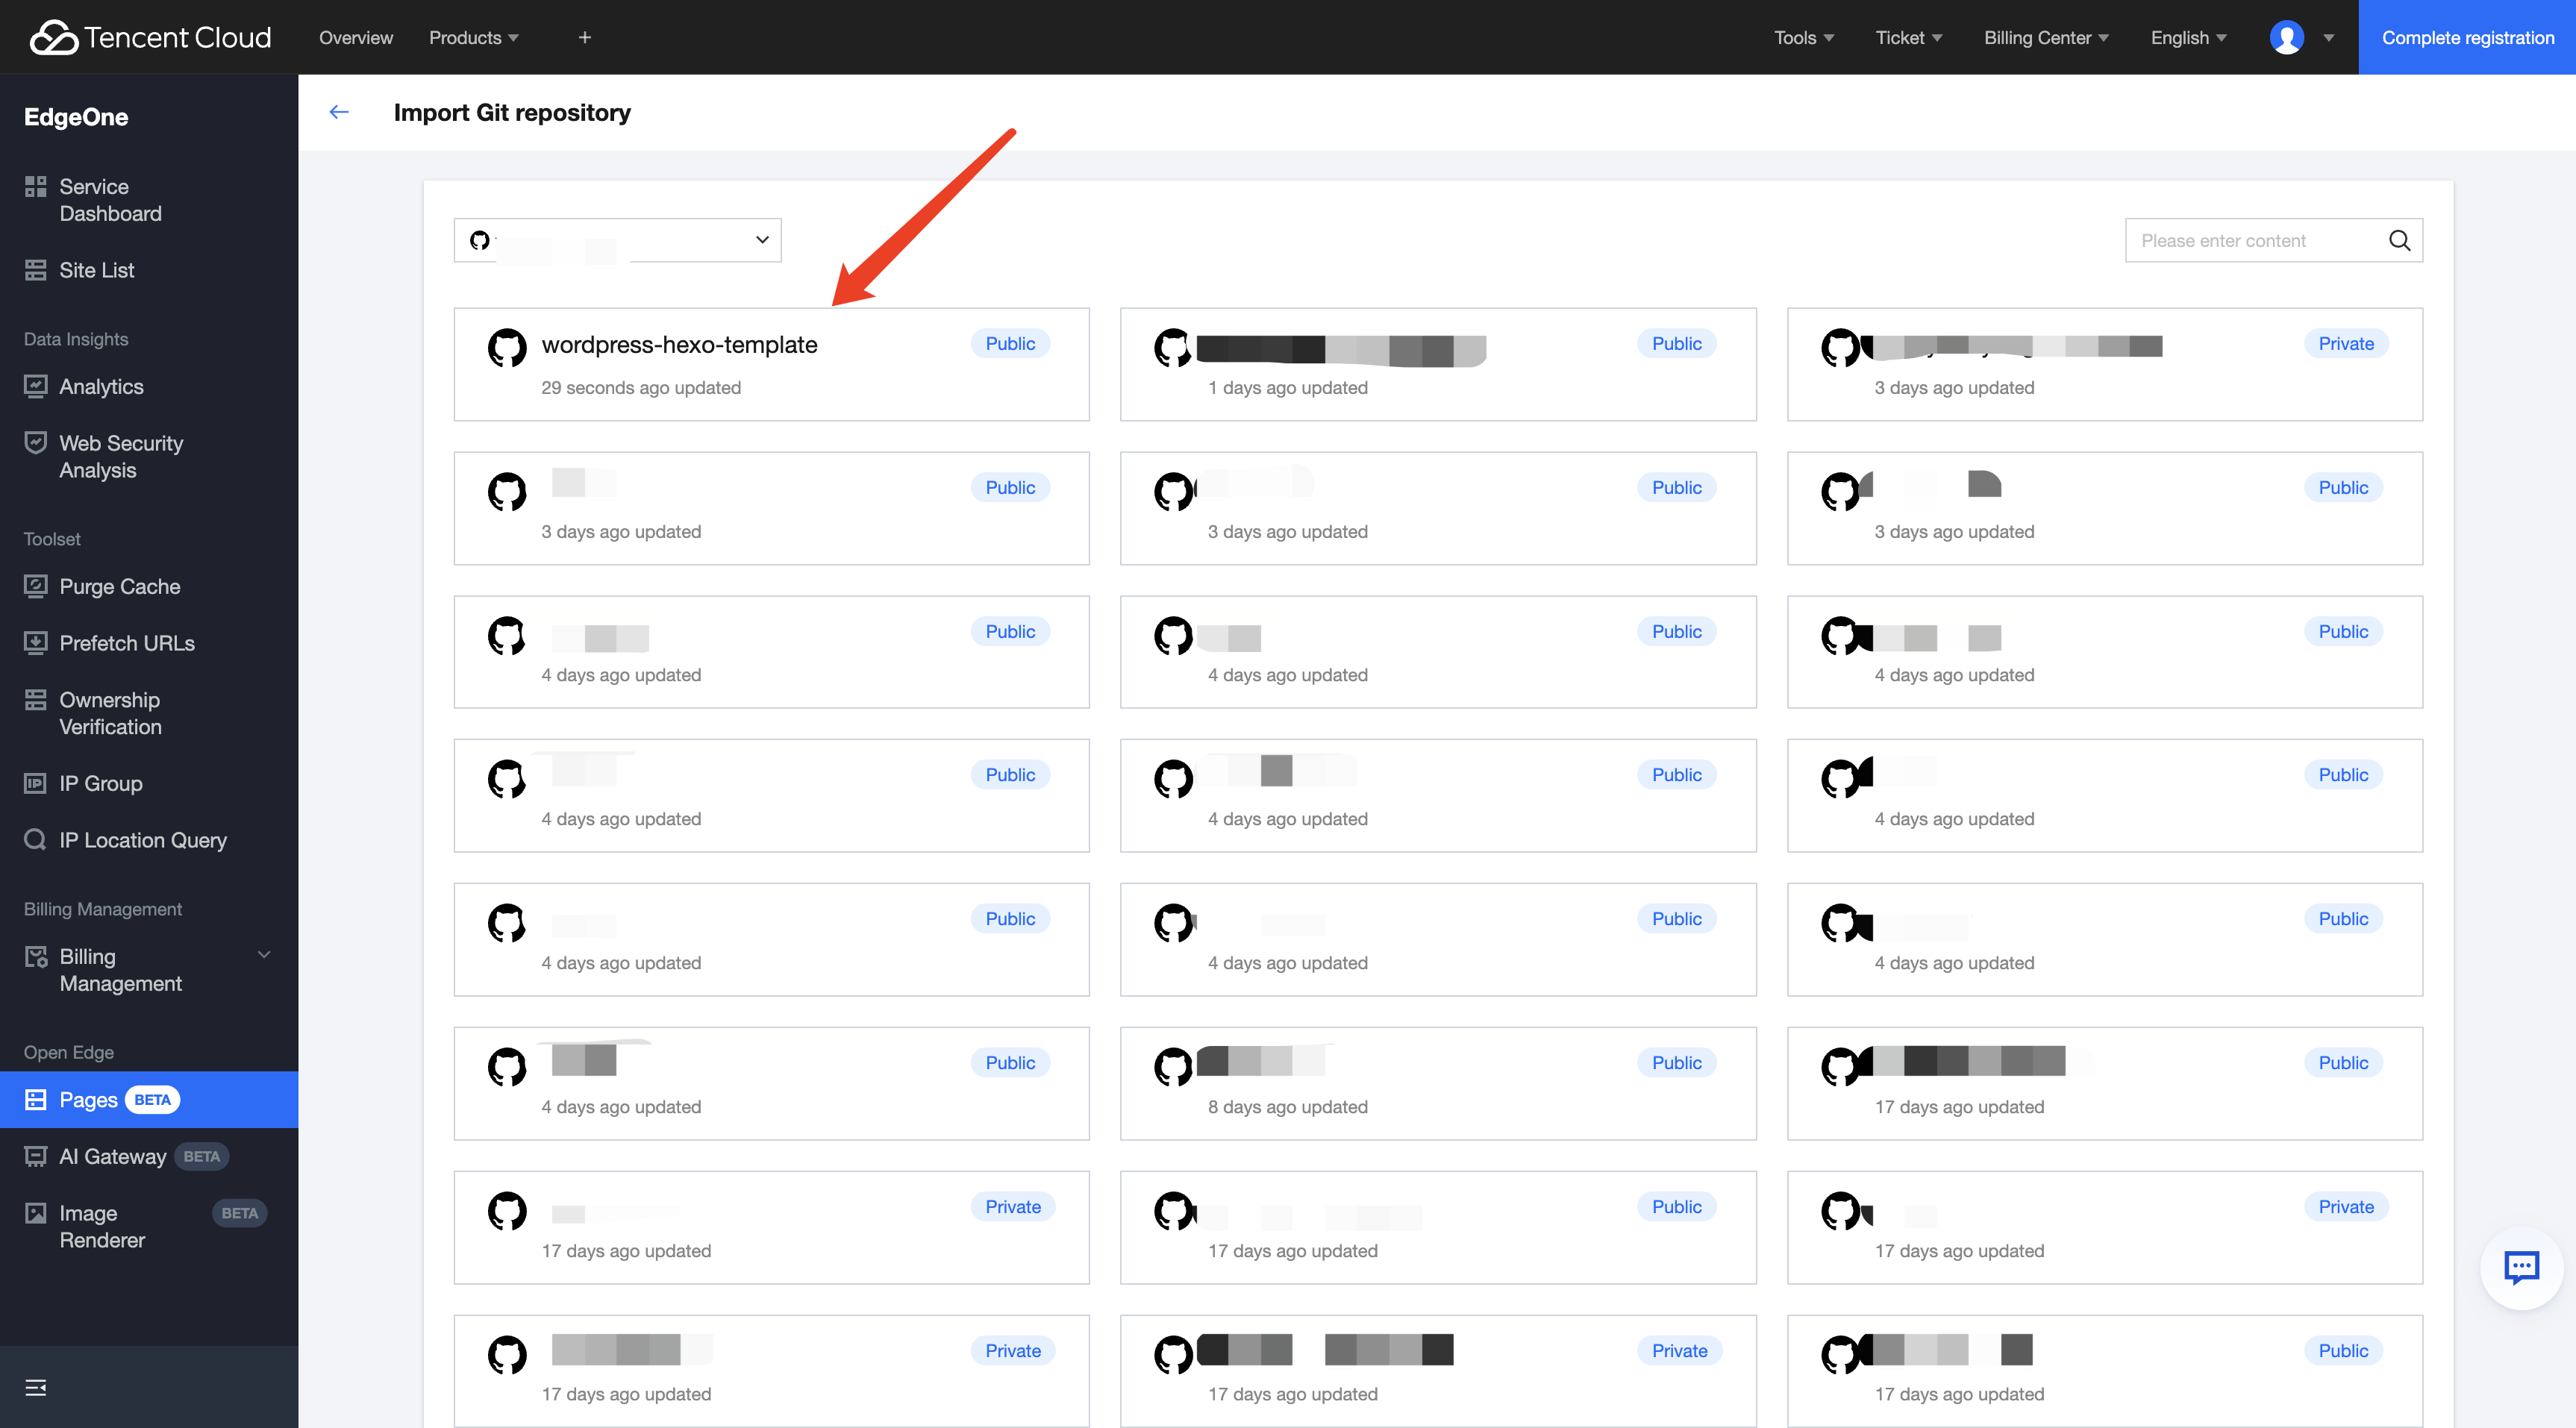
2. Importing a Project to Pages
After submission, if you are already an EdgeOne Pages user and have associated your GitHub account, access the console to deploy the corresponding project.
3. Adding an Environment Variable
Click deploy blog-with-retypeset-and-contentful, then on the deployment page, click "Environment Variables" and configure the following environment variables:
WP_URL: Fill in your WordPress address.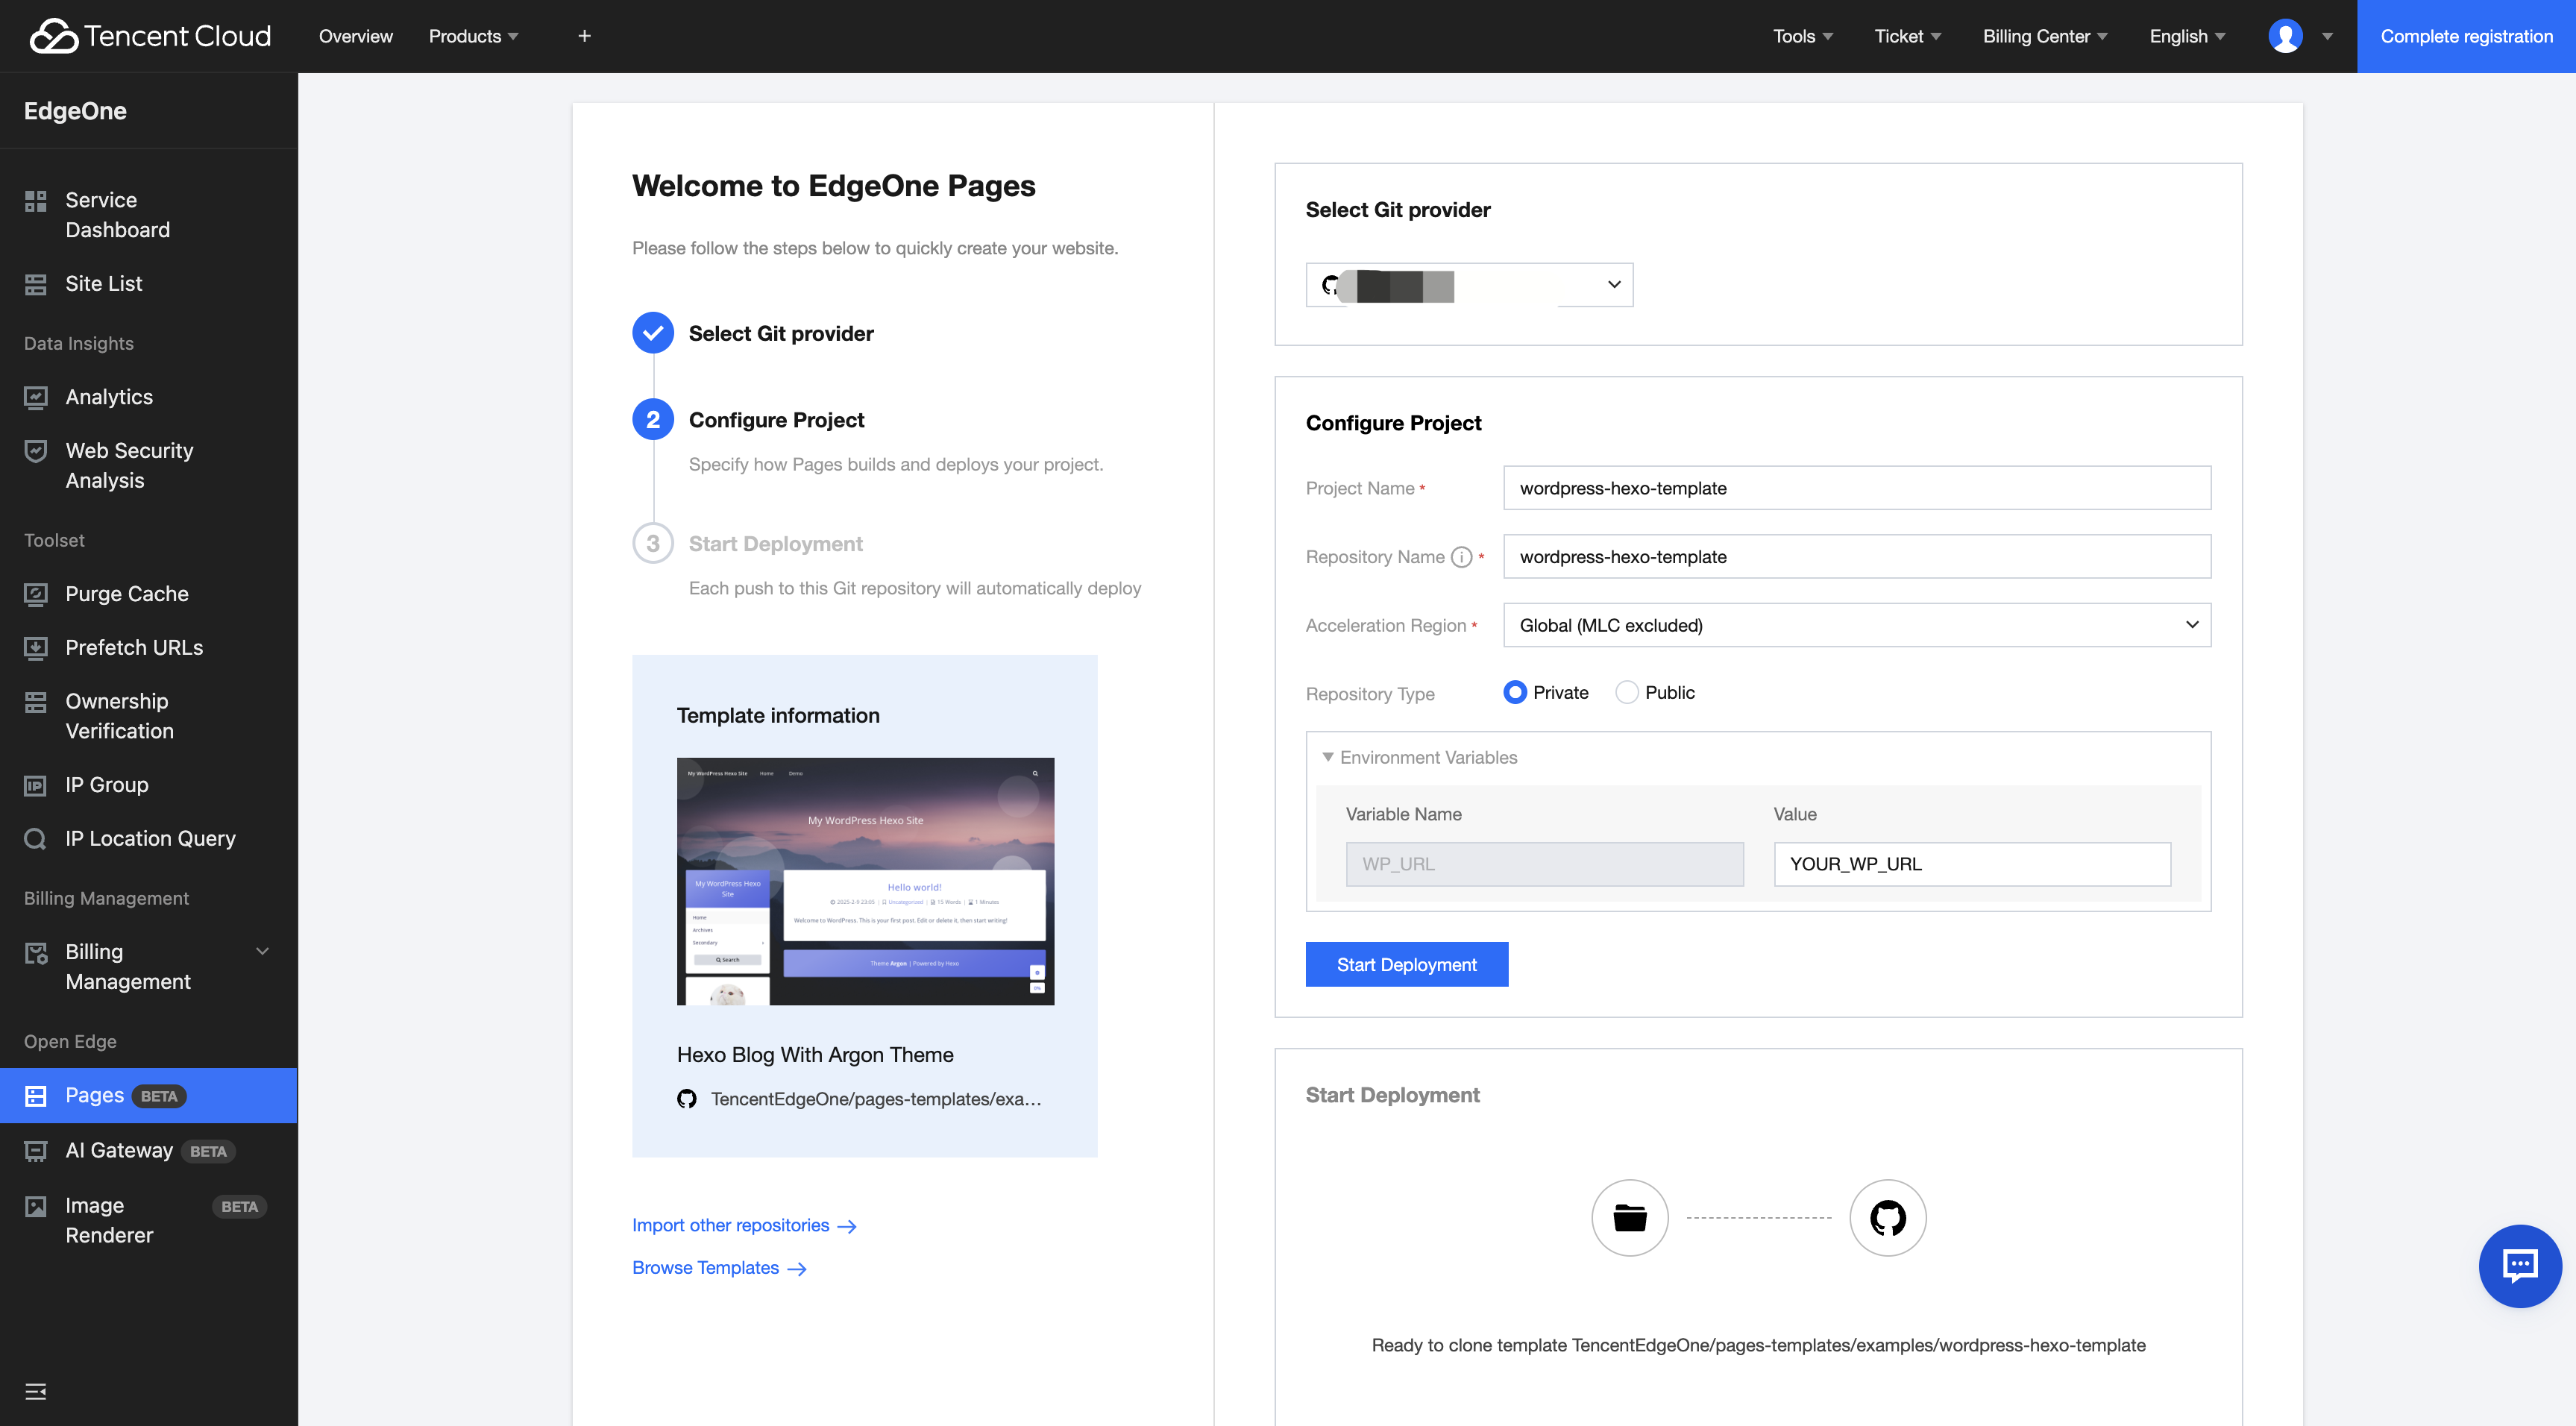
Click the Start Deployment button, wait for deployment to complete, then the interface will display Deployment Successful.
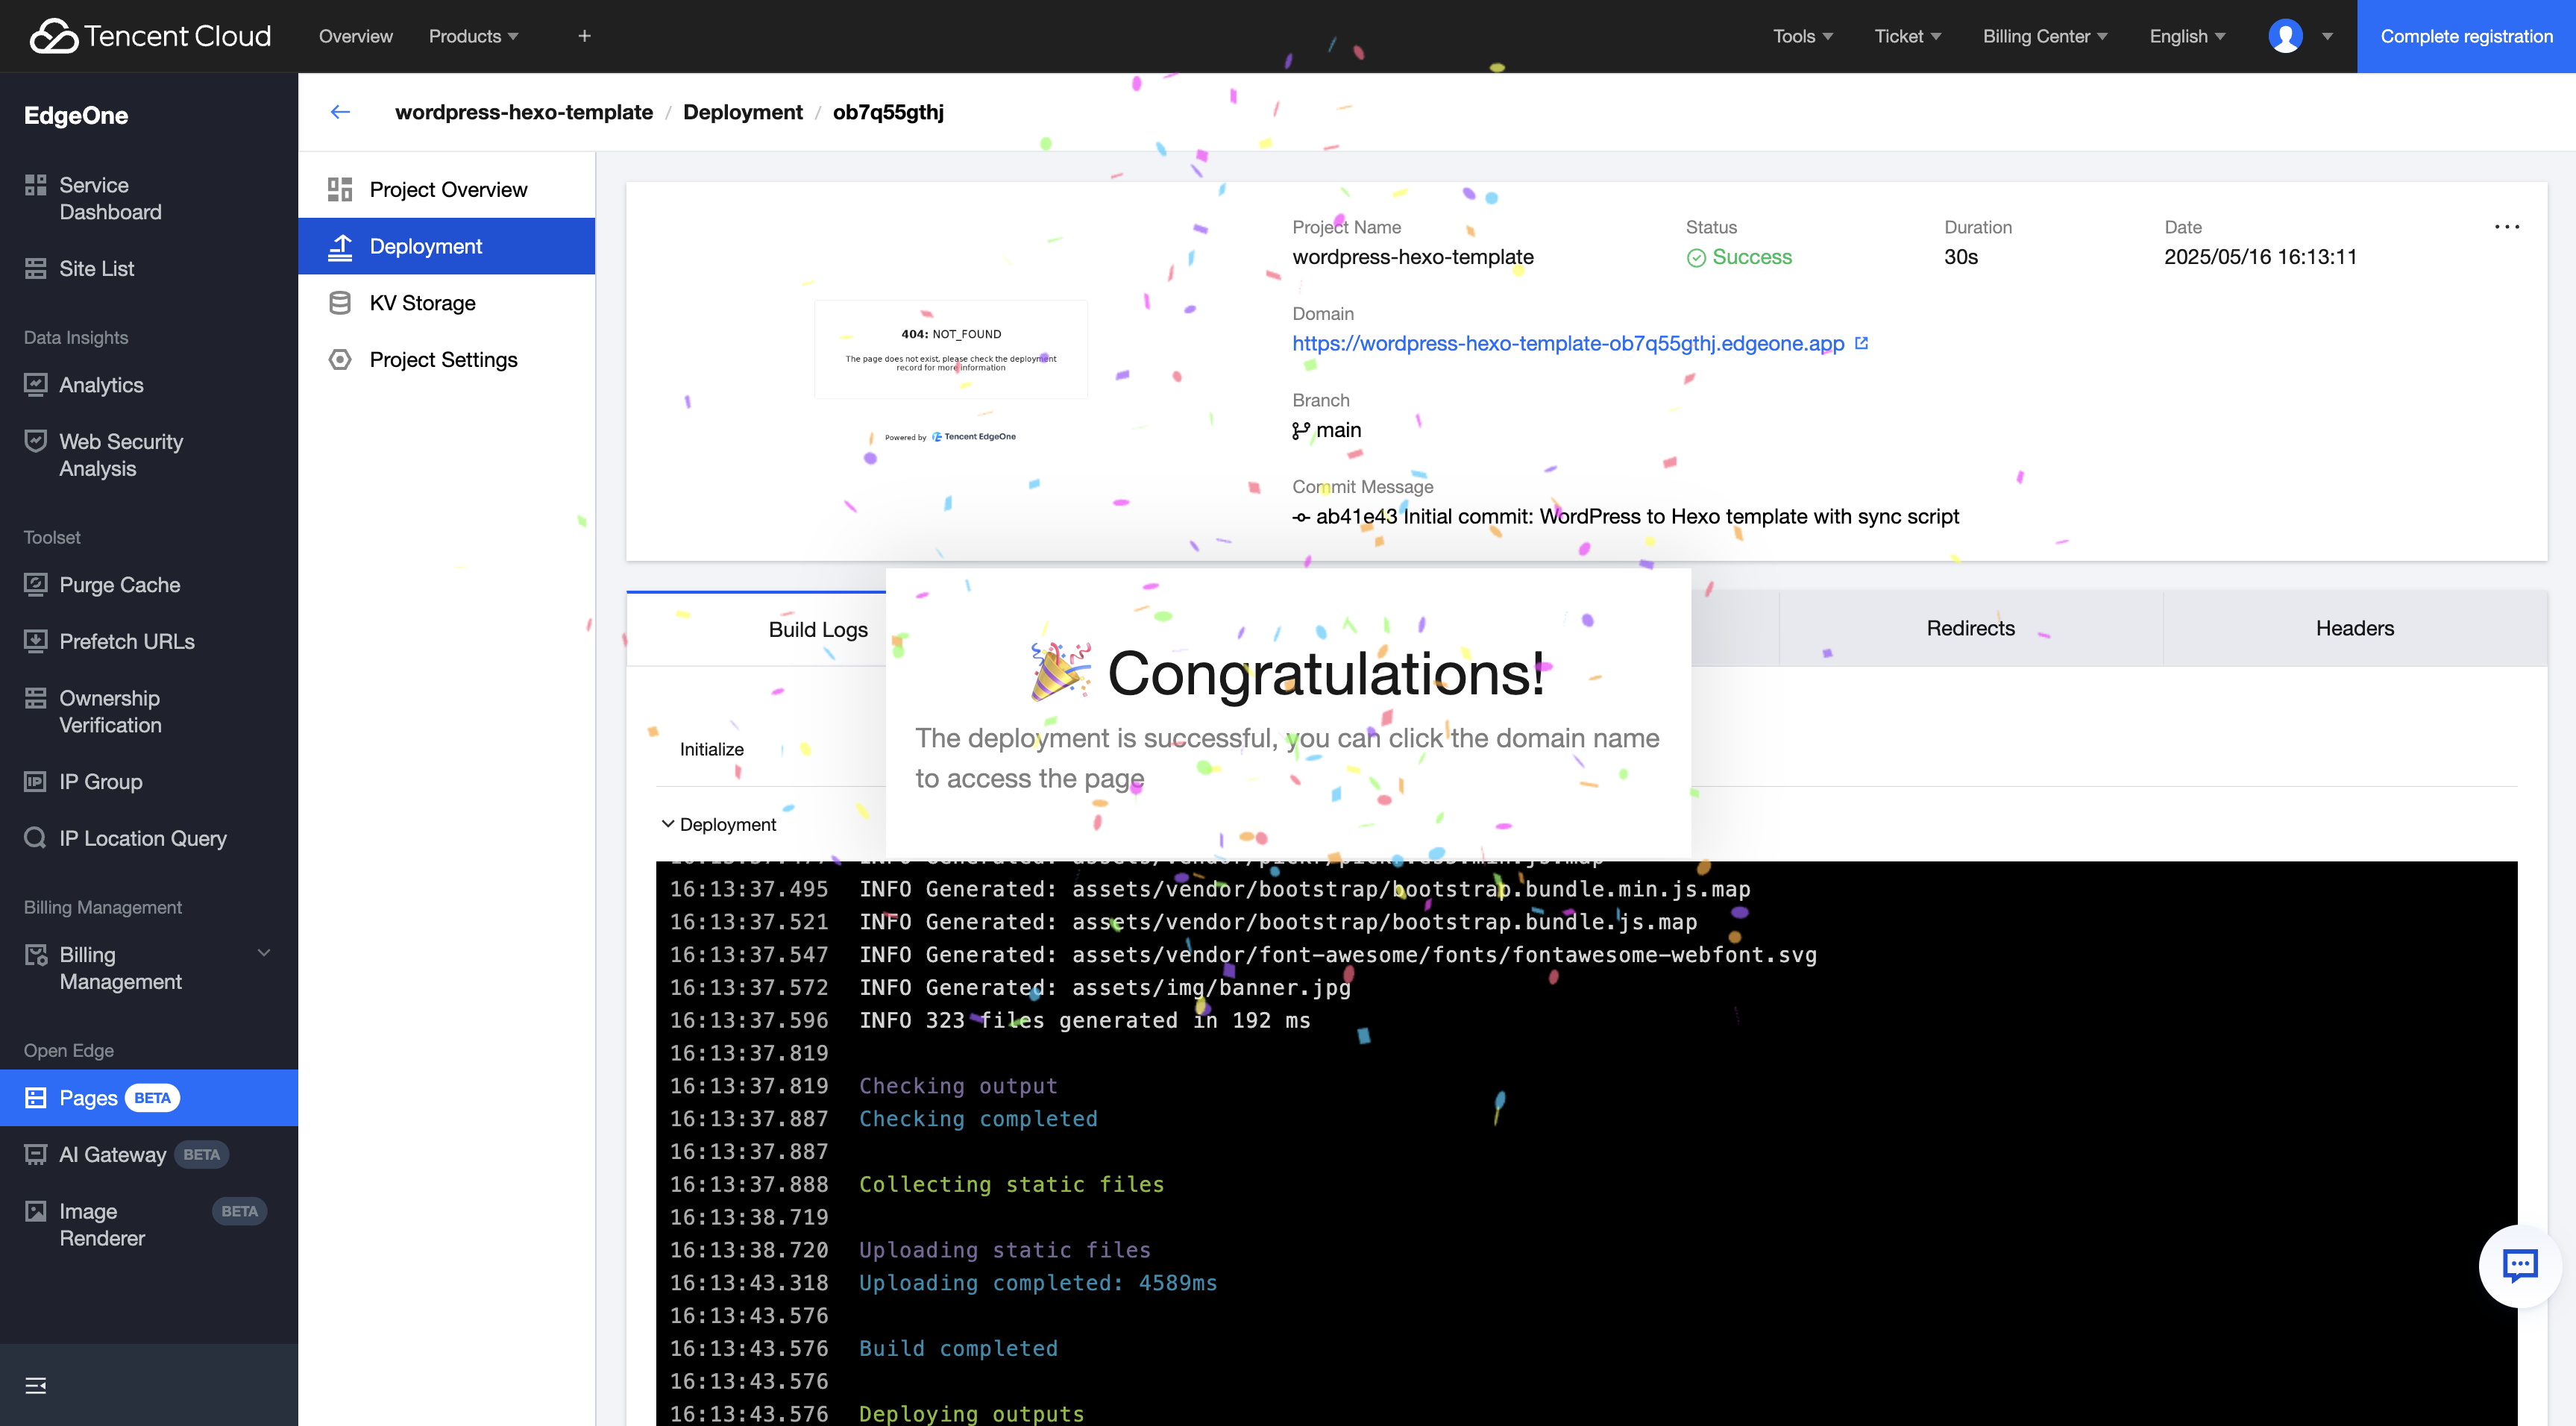
We have completed the Hexo solution deployment process. With this solution, you can:
Use WordPress to manage content and enjoy its powerful management capabilities
Generate static files with Hexo for ultimate access speed
Realize automatic deployment with EdgeOne Pages to simplify ops
Get global CDN acceleration to enhance user experience
More Related Content
View more WordPress integration solutions: WordPress templates provided by EdgeOne Pages
Switch Hexo theme styles: Hexo official topic list