

Real-Time Log Push Filter Conditions
Real-time Log Push Task supports the configuration of filter conditions to help you filter specific types of logs and reduce the volume of downstream log processing. The following are the supported log fields and comparison operators.
Note
Currently, only Real-time Logs - Site Acceleration Logs support the configuration of push log filter conditions.
The Real-time Log Push Filter Conditions feature is in beta testing. If you would like to use it, please Contact Us.
Supported Log Fields
Field Name | Data Type | Description |
SecurityAction | String | Final disposition action after request hits security rules, with possible values: -:Unknown/Not Hit Monitor:Monitor JSChallenge:JSChallenge Deny:Block Allow:Allow BlockIP:BlockIP Redirect:Redirect ReturnCustomPage:ReturnCustomPage ManagedChallenge:ManagedChallenge Silence:Silence LongDelay:Response after a long delay ShortDelay:Response after a short delay |
SecurityModule | String | The name of the security module that finally handles the request, corresponding to SecurityAction, possible values include:-:Unknown/Not Hit CustomRule:Web Protection - Custom Defined Rule RateLimitingCustomRule:Web Protection - Rate Limiting Rules ManagedRule:Web Protection - Managed Rules L7DDoS:Web Protection - CC Attack Protection BotManagement:Bot Management - Bot Basic Management BotClientReputation:Bot Management - Client Profile Analytics BotBehaviorAnalysis:Bot Management - Bot Intelligent Analysis BotCustomRule:Bot Management - Custom Bot Rules BotActiveDetection:Bot Management - Proactive Feature Recognition |
EdgeResponseStatusCode | Integer | Response status code returned to the client by the nodes. |
OriginResponseStatusCode | Integer | origin server Response Status Code, if there is no origin retrieval, record as -1. |
Supported Comparison Operators
Comparison Operator Name | Support for This Data Type | |
| String | Integer |
Equals (matches any value in the list) | ✓ | ✓ |
Greater than | ✕ | ✓ |
Less than | ✕ | ✓ |
Greater than or equal to | ✕ | ✓ |
Less than or equal to | ✕ | ✓ |
Example: Filtering logs with HTTP status codes of 4xx/5xx
Sample Scenario
In a large e-commerce platform's IT operations team, you are responsible for monitoring and analyzing the website's real-time logs. Due to the high volume of site visits and the enormous amount of log data, you aim to reduce unnecessary log data pushing by setting up filtering rules, thus avoiding unnecessary burden on the analysis platform. For instance, you can configure to only push access logs with HTTP status codes of 4xx/5xx, which usually indicate some kind of error. This way, you can focus on logs that might point to user experience issues or system failures requiring immediate attention. You can follow the steps below for configuration.
Operation step
1. Log in to the Tencent Cloud EdgeOne console, enter Service Overview in the left menu bar, and click the site to be configured under Website Security Acceleration.
2. On the Site Details Page, click Log Service > Real-time Logs.
3. On the Real-time Logs page, click Create shipping task.
4. On Select the log source Page, fill in the Task name, select the Log type Service area, the Domain name/Layer 4 Proxy Instance for which the logs need to be pushed, and click Next.
5. On the Define delivery content page, configure the Push Log Range.
5.1 Select Filtered Logs.
5.2 Enter the filtering rules as shown in the diagram below:
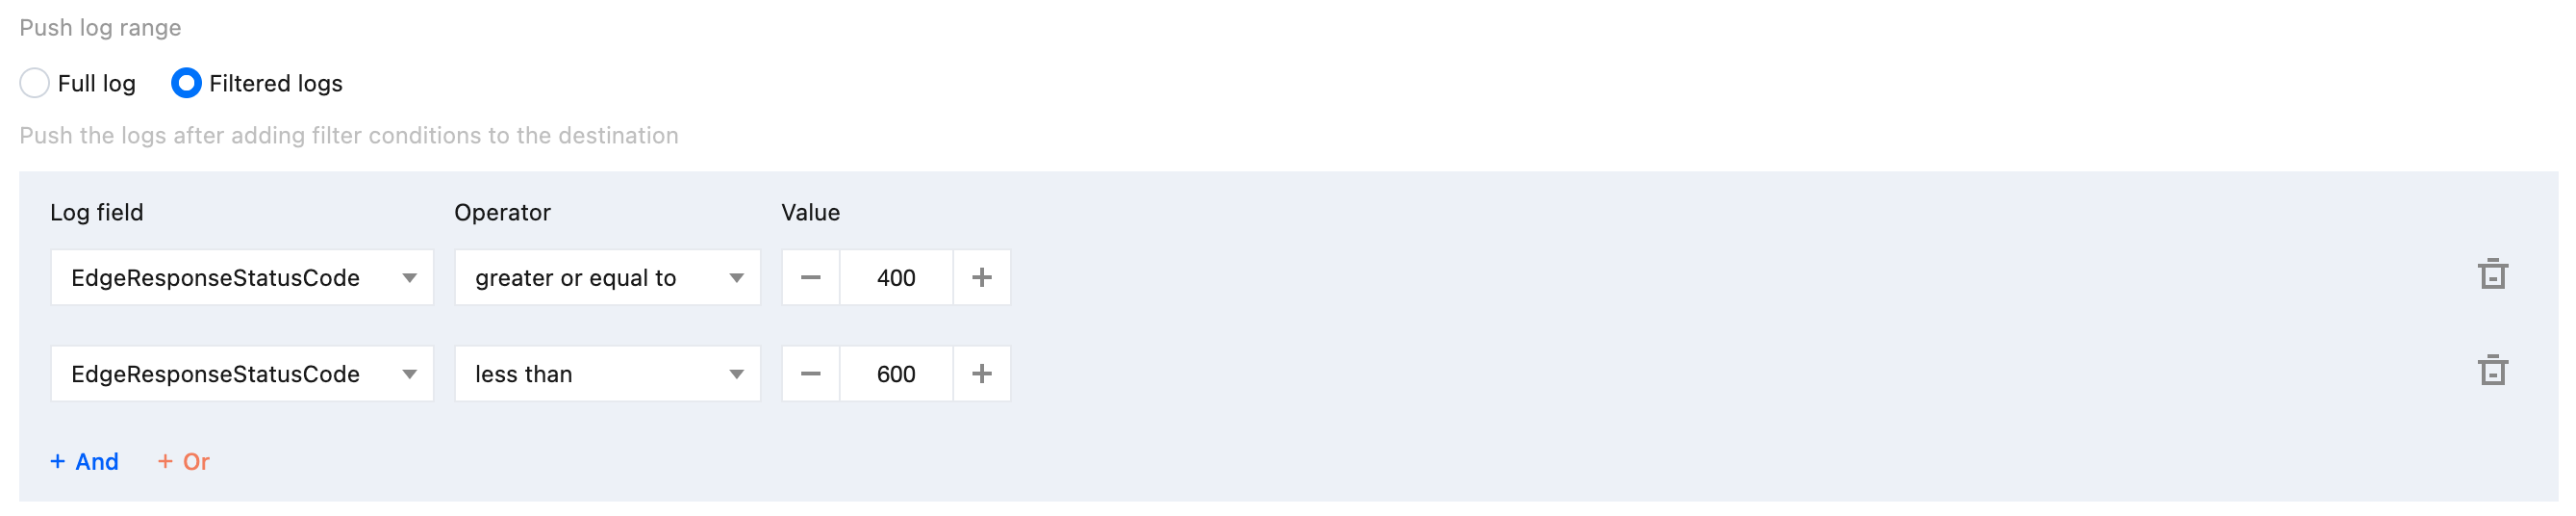
6. After configuring the destination, click Ship.