

Dialogue Large Models Integration
AI dialogue large models are deep learning artificial intelligence models with very large parameter quantities that can process and generate natural language and handle multiple tasks. These models are trained on massive data and possess powerful understanding and generation capabilities, enabling them to complete complex tasks such as text dialogue and content creation.
Overview
This document provides a detailed introduction on how to integrate mainstream AI dialogue large models into websites, covering platform selection, account registration, API key acquisition and configuration, frontend and backend interface invocation methods, multi-model encapsulation, and finally building a complete process for a website that supports large model dialogue.
Getting Started
By selecting the Large Model Integration Template ai-chatbot-starter provided by Edgeone Pages, you can build a website that supports multi-model AI conversation. It mainly includes three core components:
Register on a mainstream AI large model platform and obtain an API Key to implement model capability authorization and secure access
Debug and integrate AI dialogue large model APIs, complete intelligent calls and data interaction between frontend and backend
Deeply integrate AI capability with website pages to achieve efficient implementation of intelligent text applications
Register AI Dialogue API Key
To implement the AI dialogue function, first sign up and obtain an API Key. The API Key ensures authorized requests can call the AI platform. For example, after registering with DeepSeek, you can access the https://platform.deepseek.com/api_keys webpage to get the API Key.
Integrating AI Dialogue Model API
1. Download Code
The previous context mentioned Edgeone's ai-chatbot-starter template. This article will explain based on Edgeone's ai-chatbot-starter template, and the subsequent operations and integration flow will unfold based on this project. First, execute git clone https://github.com/tomcomtang/ai-chatbot-starter.git to clone the project code to local.
2. AI Dialogue API Integration and Integration
After submitting a request and configuring the API Keys for large models, next needed is to get familiar with the API call of AI dialogue models. The following lists API call examples for part of the models. Understanding they can provide a basis for follow-up unified integration and adaptation.
Standard API request example for DeepSeek:
curl https://api.deepseek.com/chat/completions \-H "Content-Type: application/json" \-H "Authorization: Bearer <DeepSeek API Key>" \-d '{"model": "deepseek-chat","messages": [{"role": "system", "content": "You are a helpful assistant."},{"role": "user", "content": "Hello!"}],"stream": false}'
If you need to integrate AI models, you must encapsulate the API calls for those models. Edgeone's template has already implemented this accordingly, supporting mainstream models like DeepSeek, OpenAI, Gemini, and Claude. The template's integration implementation mainly includes the following points:
Edge function unified API encapsulation
Use edge function to provide lightweight API service
Inject config via global variable
To directly access the AI conversation model API from the WEB, an API Key is required for authentication. The API Key must not be exposed in plaintext, which necessitates an API service layer for encapsulation. Since APIs are involved, the preferred approach is to use a function service due to its lightweight nature and extremely low cost. The template contains the edge function file
functions/API/AI/index.js for API encapsulation, with the code example as shown in the following figure:const { model, messages } = await request.json();if (!model || !messages) {return new Response(JSON.stringify({ error: 'Missing model or messages' }),{ status: 400, headers: { 'Content-Type': 'application/json' } });}if (model === 'deepseek-chat' || model === 'deepseek-reasoner') {return proxyDeepSeek(messages, model, env);} else if (model === 'gpt-4o-mini') {return proxyOpenAI(messages, env);} else if (model === 'gemini-flash') {return proxyGemini(messages, env);} else if (model === 'claude') {return proxyClaude(messages, env);} else if (model === 'gemini-flash-lite') {return proxyGeminiFlashLite(messages, env);} else if (model === 'gemini-2-5-flash-lite') {return proxyGemini25FlashLite(messages, env);} else {return new Response(JSON.stringify({ error: 'Unknown model' }),{ status: 400, headers: { 'Content-Type': 'application/json' } });}
In the function file,
onRequest serves as the unified entry. It can identify the model and messages parameters in the request. Among them, model is used to identify the called AI model, and messages contains the data of dialogue messages. The WEB side accesses the edge function api service via /api/AI. If support is needed for more AI conversation models, developers must add branch logic themselves.The API Key still needs to be configured in plaintext in the
functions/api/ai/index.js file. Users require the use of another global variable injection way to configure the API Key. Create a local .env file and configure the following content:DEEPSEEK_API_KEY=YOUR_API_KEYOPENAI_API_KEY=YOUR_API_KEYGEMINI_API_KEY=YOUR_API_KEYCLAUDE_API_KEY=YOUR_API_KEY
Edge function
functions/api/ai/index.js reads API Key via global variable. Sample code:const apiKey = env.DEEPSEEK_API_KEY;if (!apiKey) {return new Response(JSON.stringify({ error: 'DEEPSEEK_API_KEY not set in environment' }),{ status: 500, headers: { 'Content-Type': 'application/json' } });}
API Key injection can be achieved by env.DEEPSEEK_API_KEY to avoid leakage.
Next, verify the function API. Edgeone supports direct access locally. Users only need to follow the steps under the template directory.
npm install -g edgeoneedgeone pages initedgeone pages linkedgeone pages dev
After command execution, the API will start up on port 8088 locally. You can perform local testing through this port to verify if large model interfaces are working properly.
The following command can be used for testing in the terminal.
curl 'http://localhost:8088/api/ai'-H 'Content-Type: application/json'--data-raw '{"model":"deepseek-chat","messages":[{"role":"user","content":"Hello"}]}'
If the API Key is configured correctly, you can see the API response streaming content in streaming mode after executing the above command.
3. Static Site Integration with AI Interface
The template also provides a default UI interface and depends on the injection of global variables. Based on global variable configuration, the AI model list is obtained by requesting the edge function API at
functions/api/models/index.js. The core code to return the model list is as follows:if (env.DEEPSEEK_API_KEY) {models.push({ value: "deepseek-chat", label: "DeepSeek-V3"},{ value: "deepseek-reasoner", label: "DeepSeek-R1"});}
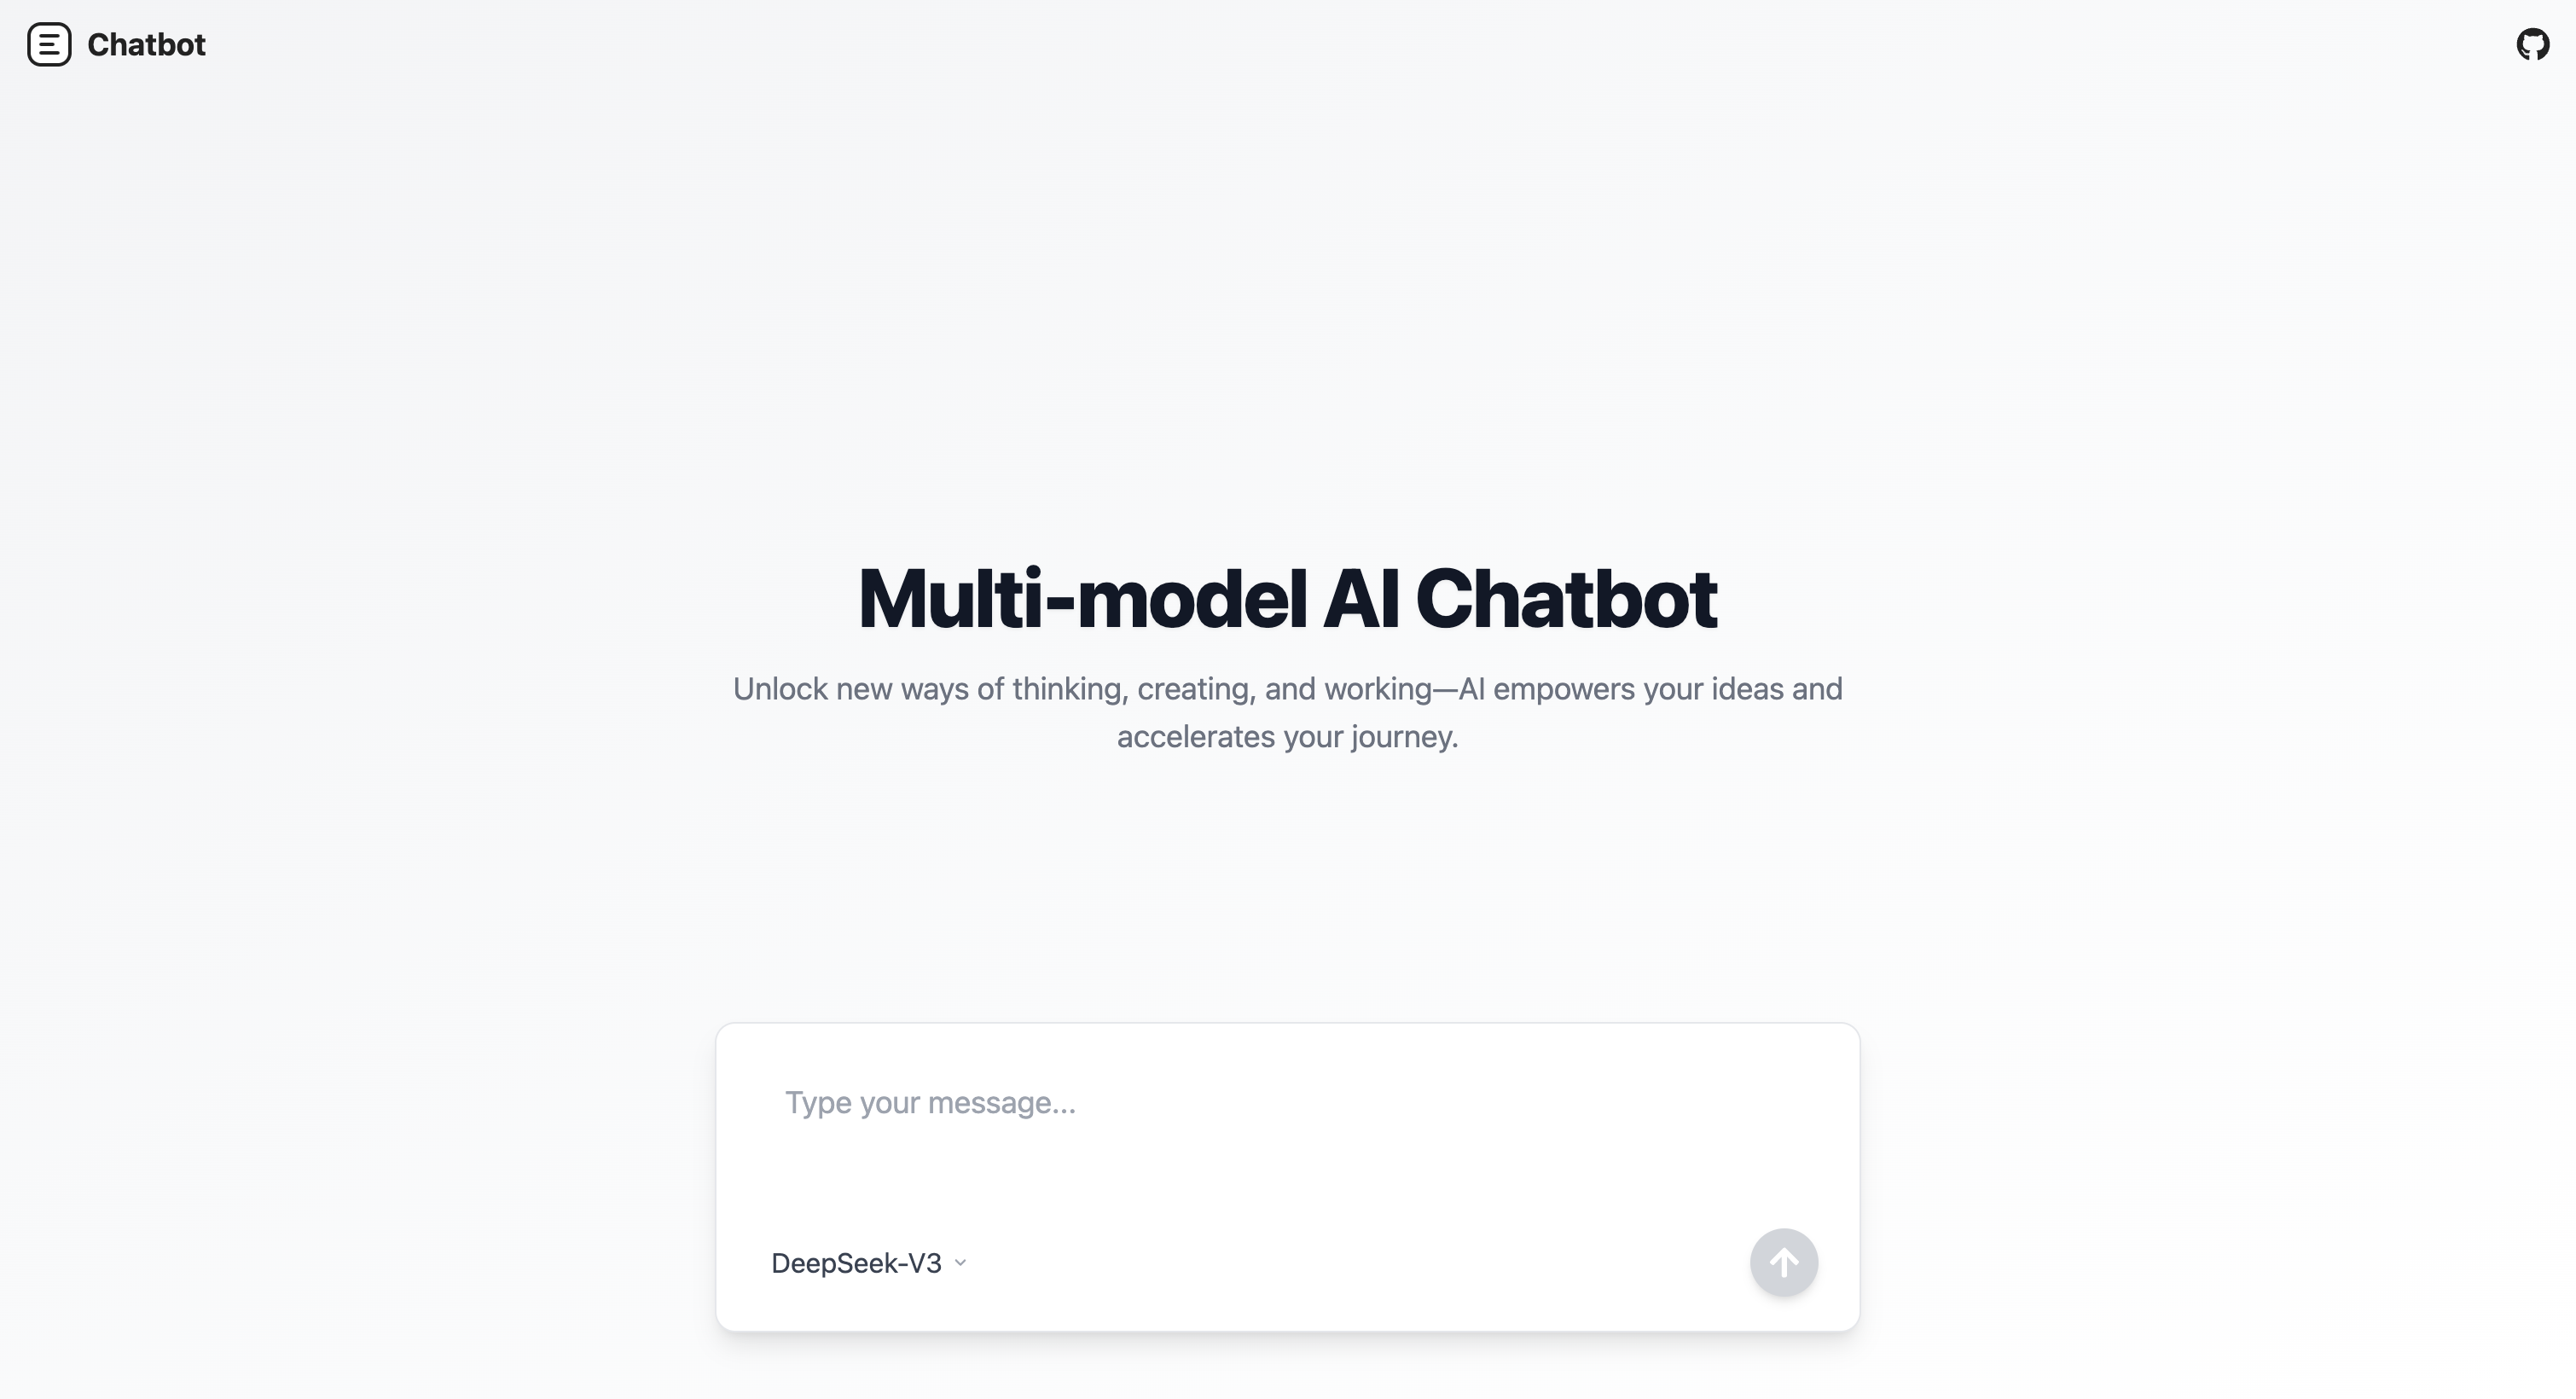
For the UI style part of the template, you can manually start it via command to view. If there are customization needs, you can also modify the template's UI code. To perform a local UI preview, directly start it via the command `npm run dev`. After startup, you can access the local webpage at http://localhost:3000/ to view the UI of the WEB page. As shown in the figure below:
At this point, the primary integration of the AI conversation model has already been implemented. Subsequently, you only need to submit the project to github and deploy it via the Edgeone console.
Deploying to EdgeOne Pages
1. Publishing Code to Git
For both AI conversation and AI text-to-image generation, the deployment process on Edgeone Pages is the same. Step one requires publishing local code to github, which can be done by directly submitting through git after signing in to github.
2. Importing a Project to Pages
After submission, if you are already an EdgeOne Pages user and have associated your GitHub account, access the console to deploy the submitted project. On the deployment preparation page, you need to configure the corresponding API Key for each AI model. Click "Environment Variables" to start configuring the API Key. Configuring the API Key is the same as setting global variables in the .env file during local development. After configuring environment variables on the console, they will be injected into the cloud environment during project deployment. The configuration interface is as follows:

3. Publishing to Pages
After configuration, click the "Start Deployment" button and wait for the deployment to complete. The success interface will display. We have now completed the entire deployment process for the solution.
More Related Content