Custom domain names have the following advantages:
Brand display: Use your own brand domain name to enhance professional image.
SEO optimization: is conducive to search engine indexing and ranking
Better control: Full control of the DNS records of the domain
Flexibility: Configure multiple custom domain names to facilitate management for different markets or purposes.
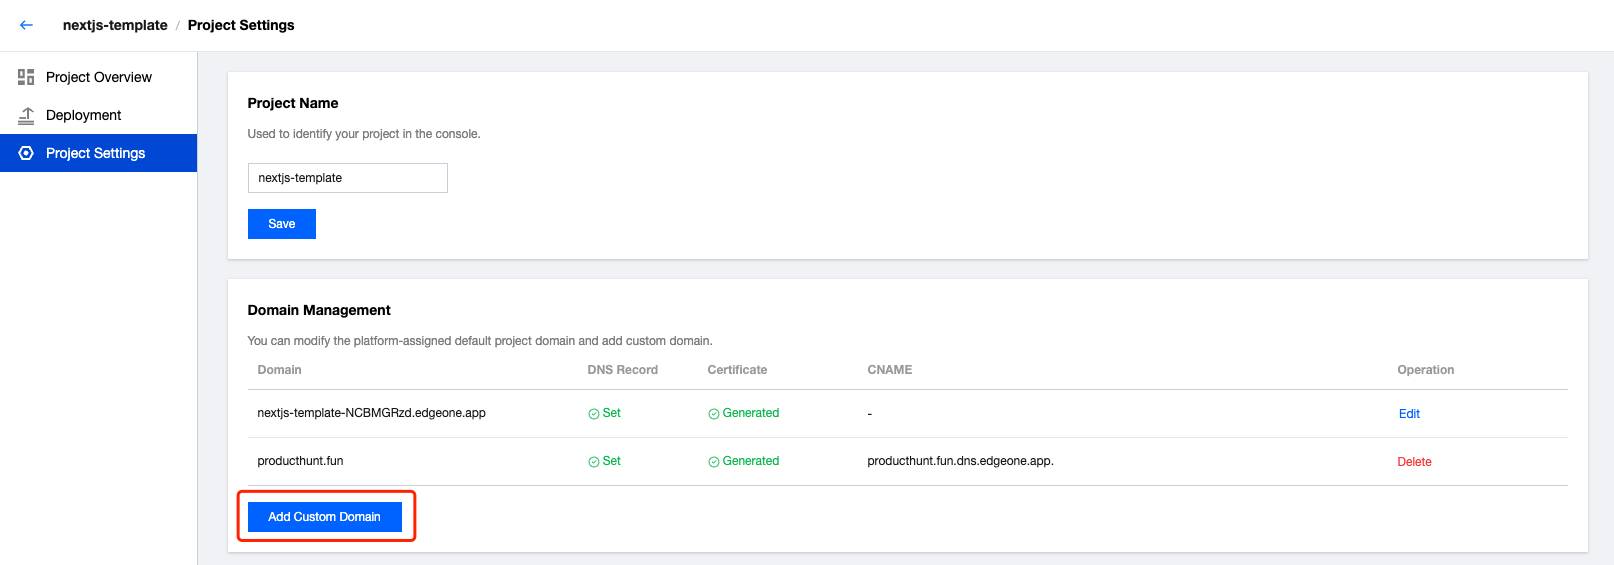
Add Custom Domain
For domain names added when the acceleration region of the project is "Chinese mainland availability zone" or "global availability zone (including Chinese mainland)", complete registration with the Ministry of Industry and Information Technology first.
To add a custom domain to your project, follow the steps below:
1. Enter console: Open project settings page, find "Domain Name Management" module.
2. Add domain: Click the "Add Custom Domain" button.
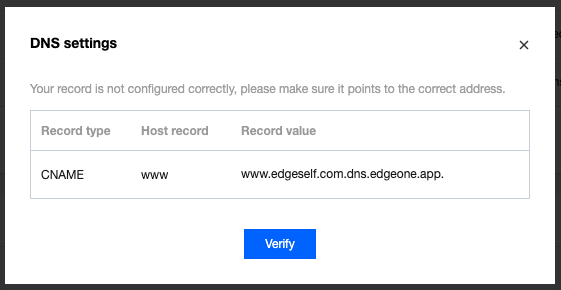
3. Input domain: Input your root domain (for example: example.com) or subdomain (for example: www.example.com) in the popup.
4. Configure DNS records: According to the DNS records information provided in the pop-up window, go to your domain name registrar's website and configure the appropriate CNAME record.
5. Verify domain: Once configured, you can click the "Verify" button on the page, or wait for the system to auto-detect whether the DNS resolution is correct.
6. Waiting to take effect: Please note that the effective time of the DNS record may be up to 48 hours, but it usually takes only a few minutes.
7. SSL Certificate Configuration: Once the domain verification succeeds, the system will automatically configure the SSL certificate for your domain name to ensure the security of the website.