

Direct Upload
You can upload the project build assets directly to Pages and deploy it to the EdgeOne global network. If you want to integrate your own build platform or upload from a local computer, you should select direct upload rather than import a Git repository.
Note:
If you select direct upload, you will be unable to switch to Git integration later. You must create a new project with Git integration to use automatic deployment.
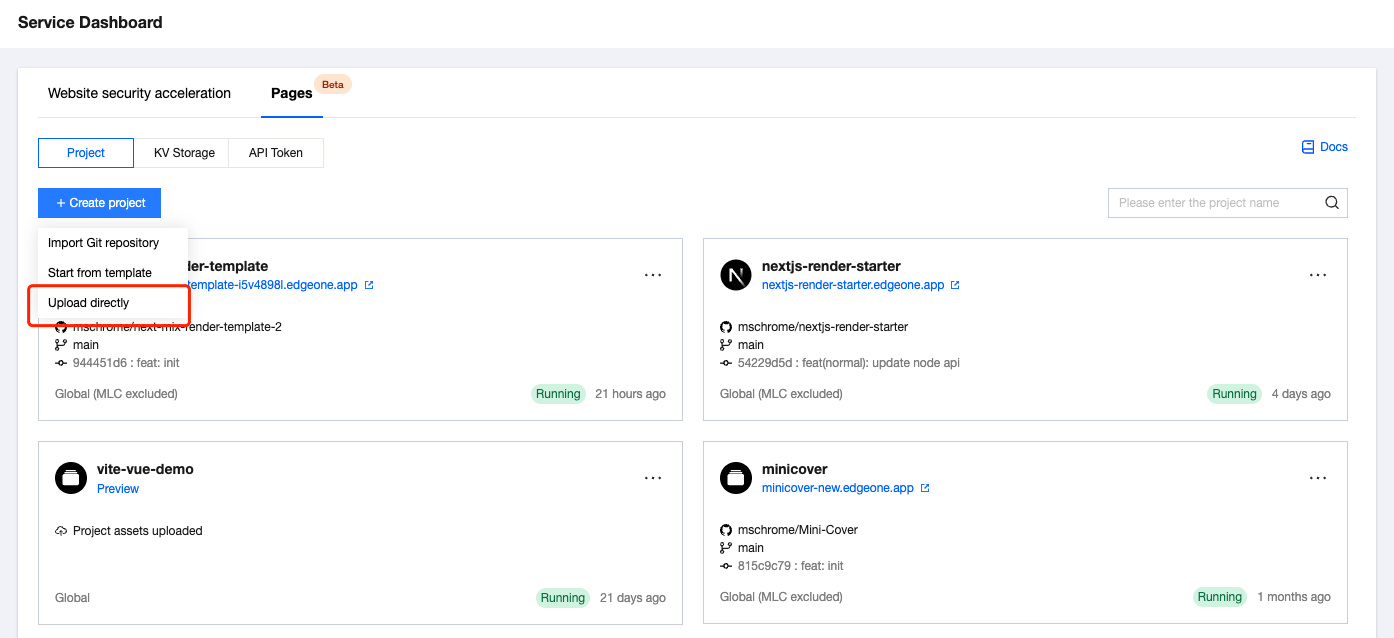
Creates a project.
Go to the console homepage of Pages, select "Create project", then choose "Direct upload".
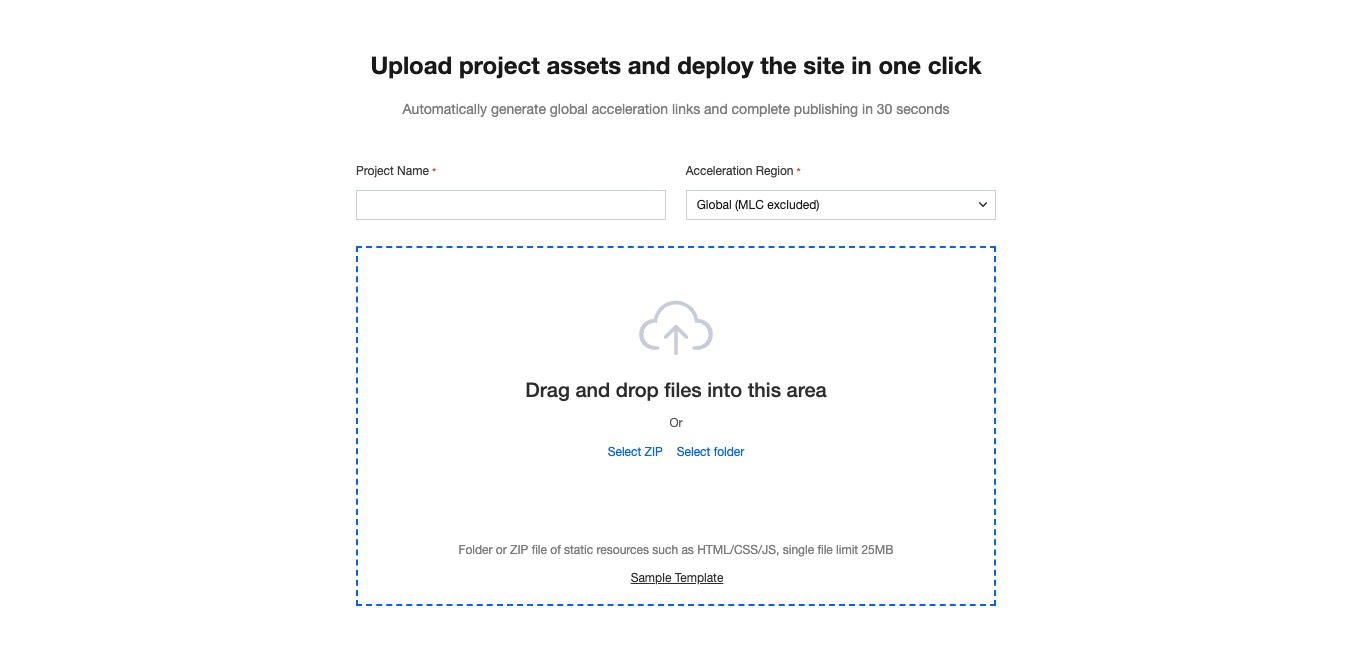
After filling in the "project name" and "acceleration region", drag and drop the project asset to the designated region.
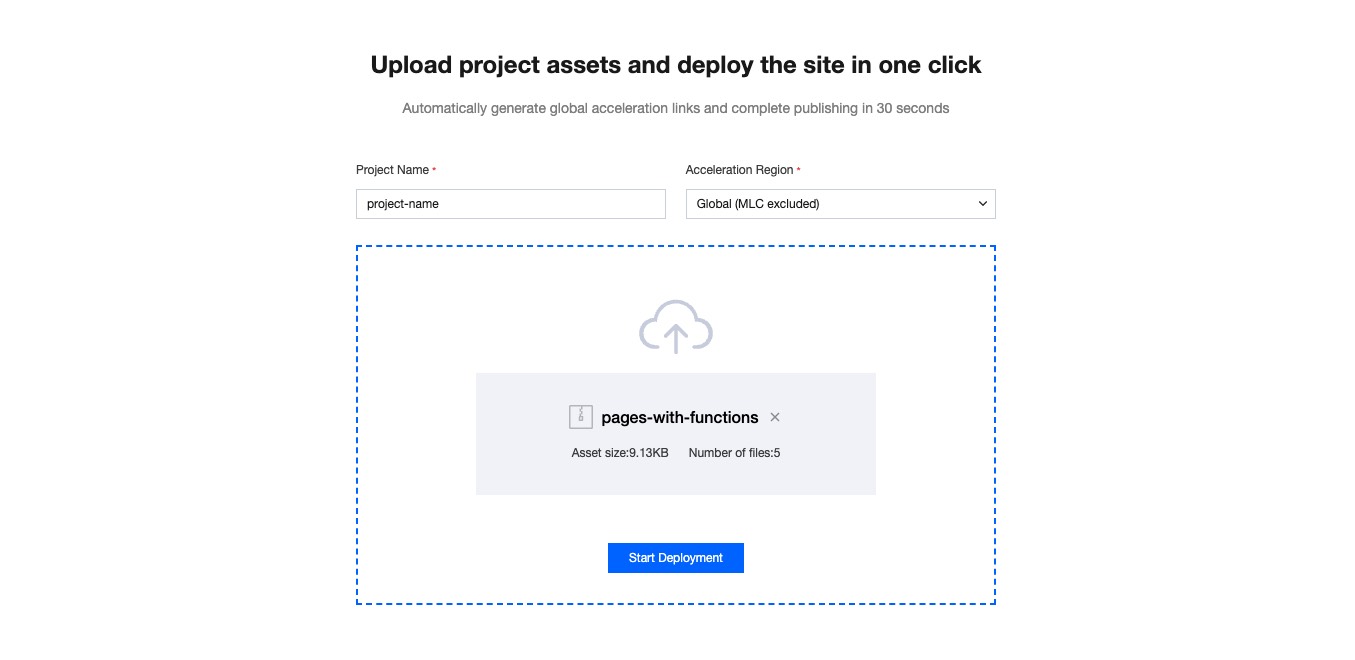
Click "Start deployment". After uploading the asset, project creation will start, then go to the deployment details page. After successful deployment, you can view the project through the preview URL.
Creating a New Deployment
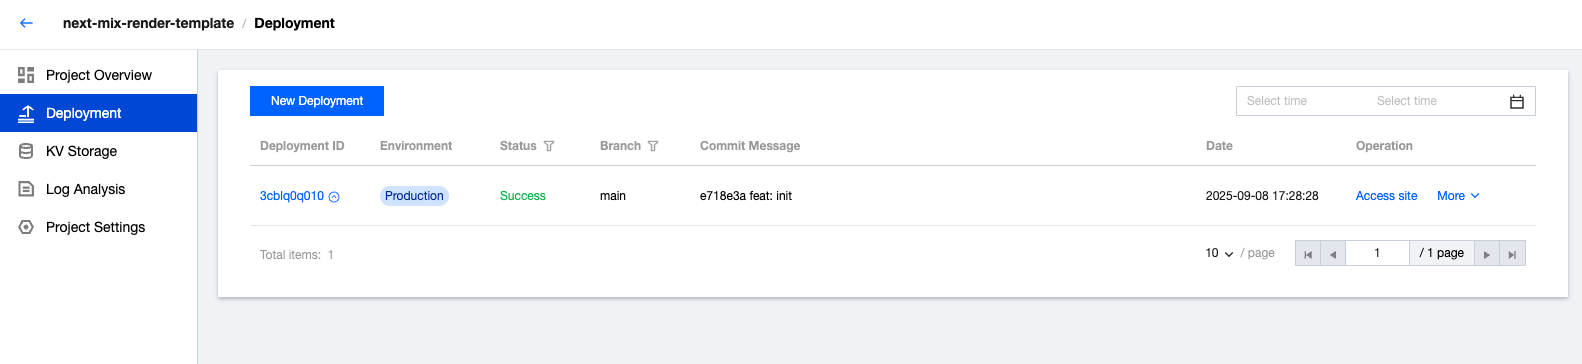
After creating a project, you can release a new version by clicking "Create New Deployment" on the deployment page.
Drag and drop the new version of the project asset to the designated region. The deployment environment defaults to "production environment" and can be switched to "preview environment".

Note:
Live production environment: Update to the user-accessed website with immediate effect.
Preview environment: Verify changes in an isolated environment without affecting official data.
Upload Limit
The project asset limit is 1000 files with a single file size of 25MB.
If the limit is exceeded, a red warning will appear in the upload area. You can adjust the project assets and reupload. Alternatively, use the EdgeOne CLI deploy command for upload deployment. For specific operation methods, see Documentation.
Supported File Types
Direct upload currently supports a single ZIP compressed package or single folder.
Functions and Edgeone.Json
Direct upload also supports Pages Functions and the project config file edgeone.json. You just need to place the edge-functions and node-functions folders as well as edgeone.json in the root directory.

Note:
Note: For direct upload, the edgeone.json file supports only the redirects, rewrites, headers, and caches fields. For details, see edgeone.json document.