In Pages, domain name management is an important step to ensure that your website can be smoothly accessed by users. Pages provides multiple domain names, including project domain names, deployment domain names, and custom domain names. By default, your project will obtain a subdomain based on the Pages platform, which facilitates your quick access and sharing.
If you wish to create a more personalized access address for your website, you can add a custom domain. With simple settings, you can associate your own domain name with the Pages project, making your website more unified in brand image.
Project Domain Name
When you create a project in Pages and deploy successfully, the platform will allocate a fixed project domain name for you. Each time a new deployment is triggered, you can always access the latest website content through the project domain name.
Deployment Domain
Each time you create a new deployment, the platform will allocate a domain name specific to that deployment. The deployment domain inherits all the features of the project domain and permanently retains the content of the deployment. You can access different deployment domains at any time to view different versions.
Notes:
To ensure content compliance, accessing Pages sites via Project Domain Name and Deployment Domain must follow the following rules:
1. Set the project acceleration locale to "Chinese mainland availability zone" or "Global availability zone (including Chinese mainland)":
1.1 Use the system-generated preview URL for access. The link validity period is 3 hours. A 401 error will be returned after timeout.
1.2 Via the console, periodically update the valid link through the "Preview" button in the upper right corner of the "Project Overview" interface.
2. Set the project acceleration region to "Global availability zone (excluding Chinese mainland)":
2.1 Non-Chinese mainland network environments can directly access. A 401 error will be returned in Chinese mainland network environments.
Recommend binding custom domains to establish stable access channels. No record filing is required in global availability zones (excluding Chinese mainland).
Custom Domain Name
Has the following advantages:
Brand Display: Use your own brand domain name to enhance professional image.
SEO optimization: is conducive to search engine inclusion and ranking
Better control: Full control of the DNS records of the domain
Flexibility: Configure multiple custom domain names to facilitate management for different markets or purposes.
Add Custom Domain
Added domains need to be registered with the Ministry of Industry and Information Technology when the project acceleration region is set to "Chinese mainland availability zone" or "Global availability zone (including Chinese mainland)".
To add a custom domain to your project, please follow the steps below.
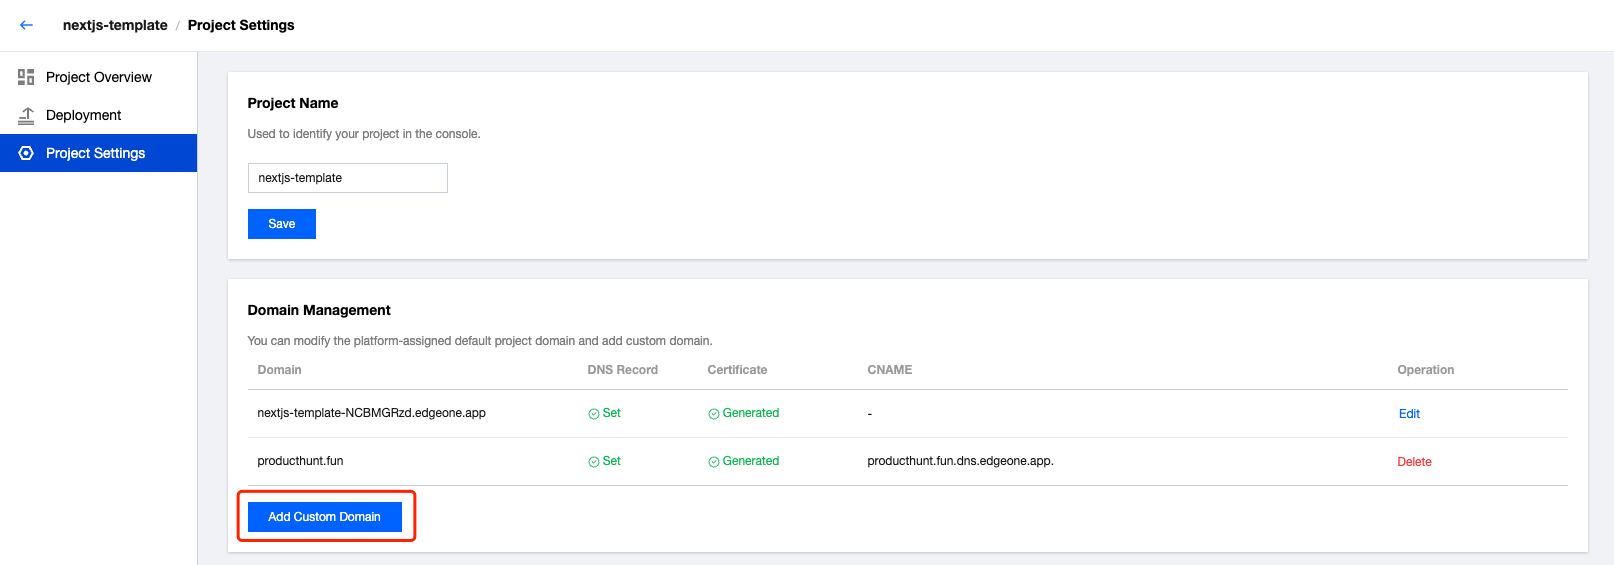
1. Enter console: Open project settings page, find "Domain Name Management" module.
2. Add domain name: Click the "Add Custom Domain" button.
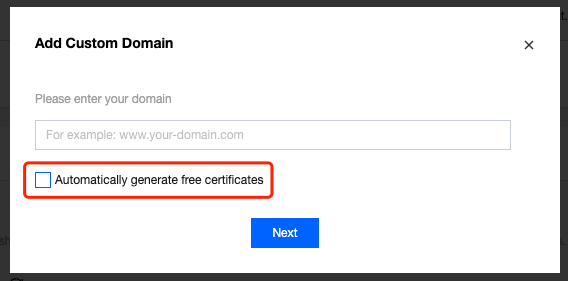
3. Input domain: In the pop-up, enter your root domain name (for example: example.com) or subdomain (for example: www.example.com).
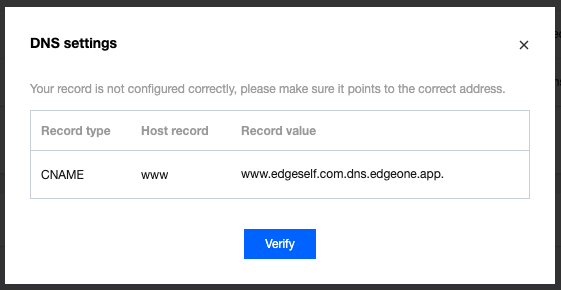
4. Configure DNS records: According to the DNS records provided in the pop-up, go to your domain name registrar's website and configure the appropriate CNAME record.
5. Verify domain: Once configured, you can click the "Verify" button on the page, or wait for the system to auto-detect whether the DNS resolution is correct.
6. Waiting to take effect: Please note that the effective time of the DNS record may be up to 48 hours at longest, but usually it can be completed within minutes.
7. SSL Certificate Configuration: Once the domain verification succeeds, the system will auto-configure the SSL certificate for your domain, underwriting the security of the website.
Configuring HTTPS Certificate
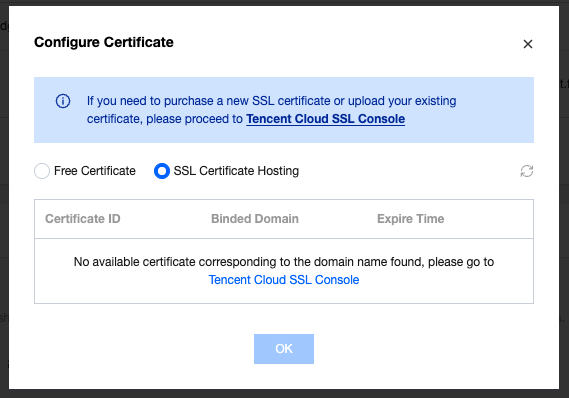
Pages will by default configure a free HTTPS certificate for your domain name. You can also select a certificate hosted on Tencent Cloud SSL through "Configure Certificate".
If you are concerned about CT (Certificate Transparency) log leakage, which may lead to exposure of business architecture details, you can uncheck "Automatically Generate Free Certificate" when adding a custom domain. Then, select a custom certificate via "Configure Certificate".
Acceleration Region
Acceleration regions are mainly used to allocate node resources for the current project's services. The differences between acceleration regions and the requirements for domain name registration are as follows:
Acceleration Region
Overview
Chinese mainland availability zone
When you select the Chinese mainland availability zone as the acceleration region, Pages will assign nodes in the Chinese mainland availability zone to your domain names under your site to provide acceleration service.
When you select this region for acceleration, adding a custom domain requires completion of the Ministry of Industry and Information Technology filing. If the domain is not filed, please refer to Filing Process to complete the domain name filing.
global availability zone
When you select the global availability zone as the acceleration region, Pages will assign nodes in the global availability zone to your domain names under your site to provide acceleration service.
When you select this region for acceleration, adding a custom domain requires completion of the Ministry of Industry and Information Technology filing. If the domain is not filed, please refer to Filing Process to complete the domain name filing.
global availability zone (exclude Chinese mainland)
When you select the global availability zone (exclude Chinese mainland) as the acceleration region, Pages will assign nodes other than those in the Chinese mainland availability zone to your domain names under your site to provide acceleration service.
When you select this region for acceleration, adding a custom domain does not require Ministry of Industry and Information Technology filing.